Easier Numbering
If you started with one of our non-fiction templates, you may have some “macros” built into the compile settings that can help you out with this. To check:
- Open
File ▸ Compile... - Double-click on the selected compile Format in the left sidebar to edit it.
- Click on the “Replacements” pane. If you’re set up for them, you’ll see a few cryptic looking lines in here. These make it so you don’t have to worry about the numbering placeholder syntax directly, and can instead more clearly type in just the identifier you want to use for the figure.
How to use them is described in the help file provided at the top of the template’s binder, but it’s quite simple: #fig(name of counter) creates a reference pointing to the spot where !fig(name of counter) is set. Both of these codes will print the figure number associated with that image.
If you don’t have these replacement links, copy the following code and paste it into your Replacements table:
Replacements
<Replacements>
<Replacement>
    <Replace><![CDATA[!fig($@)]]></Replace>
    <With><![CDATA[<$n:figure:$@>]]></With>
</Replacement>
<Replacement>
    <Replace><![CDATA[!table($@)]]></Replace>
    <With><![CDATA[<$n:table:$@>]]></With>
</Replacement>
<Replacement>
    <Replace><![CDATA[#fig($@)]]></Replace>
    <With><![CDATA[<$n#figure:$@>]]></With>
</Replacement>
<Replacement>
    <Replace><![CDATA[#table($@)]]></Replace>
    <With><![CDATA[<$n#table:$@>]]></With>
</Replacement>
</Replacements>
This is flexible of course. The “!fig(stuff)” part could be changed to something even simpler, like “{” and “}”, so all you type into the editor is “{stuff}”, and then elsewhere type in “[stuff]” to refer to that number in cross-references—like so:
Replacements
<Replacements>
<Replacement>
    <Replace><![CDATA[{$@}]]></Replace>
    <With><![CDATA[<$n:figure:$@>]]></With>
</Replacement>
<Replacement>
    <Replace><![CDATA[[$@]]]></Replace>
    <With><![CDATA[<$n#figure:$@>]]></With>
</Replacement>
</Replacements>
Restarting Numbering
A simple number hierarchy sounds right. It could be chapter based (starting at x.1 for each chapter) or even just be non chapter based, being consecutively numbered from start to finish . The latter might be easier for now.
To restart a numbering stream, insert the proper reset code into a place where the compiler will insert it as needed. A common tactic for doing that is into either the title prefix or suffix fields, in the Section Layout that generates the chapter break:
But if you do that, then cross-references become more complex in that you need to refer not only to the figure number but the chapter it came from, like 21.3, which would be the third figure in chapter 21. That’s possible to do with Scrivener, but indeed it is a lot easier to just number them sequentially. Let’s return to that topic after looking into the replacement a bit further.
Keeping Output Agile
This method highlights one advantage to using an intermediate syntax instead of the numbering codes directly in the editor: if you change your mind about the implementation, then all you need to change is the one Replacement that governs how the hundreds of individual “!fig(stuff)” codes work in your text, all at once.
figures_and_cross_referencing.zip (187.4 KB)
Here’s a simple example (see attached project for starting point). Let’s say you get tired of typing in "Fig. !fig(stuff): " in front of every single caption. Indeed, if you are doing that, it’s a strong argument for not typing this in manually over and over, and instead having the Replacement generate the static text around the number:
Instructions...
-
First compile the project to see how the codes I’ve added into the two sample chapters work normally. They print a number where you use the code, meaning we need to add any embellishing text ourselves at the moment.
-
Open the compiler and edit the “Example Numbering” compile format, and go into the Replacements pane. The With field is what the simple codes will be converted into. The “$@” symbol means first: select everything in between the text around the symbol and save it; and secondly, print the saved text into this spot. So we capture the “name_of_figure” text from “!fig(name_of_figure)”, and then insert it into “<$n:figure:name_of_figure>”, which prints “2” or whatever.
-
So if we want the Replacement to print “Fig. 2:” so that we only need to type in the simple code and then the caption, change the With field to:
Fig. <$n:figure:$@>: -
Click the
Test...button and examine the two captions in the output PDF. -
Now that we know how to do that, we can also change the cross-references as well:
Figure <$n#figure:$@>
The “Example Numbering - Custom” compile format in that sample project demonstrates the above two changes.
Chapter Numbering with Reset
To proceed with the demonstration, first implement a chapter break numbering reset as described above:
Instructions...
-
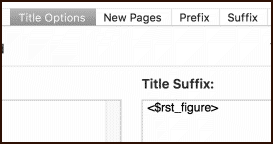
Edit the compile format again, and this time go into the Section Layouts pane. Select “Heading & Text”, and then click on the “Title Options” tab.
-
Type the following into the suffix field:
<$rst_figure>As you might suspect, this can be done for any named number stream. We’ve been using one called <$n:figure:your_token>, so we put “figure” into the reset code.
Give that a test compile. You should now get “1” for both example figures since they are each in their own chapter. Of course now we have an ambiguous result since two figures are “1”. We need “1.1” and “2.1” for these cross-references to make sense across chapters.
-
Well firstly we need to number our chapters.
 Click over into the Prefix field, and add the following:
<$n:chapter:<$title_no_spaces>>So this one is a little special. There are two codes, the inner one will be evaluated by the compiler first, printing the name of the chapter into this spot, making a code like this: “<$n:chapter:Firstexample>”, which then gets turned into a number.
-
We could at this point paste that same placeholder into the Replacement designed to print captions. With this simple project structure, where each file is one chapter, from the “perspective” of both the heading and the captions, the title of this document is a suitable common identifier. But there is a problem with that assumption, let’s test it out. First go ahead and add the chapter numbering code to the !fig Replacement:
Fig. <$n#chapter:<$title_no_spaces>>.<$n:figure:$@>:Save the compile Format and run a test compile to examine the result. The captions should be working well! You now have Figure 1.1 and Figure 2.1. Of course the cross-references won’t work yet, but one thing at a time.
This approach isn’t very flexible however. To demonstrate, open the Research folder in the example project binder and drag the “Third example” file on top of the “Second example” file, nesting it beneath. Our “chapter” now has subsections. We won’t worry about numbering and formatting that for now, we just want to make sure we get a “Fig. 2.2” because it is the second illustration in the chapter. So compile and see how it goes.
We get a broken token on the third illustration because we are requesting a chapter number that doesn’t exist, the “Thirdexample” number—it is pulling the title from the document the placeholder is found within, naturally. We need to somehow get the chapter number no matter how deeply nested the figure caption may be.
This is where the <$levelN_title_no_spaces> placeholder comes in handy. From no matter where within the chapter we use that placeholder, it will extract the title from that level of the outline, rather than using the current document (“Third example”). So try this in your replacements field:
Fig. <$n#chapter:<$level1_title_no_spaces>>.<$n:figure:$@>:
Much better!
Debugging Placeholders
This is a useful spot to make mention of a good trick for figuring out why things aren’t working the way you want. With our prior example, the failure was obvious as there was no chapter number identified as “Thirdexample” and the placeholder just broke. Sometimes the fail result will be a number—for example if we had used the less safe “<$n:chapter:etc>” instead of “<$n#chapter:etc>”, then our compiled result would have been “Fig. 3.2”, as it would have see “Thirdexample” hadn’t been used yet, and would have incremented the chapter number counter to 3.
If you didn’t know all of the above yet, it might be entirely mysterious as to why you get “3” instead of “2”. A way of probing into what a compound placeholder is doing is with a backslash in front of the placeholder. Here’s an example compiled result from putting a backslash in front of the chapter number placeholder in the Replacement pane:
Fig. \<$n#chapter:Thirdexample>.1
Since we didn’t backslash the interior placeholder, we can see what it evaluates to (“Thirdexample”) and know from that we have the wrong target, as the current chapter should be “Secondexample”. The “.1” on the end is the figure numbering placeholder, we didn’t escape that one either.
Cross-References
So long as we have a stable outline level to consider a chapter, we pretty much have the caption problem solved. Now we need to somehow get that full chapterNum.figureNum sequence printed in other documents.
The best way to do this will be to combine two different techniques together:
Instructions...
-
First, go back into the compile format and change the cross-reference figure Replacement (the #fig variant) to the following and give that a test compile:
Figure <$n#chapter:<$level1_title_no_spaces>>.<$n#figure:$@>We’re using something pretty much the same as the caption number itself. You’ll note that references pointing to a figure in the same chapter will work as expected. It’s the second reference in the “Second example” document that fails, printing “Figure 2.1” instead of “Figure 1.1”. That’s because <$level1_title_no_spaces> evaluates to “Secondexample” in both cases. We need to somehow get the cross-reference to have “Firstexample” in it. Feel free to use the backslash technique here to keep an eye on what happens underneath the surface, if you wish.
-
To answer this problem we’ll need to step out of the compiler, so save your settings and return to “Second example” in the project window. Locate the “#fig(test)” example and select the placeholder text completely.
-
Drag the “First example” chapter, from which this figure comes, and drop it onto the selected text in the editor, forming a link from the placeholder to the target.
-
Run a quick test compile. And now the cross-chapter reference prints correctly, as “1.1”.
If you used the backslash trick on the chapter placeholder, you’ll see the difference in these two #fig(…) placeholders:
Refer to Figure \<$n#chapter:Secondexample>.1.

...

Refer to Figure \<$n#chapter:Firstexample>.1.
So the hyperlink directs all placeholders that are document-specific to use the link target’s data instead of the document the placeholder is found within. This approach is ignored by placeholders that produce static numbers, so the link has no detrimental effect on them. It is something to be aware of however, if you use other placeholders that are document specific and wrap the whole thing into a Replacement macro with a hyperlink on it, then you’ll end up pulling all metadata within that replacement from the target.
And, since we’re using the levelN approach for our target, the target figure’s binder item can be as many levels deep as it needs to be. The hyperlink points the placeholder to this subsubsection and then from that context the level1 title is whatever chapter file is at the top, for it, not the original.
The “Numbering - Chapter Restarts” compile Format has all of the above modifications made to it, for your reference (sans the hyperlink of course).
Conclusion
So one important thing to reiterate at this point is that, with the exception of the link, all of the above adjustment and even radical alterations, were done without a single adjustment to the source material in your editor. We maintain a very simple numbering/referencing macro in the editor, and precisely how that ends up working is down up to the compile format.
Hopefully the above tutorial provides enough background into what is being done, to make suitable alterations to it, but if I didn’t explain something well enough, let me know!