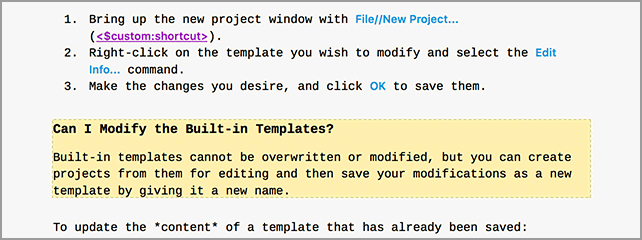
Using Scrivener alone, the 1x1 table is the best approach. You probably won’t be able to get a box quite like the manual though without using the same tools we do: LaTeX. For anyone curious as to how it works, I’ll describe the process.
In Scrivener I have two styles that I use to build a box. There is a paragraph style with a yellow background highlight used to enclose the entire thing. This is used to insert part of the code necessary to build one in the output. The other style handles the heading, which inserts the rest of the code.
- The box style itself has compile settings that insert a prefix and suffix around the whole thing of
\begin{callouttip}and\end{callouttip}. - The title style has its own prefix and suffix around the line of text, simply:
{and}\n.
Consequently, in Scrivener the box itself looks nice—not terribly unlike the end result, and no code visible within it. The compiler does all of the dirty work for me, and it means if I change how these boxes are constructed at a technical level, I can do so in one single place rather than fixing hundreds of them.

The compiled result looks like this though:
\begin{callouttip}{The heading of the box}
The body text of the box...\end{callouttip}
This is shorthand, a LaTeX environment I’ve built that looks like this:
\newenvironment{callouttip}[1]{
    \begin{mdframed}[style=titlecallout,
        linecolor=lnl-latte, backgroundcolor=lnl-yellow,
        frametitle={#1}]
}{
    \end{mdframed}
}
The ‘titlecallout’ style is one I’ve defined elsewhere that handles all of the other particulars, like the amount of padding between the edge of the box and the text, between the heading and the text, the heading font, etc.
So I’m using the mdframed package to get this result. It comes with a number of useful features, one of which is multi-paragraph support for the box contents, the ability to put a border around the box and another is page break avoidance. The box will float to the next page if it won’t fit into the end of the previous, rather than getting split between pages.