working on a Mac, with a template that gives me Part, Chapter and Scenes, I can’t add chapters or parts, only scenes. The advice given in the forum is from 2016 and doesn’t work. It suggests CNTL N but that takes me to Notes. Has anyone got a solution please?
In this template, Parts and Chapters are represented by folders, not by documents, and the shortcut for new folder is cmd-opt-n, not cmd-n, which is exclusively for documents by default.
The alternative is to use the Project > New Text (or Scene) / New Folder menu commands.
As for the Ctl-n shortcut you’ve been using, that’s actually a MacOS system-wide shortcut for ‘down arrow’ so I suspect that you were in the Binder in the folder above Notes, and so Ctl-n moved you down the binder. I suspect the advice you saw in the forum to use ctl-n was from a Windows user.
In case you’re wondering, folders and documents are quite similar – they can both text, notes, metadata etc and they both can have subdocuments and/or folders. There are differences between them, though – e.g. The default view you see when you click on them in the binder – and the convention in fiction templates that you write your text in documents in scenes, while folders represent the bigger structural units (Part, Chapter etc).
There are some advanced features which can be added to this basic functionality. When you have time, it is highly recommended that you do the Interactive Tutorial (on the Help menu), to see what’s possible. It won’t take long and it will make your introduction to Scrivener go a lot more smoothly.
HTH.
To extend on the previous answer:
Scrivener only knows folders and documents, what role they play is determined by their “Section Type”. By default, Scrivener tries to figure out the Section Type depending on how a document/folder is attached to the manuscript tree, but you can override that manually.
Go to “Project”>“Project Settings…”>“Section Types”>“Default Types by Structure” to see how the template you’re using is set up. For example, in my template:
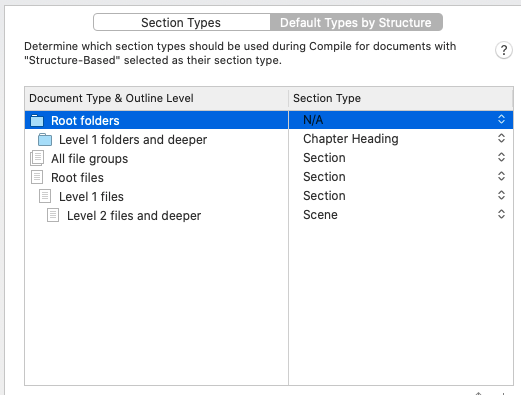
all folders give me Chapters while documents give me either Scenes (when they are in a chapter folder) or Sections otherwise.
BTW: In Scrivener, documents can contain other documents just like a folder, they are then called “file groups”. The effect is the same as if the contained documents came after the containing document aside from the automatic Section Type selection.
1 Like
Windows user. Ctrl-N is the keyboard shortcut for a new document. Alt+Shift+N will give a new Folder.
thanks for your reply. I’ve followed your instructions still can only get 2 levels when adding. I’ve got Part and Chapter but cannot get a scene in there.
OK. Let’s start from a blank ‘Novel (Parts)’ template (which is the one I’m assuming you’re using).
The first thing you see is something like this:
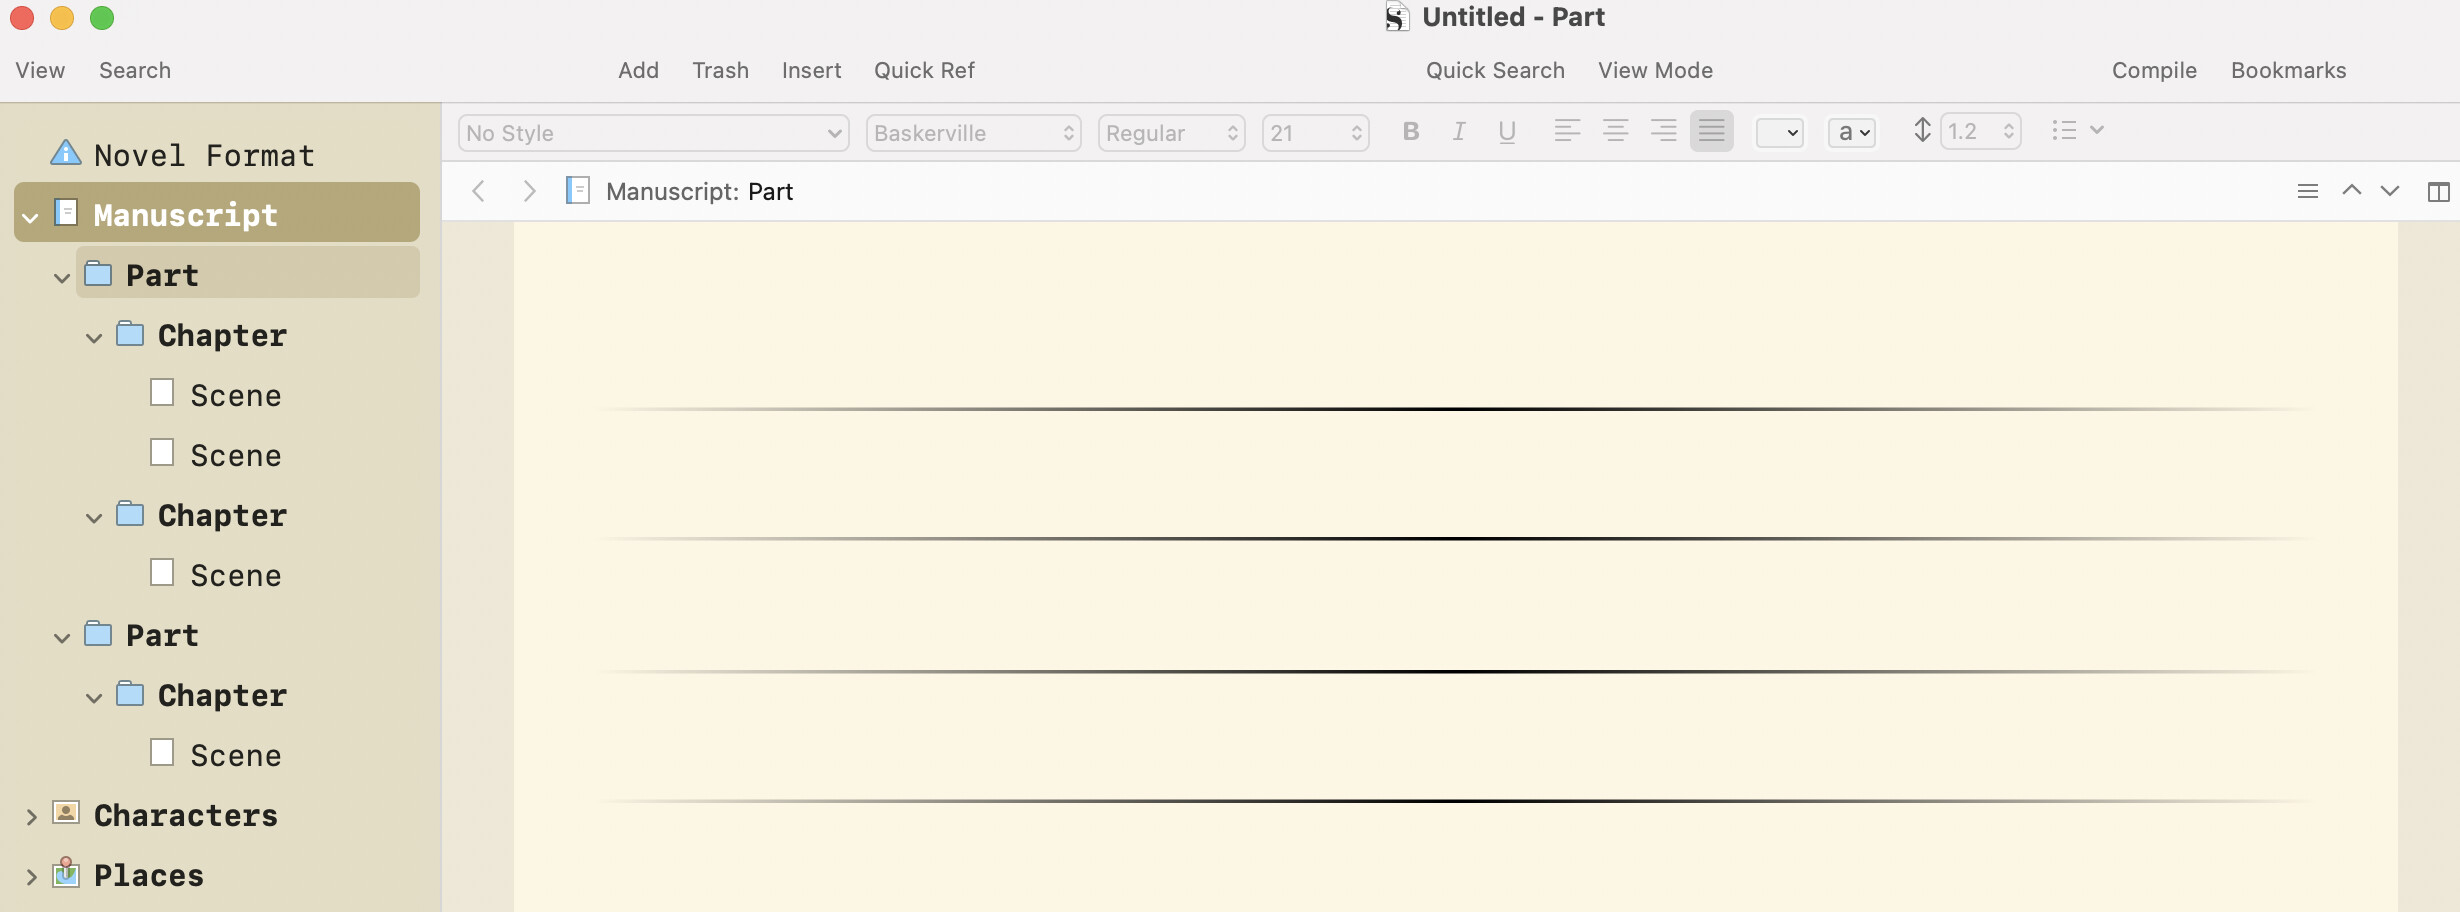
Select the Manuscript folder in the Binder and press cmd-opt-n and you will get a new folder at the first level, helpfully called ‘New Folder’! Type in your name for it (“Part 3”…).
Press cmd-opt-n again and you’ll get another new folder. You want this to be a chapter, not a part, so give it a name (“It’s all going wrong”) and drag and drop it onto Part 3 in the binder (if it’s not already there). You now have your first chapter in Part 3.
Click on “It’s all going wrong”, and press cmd-n (NOT cmd-opt-n!) and you will create a new text document, initially called ‘Untitled document’. This is a new scene, so name it as you want (“Danger looms!”). If you want to add a new scene to the first chapter of part 2, then select that chapter in the binder and press cmd-n: you will get a new text document which will act as a scene.
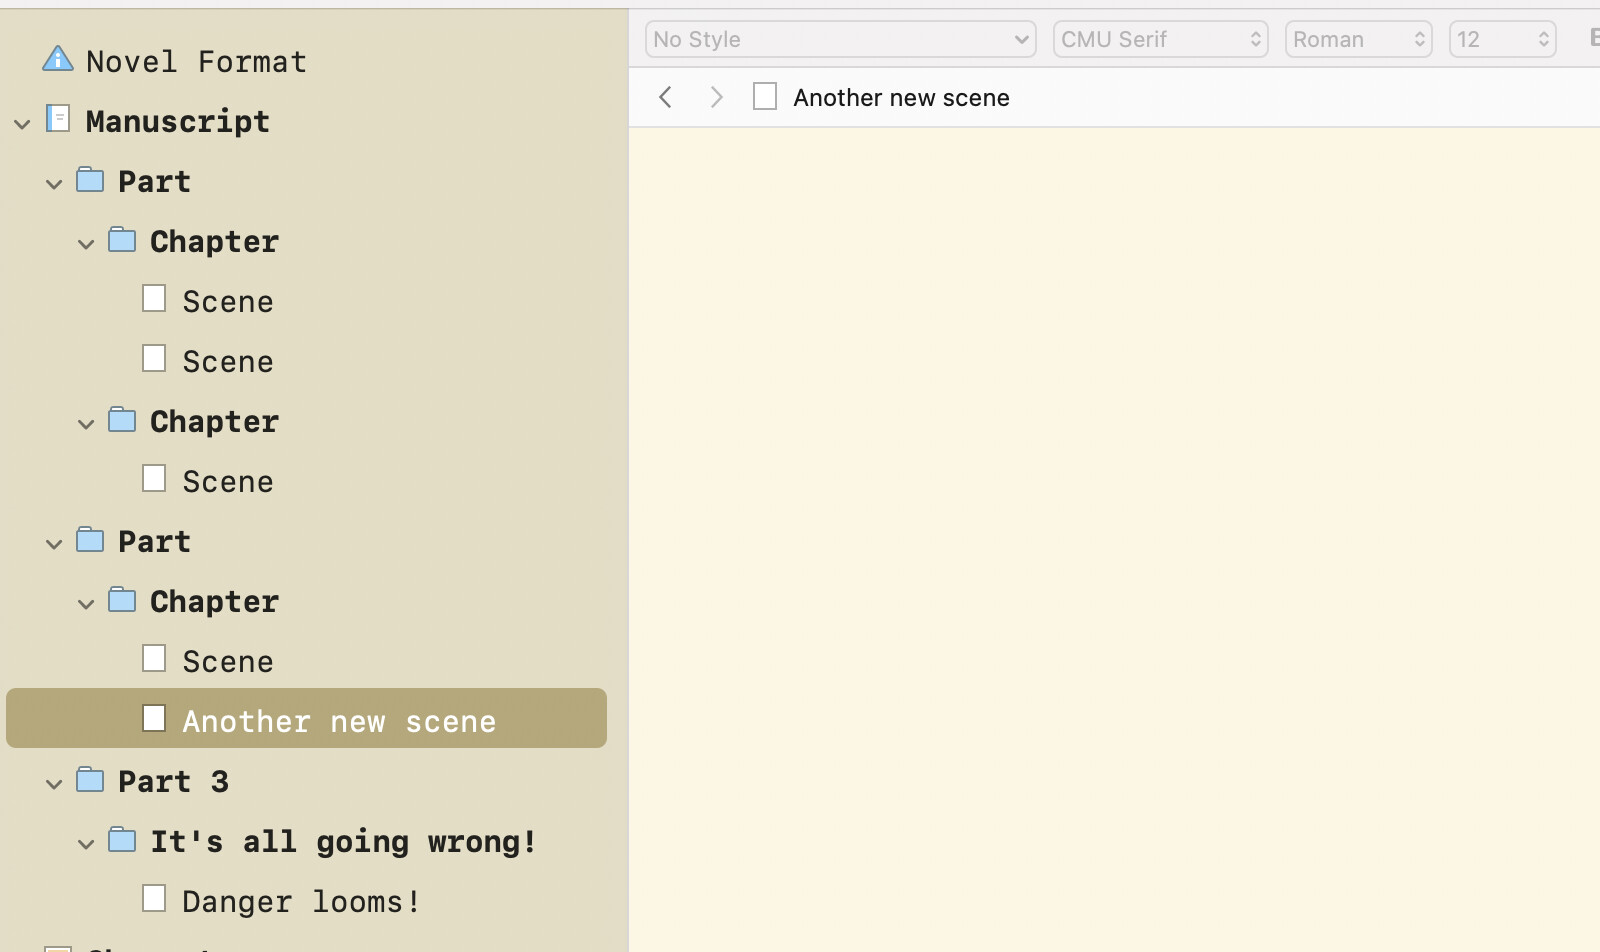
It’s really that simple. Press cmd-opt-n for new folders for Parts and Chapters, dragging the new folders into their place in your structure if you need to – Parts at level 1, Chapters at level 2.
Create new scenes inside you chapters by pressing cmd-n.
Scrivener ‘knows’ whether whether it’s a Part, Chapter or Scene by looking at
a) is it a folder or a text document?
b) by it’s place in your structure (first indents for Parts, second line indents for Chapters).
This is all by default, and you can change this behaviour, of course, but I hope this explains the basics for you.
Just one more tip: Give your parts, chapters and scenes meaningful names to help you when you’re planning. Don’t give them numbers: you decide whether you want them to be numbered and whether their title appears during the compilation process.
thanks for your patience. I have followed your instructions and still can’t get them to format. I’m attaching a screenshot to show you that Part 1 works - that’s the template I started with, but as soon as I moved to part 2 or 1941, it will not format in the same way.
Sorry, but your .heic file won’t download, so I can’t see what you mean… (I think you’re trying to download a photograph, rather than a screenshot, and that won’t work. Use cmd-shift-4 and drag the cursor over the relevant window to take a screenshot, and try to attach that file – it should be on your desktop…)
What do you mean, ‘it still won’t format’? Formatting shouldn’t really be relevant here: we’re talking about adding scenes to chapters and parts and text format shouldn’t really come into it. That’s a separate process.
Please give us a detailed step by step account of what you’re trying to do, and what you expect to see when it’s been successful, compared to what you actually do see.
E.g.
-
I click on the Manuscript folder and press
cmd-opt-nto get a new part and I see… -
I click on the Chapter folder and I click on
cmd-nto get a new scene and I see… When I really wanted to see…
(I say this because the steps I’ve given you are absolutely basic and I can’t think of any way they wouldn’t work. So there’s obviously a mismatch somewhere in what we’re describing to each other, and it will help to know exactly the steps you’re taking.)
Thanks.
Is the issue that you can’t create the structure you want in the Binder, or that you can’t get the formatting you want in your output document?
I think that because I can’t create the structure I need in th eBinder then I won’t be able to format the output document as it should be. Is that right?
Well, you can assign the “Part” or “Scene” Section Type to any document you want, regardless of its position in the Binder. But if you want to take advantage of the default “structure-based” Section Type assignments then yes, it would be helpful for the Binder to reflect the structure you want.
Hence my question. Is the problem that you’re unable to create the structure you want in the Binder? Or that, given that structure, you still aren’t getting the output results you want?