![]()
. . . . . . . . .
yes
(yyyyyyyyyyyyyyy = padding to make message sendable).
“Yes” the app runs ?
. . . . .
1 Like
Ok. So now, create a blank new project.
Then go to File / Import / Scrivener Project...
Navigate to and import that project for which you’ve got only the “Files” and “Settings” subfolders.
(??)
![]()
1 Like
This response applies to Windows users; the Scrivener for Mac system works differently, where a .scrivx project file is not applicable, to the best of my knowledge.
Using File Explorer in Windows (Win+E), do you have YourProjectName.Scriv folders? YourProjectName.Scrivx files on their own are useless because they point to the respective YourProjectName.Scriv folder’s content.
This is what a .scriv folder’s contents looks like:
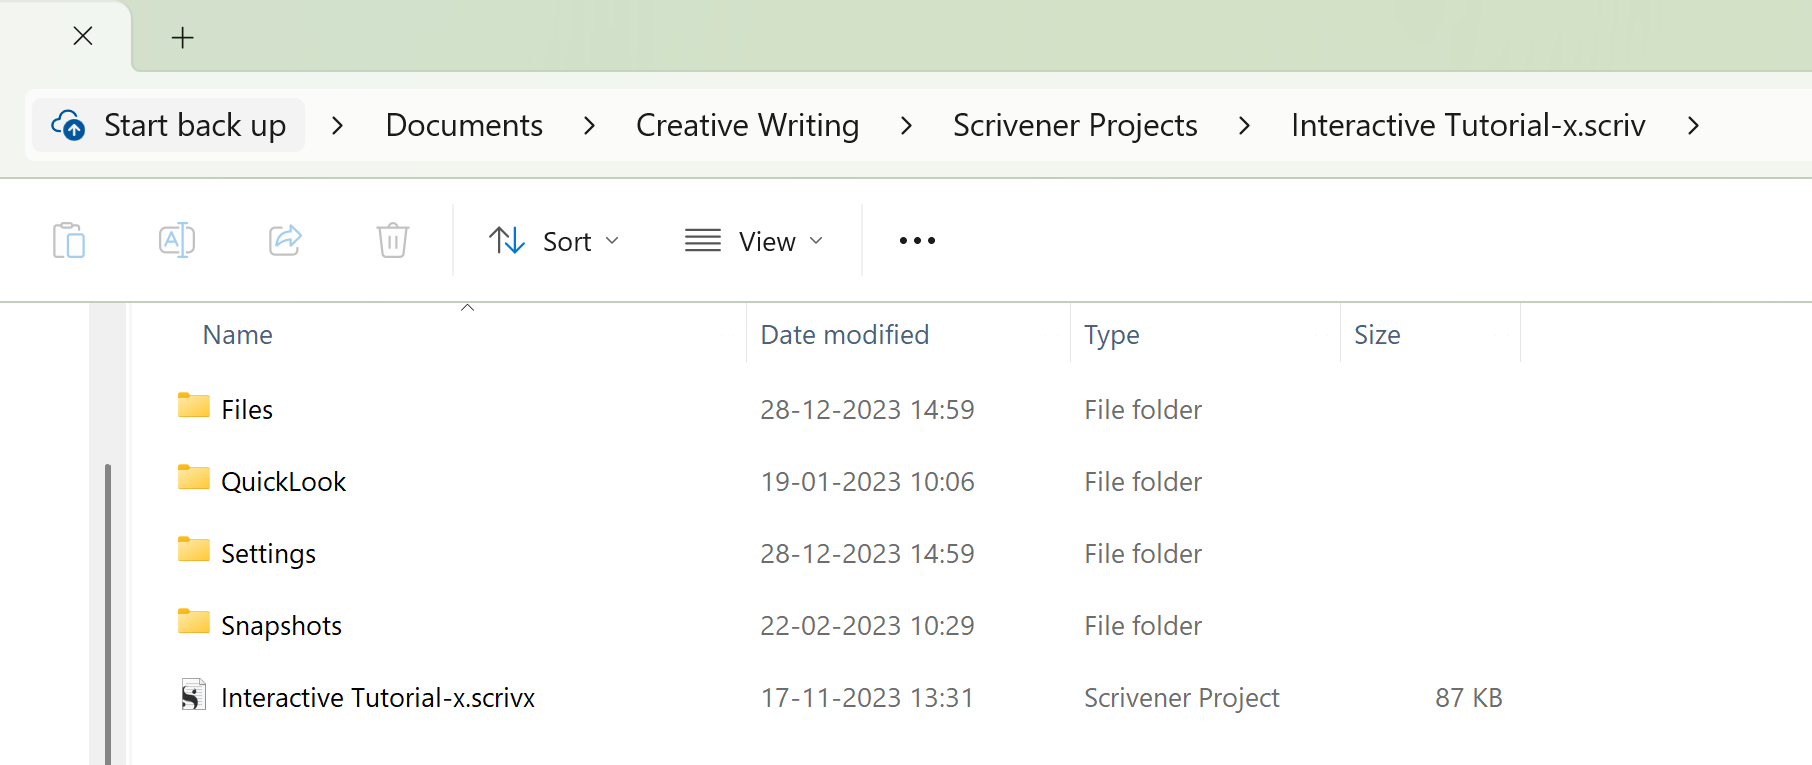
In the example, the project is named Interactive Tutorial-x, which comprised of the Interactive Tutorial-x.scriv folder in which is the Interactive Tutorial-x.scrivx Scrivener project file.
The .scrivx project file is the glue that organises the project in the Scrivener interface that you interact with as an onscreen project.
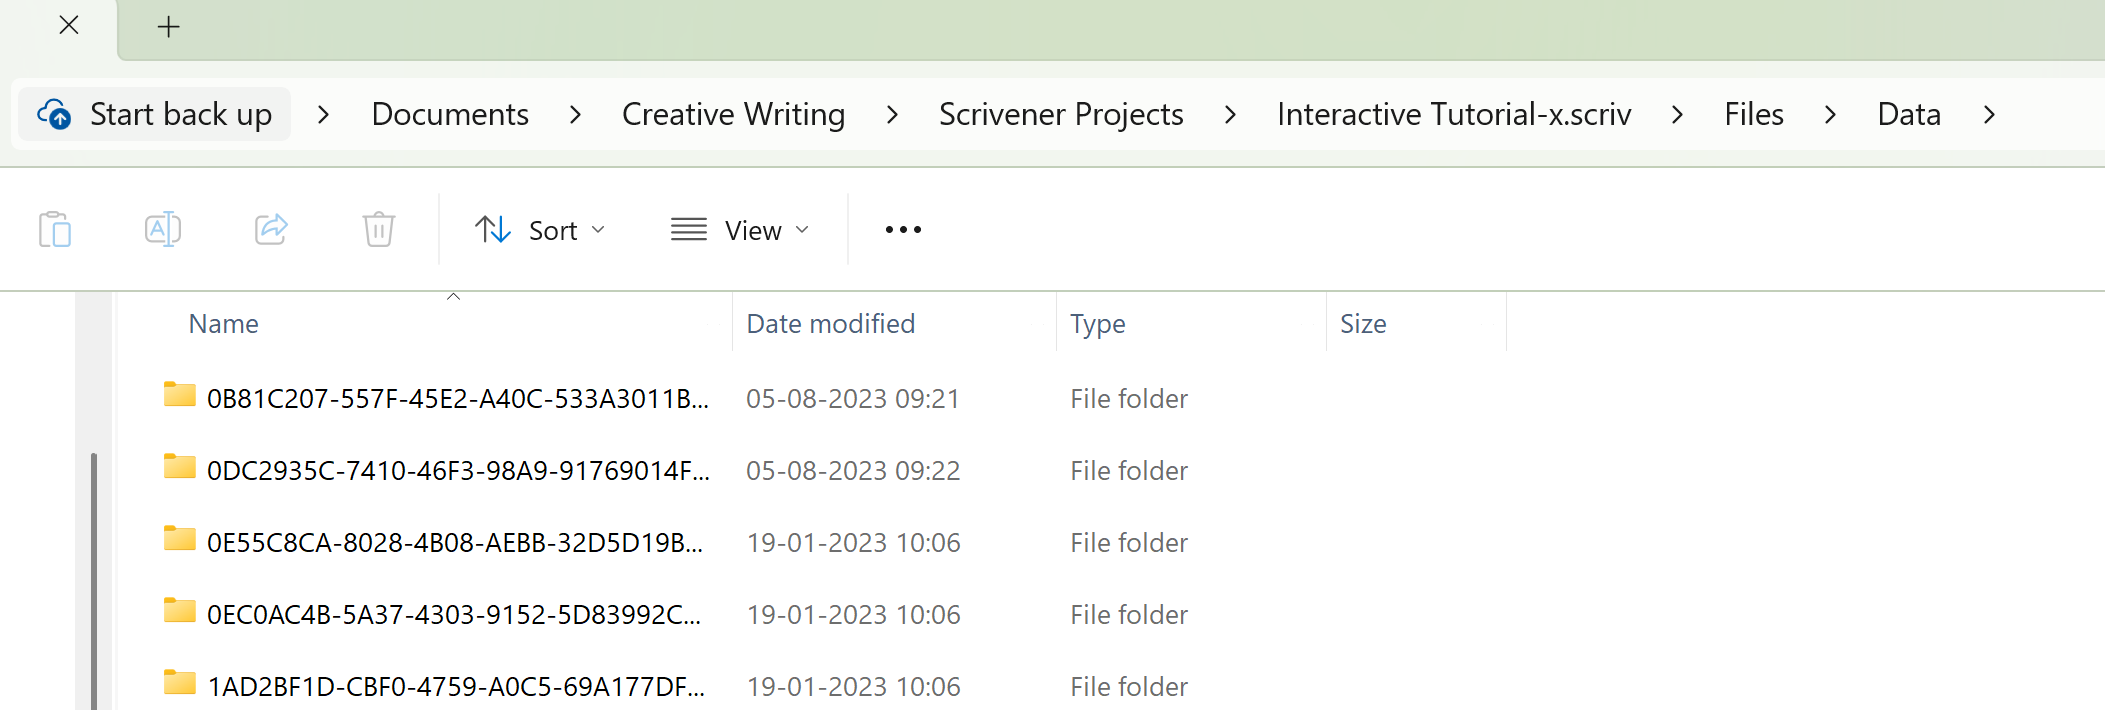
Every document you create in your project is stored in (as per this example) the Interactive Tutorial-x.scriv folder > Files > Data in the form of a humanly meaningless string-long folder (one file per document you create), as per this screenshot:
And then a contents.rtf file after that:
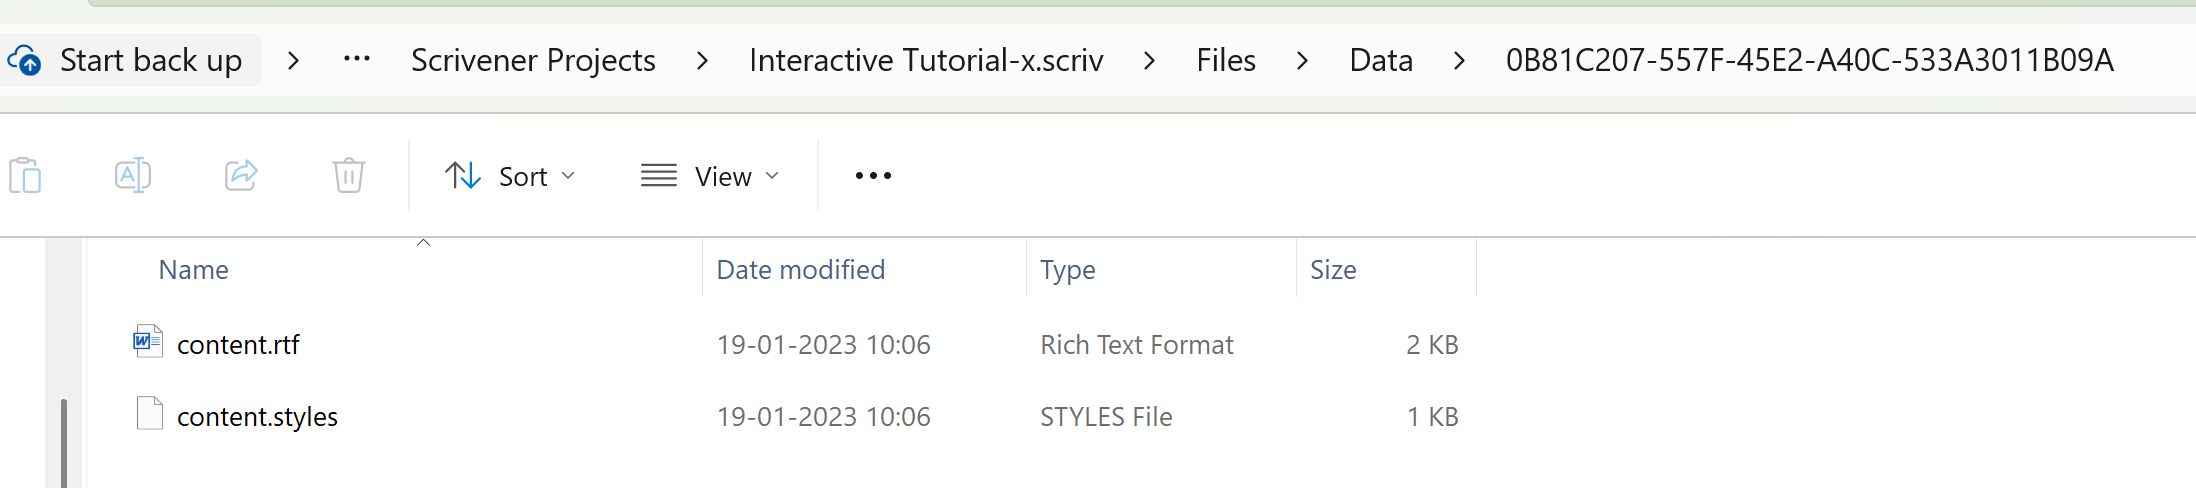
So, if you create 10 documents, you get 10 such folders each with a contects.rtf file, 100 documents would give you 100 such folders…, etc.
Using File Explorer (Win+E) in Windows, click on the Documents folder and search for *.SCRIV – remember to include the asterisk in this instance. For each positive result, click into the found folder and determine if it has a .SCRIVX Scrivener project file. If it exists, double click on the project file and Scrivener will launch with the respective project, as long as at least the Files and Settings folders are available, within the respective .SCRIV folder, with their underlying content.
If you’re in a dilemma where you might have the .SCRIVX project files not in the .SCRIV folder with the same project name, still search for the folder and return to the project file to it’s folder. The caveat is, the folder must exist, because the .SCRIVX project files is only a pointer, as I indicated in the beginning of this post.
Hope this works for you.
3 Likes
Hi @vincent_vincent
Sorry about yesterday - as a new account I ran out of messages so could not send any more until now!
Anyway - your procedure (i.e. import the existing projects into a new blank project) has worked pretty well for me so thanks very much. I have retrieved almost everything that I remember being there. Luckily I had already copied my draft chapters to GDocs for refinement so I have those although curiously the original drafts do not seem to have been recovered using the import method. However, I am very glad to have my research notes back. The chapter drafts don’t matter so much as I have been working on those since I migrated from W10 to W11.
Where do I leave feedback to boost your online rep?
![]()
![]()
3 Likes
You are welcome. And I’m glad I could help.
You just did.
![]()
Here is an advice in case you decide to work in Scrivener again in the future :
Read the manual (or search these forums) and learn how to set proper backups of your project(s).
It would have spared you all of these worries and trouble.
2 Likes
Thanks again @Kevitec57 - very useful. Could not reply last ight as I am a new subscriber and I ran out of newbie message quota.
I had figured some of that out but I also found that the method described by @vincent_vincent worked well in this instance (ie create a new blank project then import the wayward project files).
I did search as you suggested using *.scrivx but this did not retrieve anything useful in my case. However, I now have a good understanding of Scrivener’s file structure.
I have retrieved the content I most wanted and when I get around to it there’s one or two more pojects I need to restore, but they can wait.
This forum has been a great help! Thanks to all who replied to me.
![]()
2 Likes
The structure of the project is the same on a Mac, but Mac OS hides it.
2 Likes