I apologize if this has been recommended already, I looked through as many previous posts as I could and didn’t see it addressed.
My recommendation would be to add/link the Character profiles in the Inspector panel. This way you can reference character information, details, descriptions, notes, etc. by pulling them up in the Inspector panel instead of switching back and forth between different documents within a project. This also eliminates the need to copy and paste all character info in the Notes section of the Inspector.
If this already exists and I haven’t been able to find it in the Scrivener literature, please direct me to the right place. Thank you!
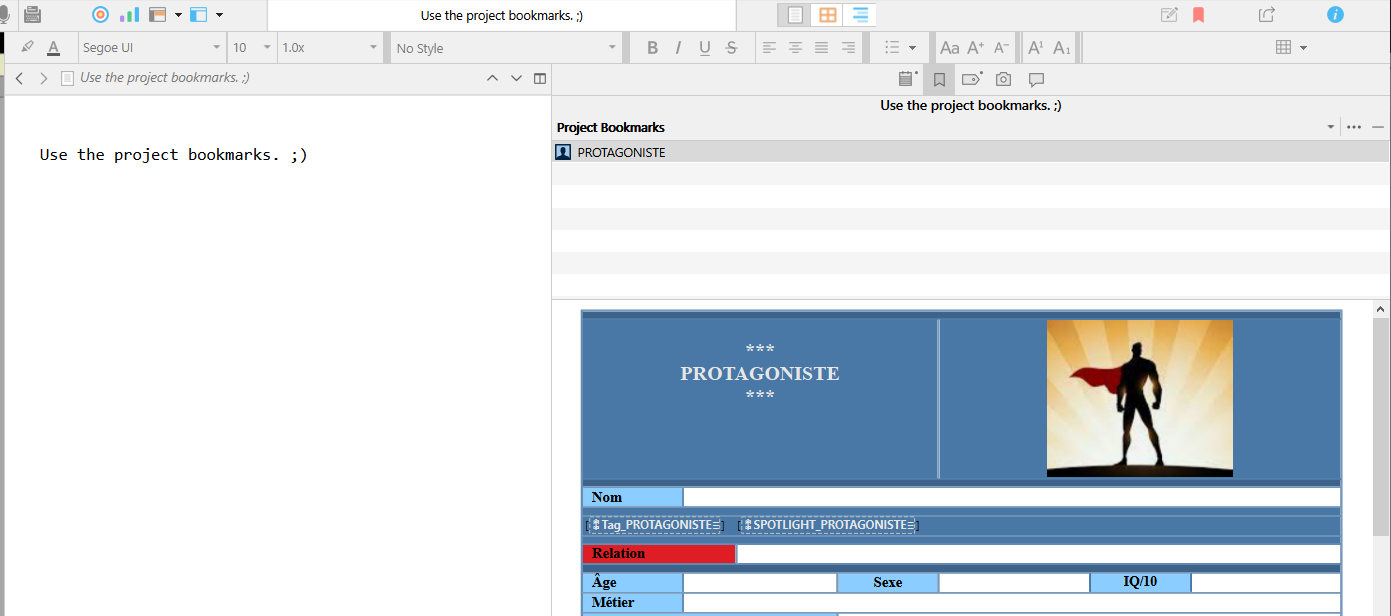
Your Character Sheets are typically in a folder outside the Manuscript, called Characters.
Simply drag that Characters folder to the Inspector > Project Bookmarks to make it available to any document you’re working on.
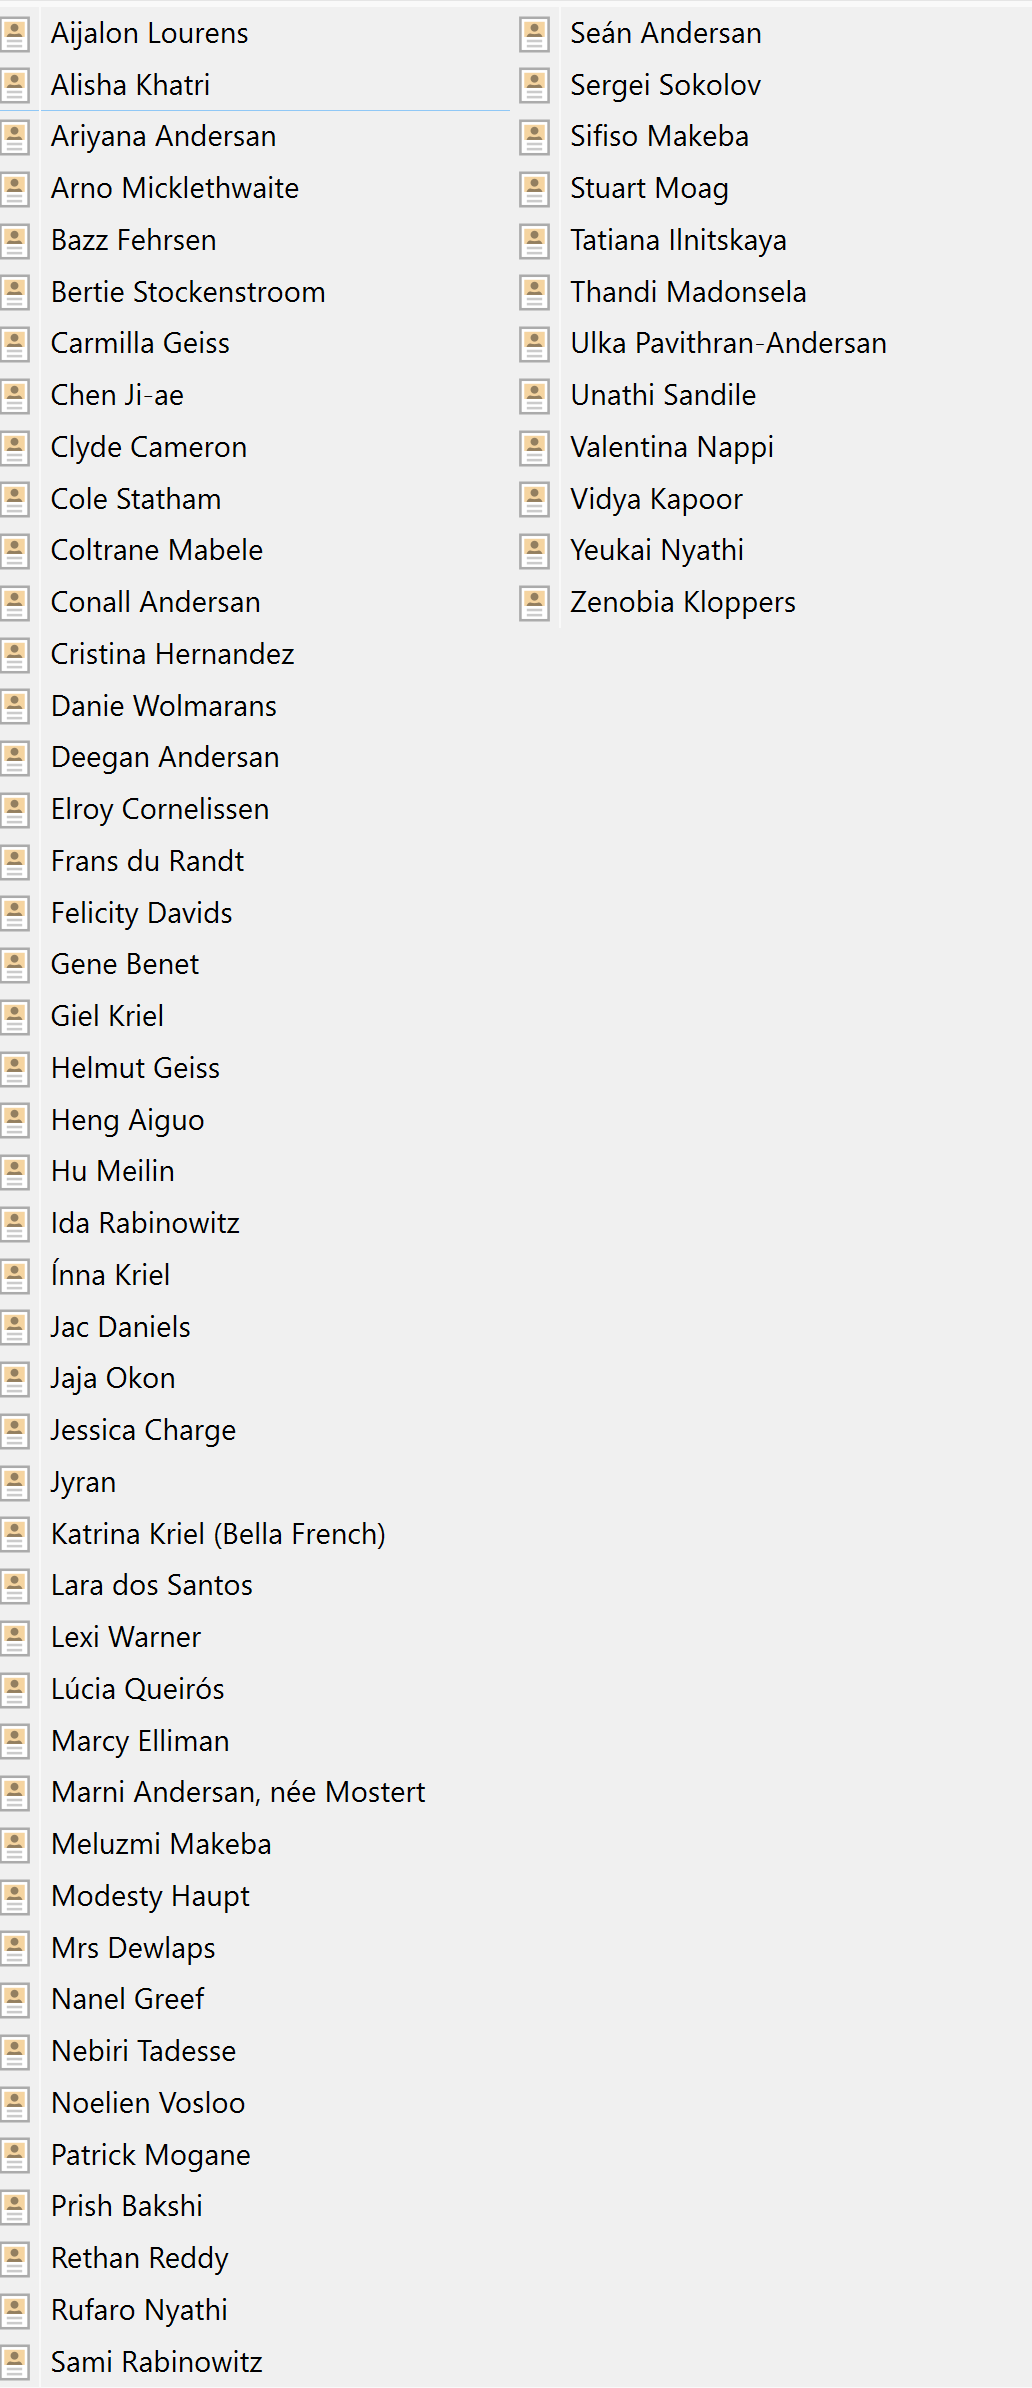
Clicking on the down-arrow to the right of Characters now linked to Bookmarks, you get something like this, where you can access individual sheets by clicking on them.
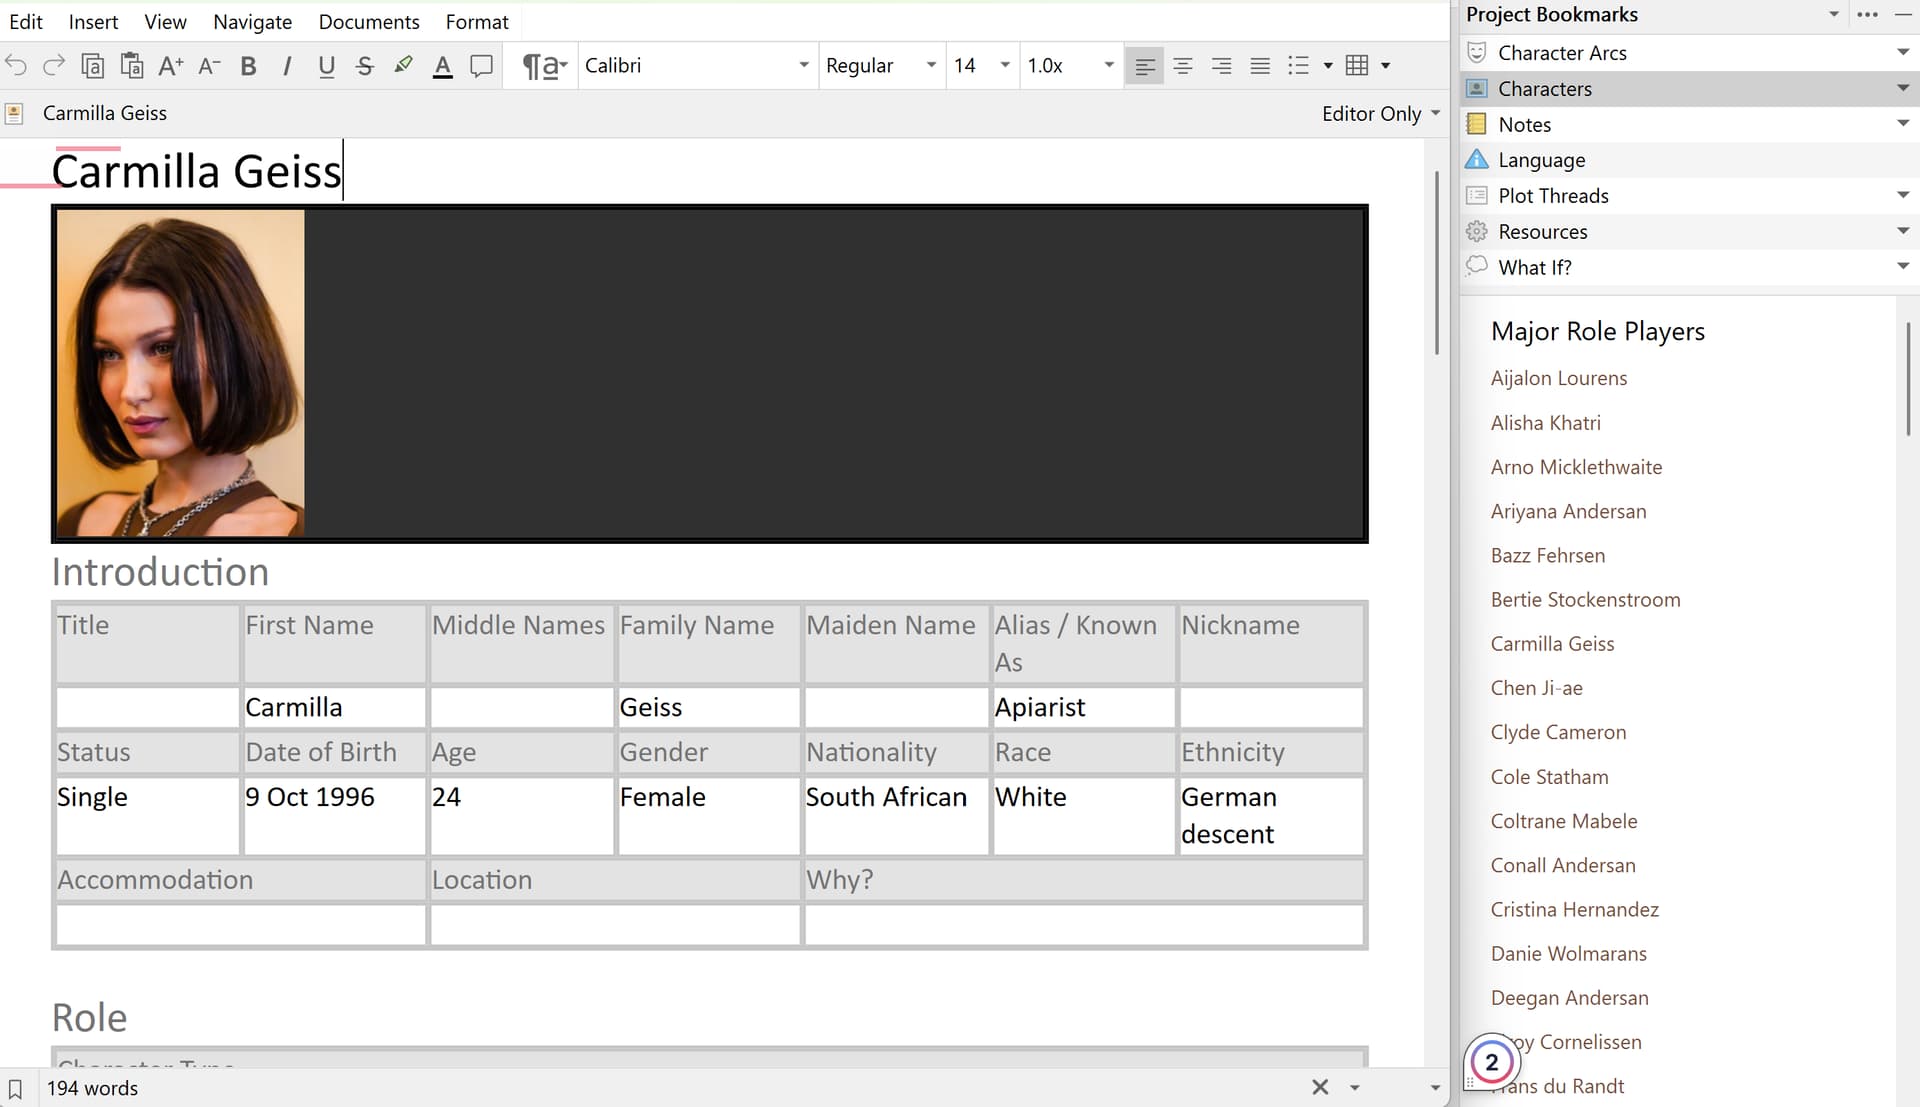
Clicking on a character sheet’s name gives you the info in the Inspector’s Bookmarks preview windows, which is fully editable. See image for example.
I use another approach, where clicking on internal links to Character Sheets in the preview window opens Quick Reference panels—mainly because I keep my Inspector size static in width, but that’s my preference. Here’s an example:
So, there’s no one size fits all, but the facility is there to experiment as you please.
5 Likes
@Kevitec57 This is off topic, and if this needs to be split off, I understand.
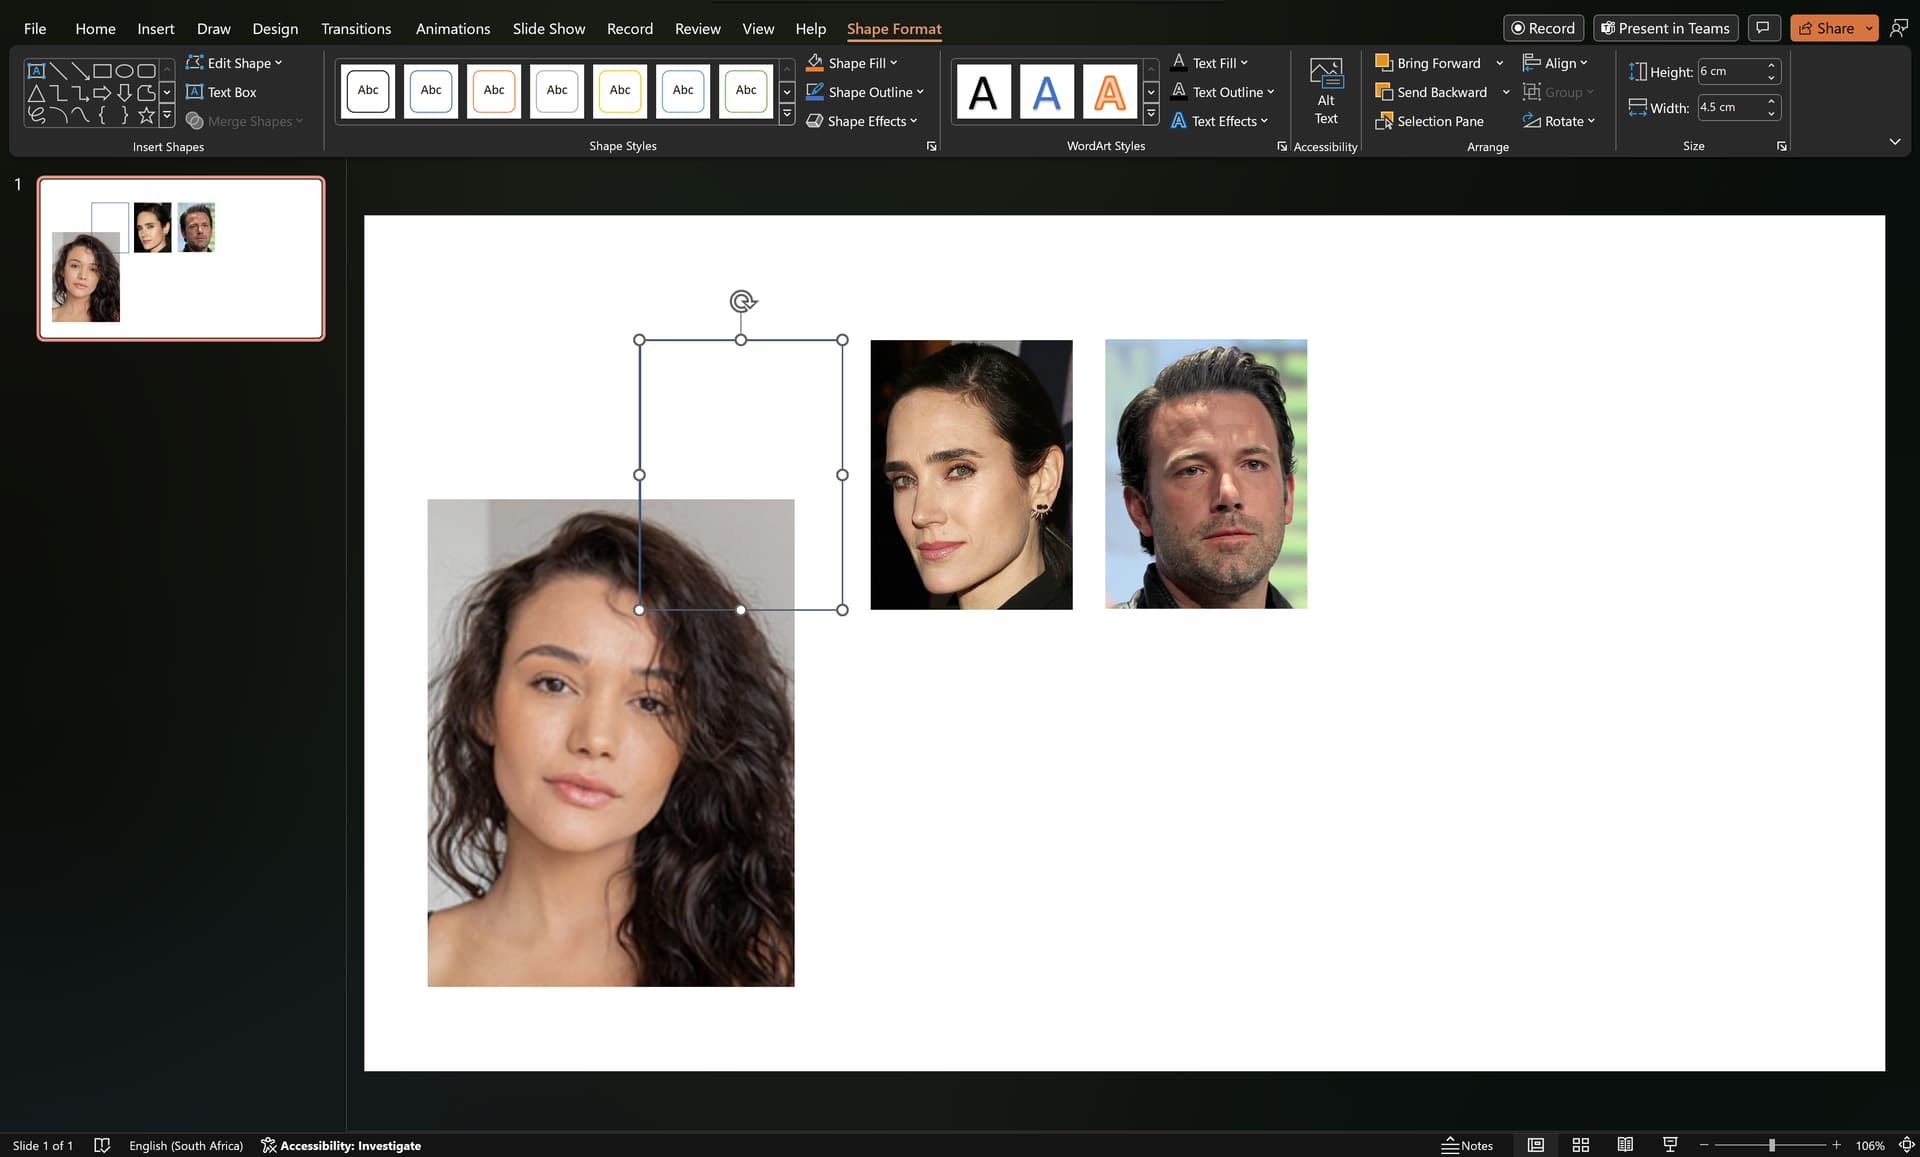
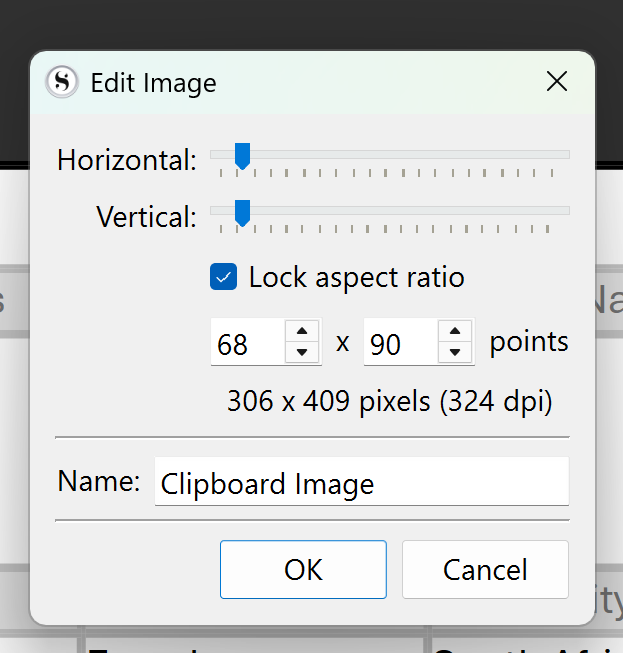
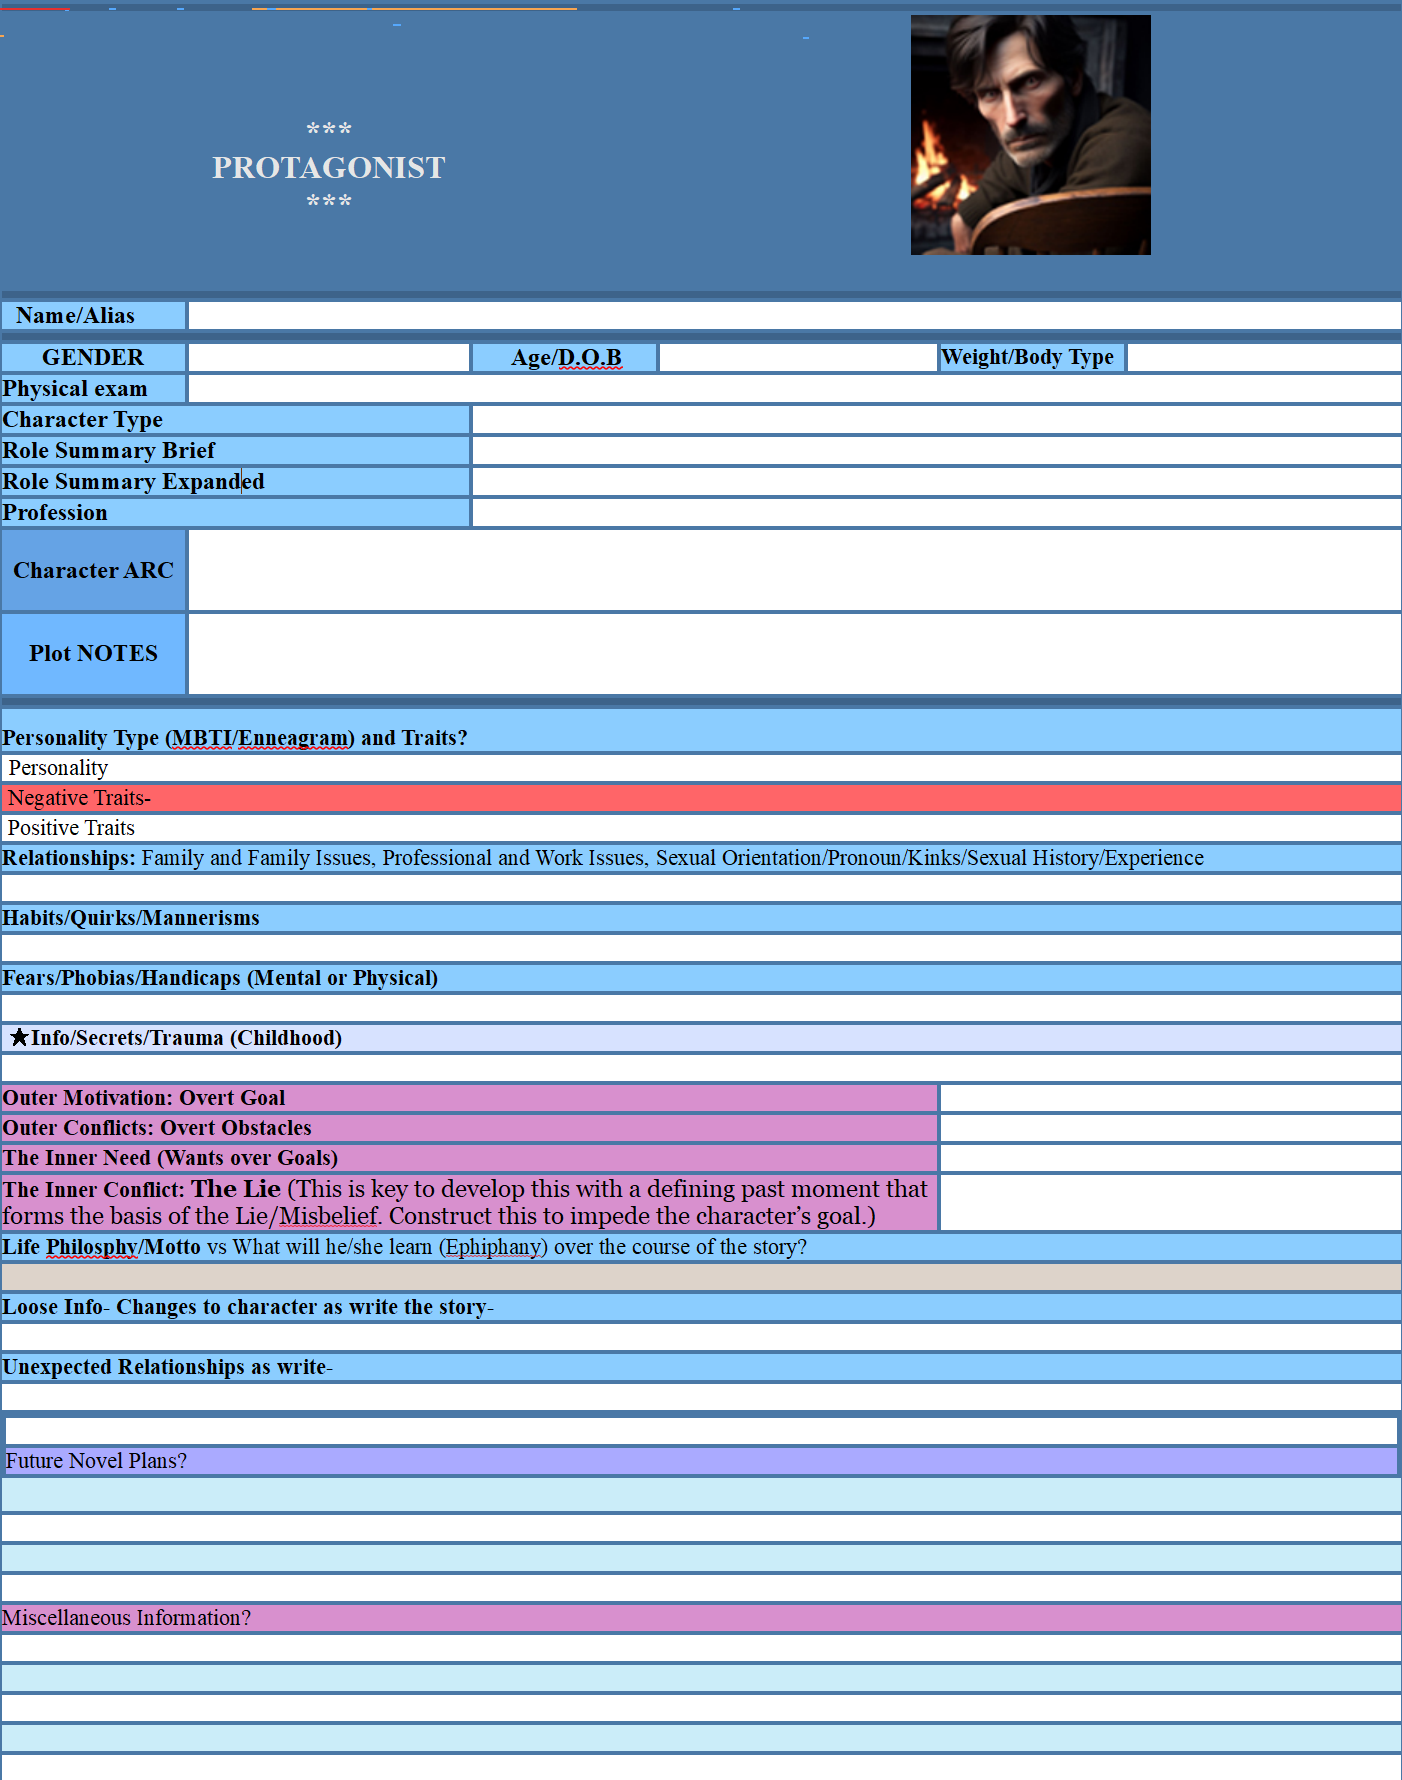
How did you create such a nice table with a photo that displays so well? I could totally use something similar, but failed to make it work right. Is it a Scrivener doc or something linked from research?
Tables
. . . . . . . . . . . . . .
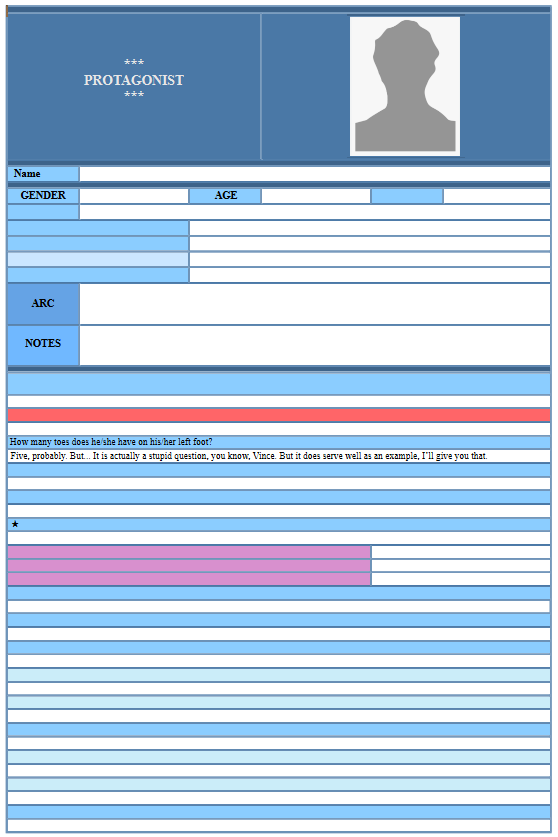
Character sheet-bak-2024-03-30T14-33.zip (24.6 KB)
3 Likes
@Kevitec57 Thank you so much for the details and the link. I need to get to my desktop and download it. Again- THANK YOU!
Kevitec 57 great template, Interestingly, I used a photoeditor (the Photoshop Elements to make a picture of a character 160 by 160 and dragged into header and worked perfectly. I love the colors and added content from another plainer template to get this idea, based on yours. I used a 160 by 160 pic which I dragged into the template after removing your picture placeholder. It looked like this. Again thanks
1 Like
Vincent_Vincent posted the template. (Credit where credit’s due, and all that.)
2 Likes
@Vincent_Vincent many thanks for sharing your template! Please accept my apologies for misidentifying who posted it. My bad!

(@Kevitec57 thank you for the correction.  )
)
2 Likes
A detail. No worries.
Kudos to @Kevitec57 for the just as valuable input.
1 Like