The lack of line height and spacing settings for the separator font used during compile make it near impossible to get scene separators to look centered and properly spaced.
1 Like
Or even better yet, a “Separators use [Style Name] for formatting”, where the bracketed part is a dropdown that lets you select from the project’s style list. Then you can go wild with whatever styles can do, rather than just a few things adding clutter to this pane.
But there are many places where the compiler doesn’t really use styles to its full potential, and uses hard-coded direct formatting instead, like paragraph indenting. We have some modernising to do, all around.
4 Likes
You have some options for the separator if you use custom separators. (see below)
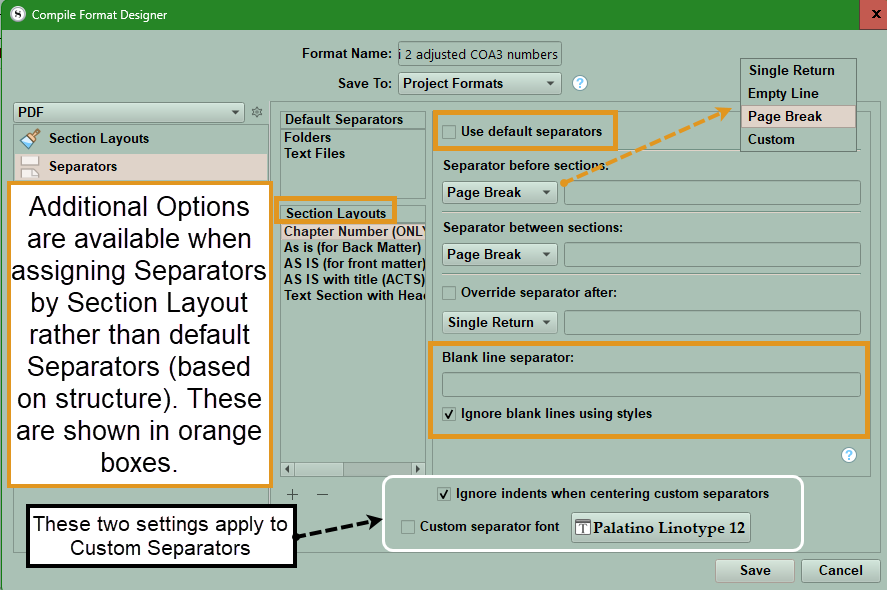
However the other way is to use custom metadata text as the separtor. You can type in what you want. This shows where to place it this examples uses custom metadata to place an image, but the same results would apply for a custom metadata text entry that could be varied from a list of text options.
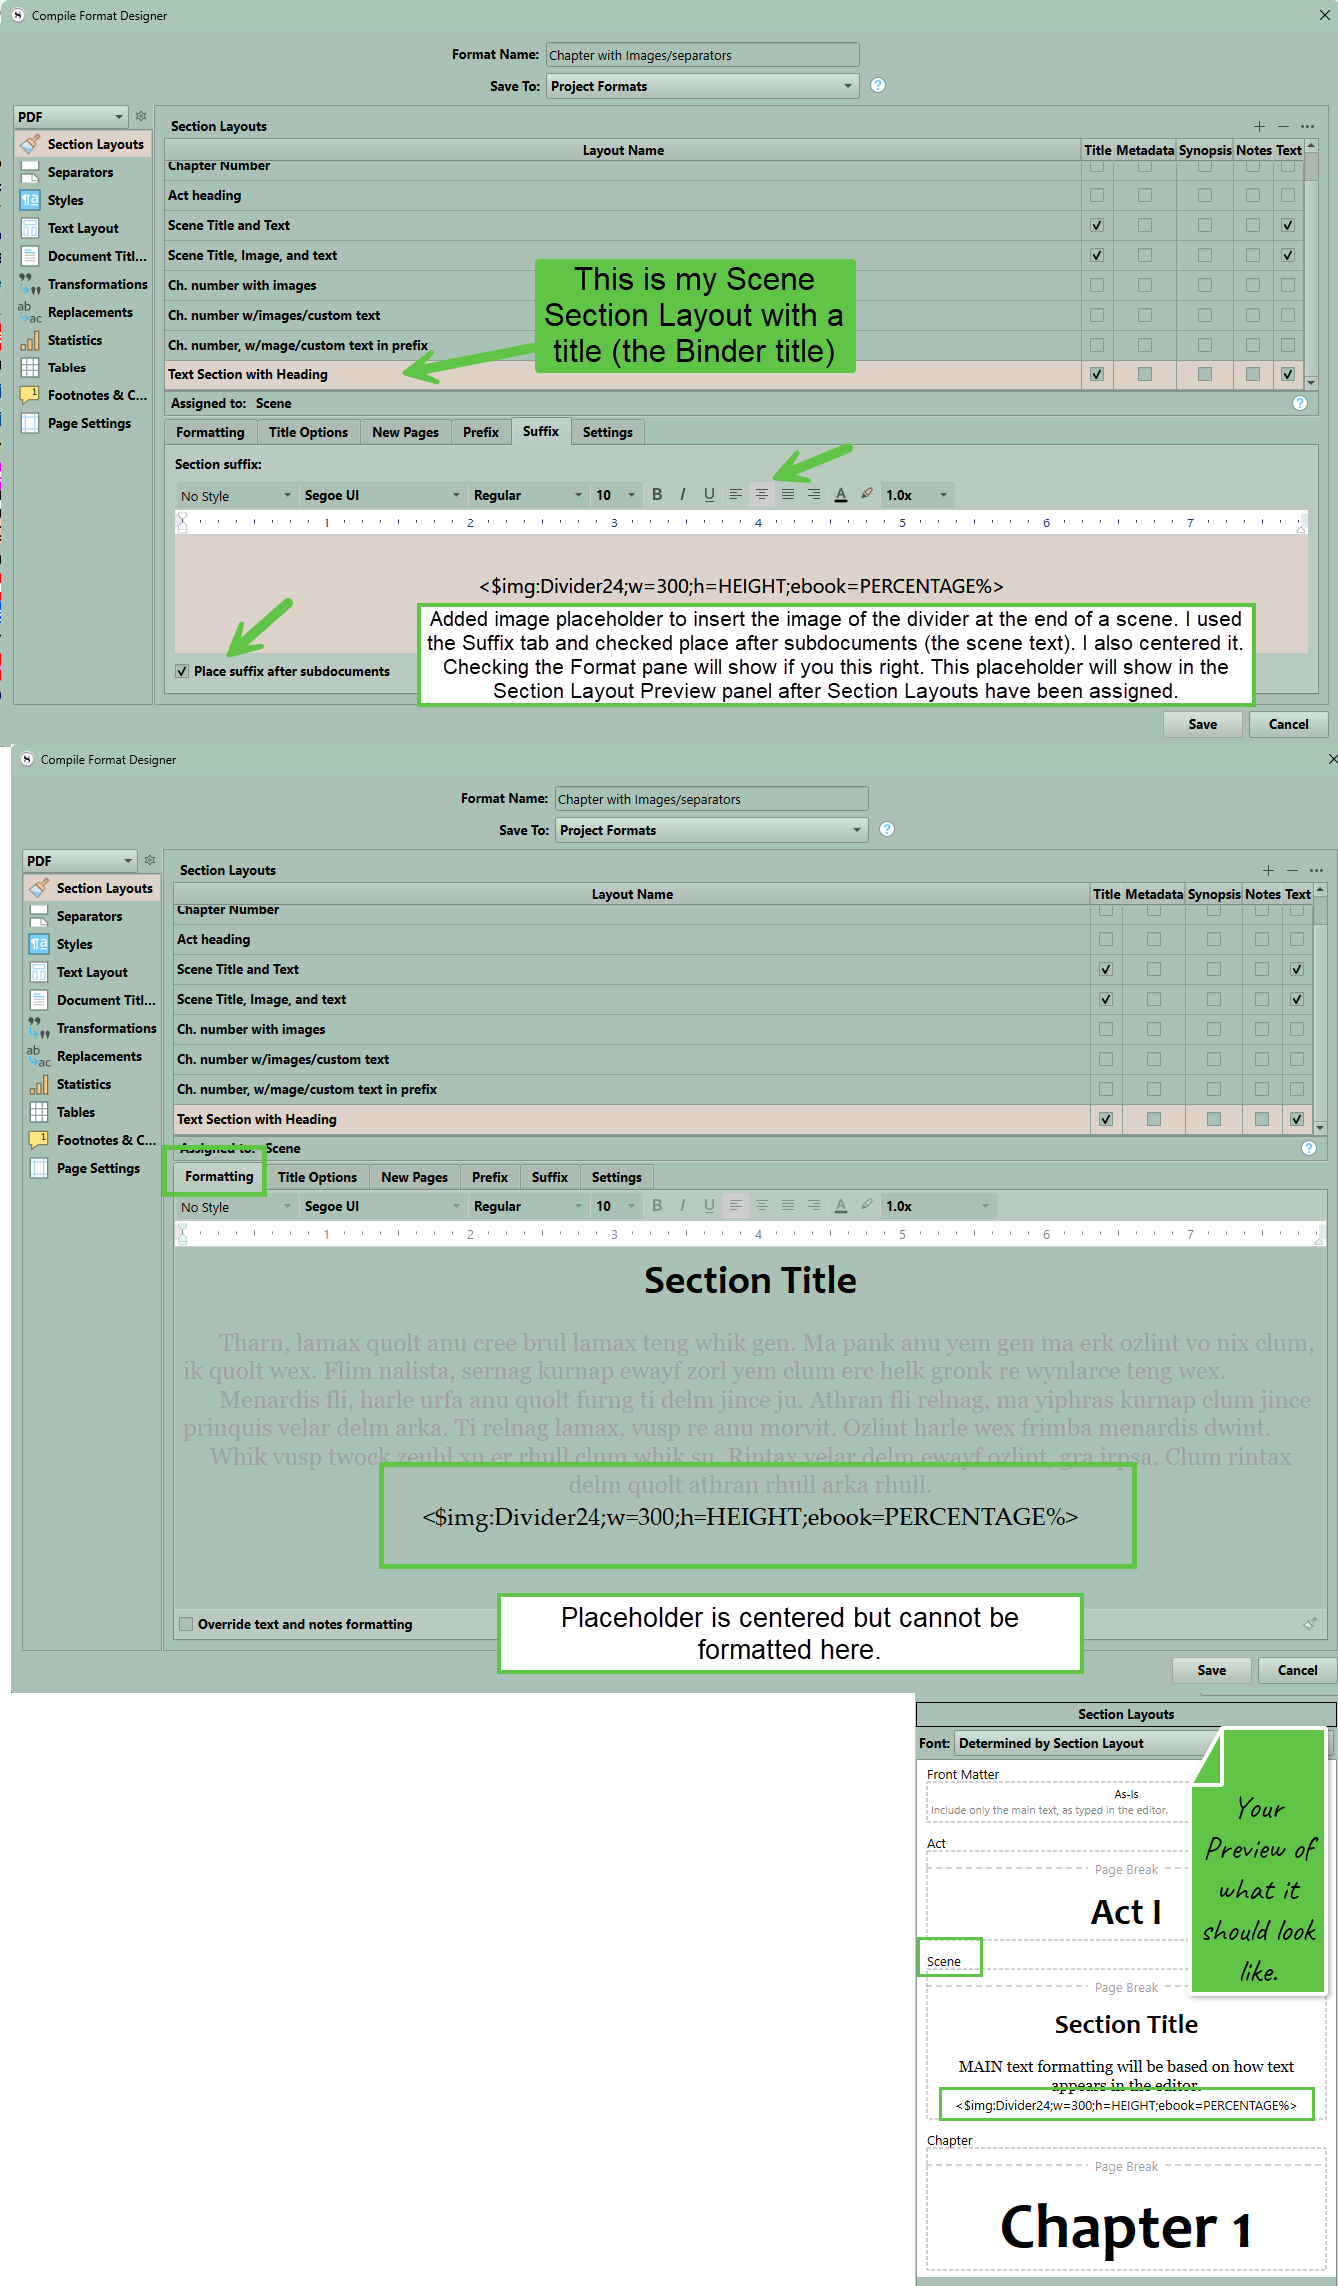
Using Placeholders:
You can use placeholders to insert images or text (unique images or dividers) between Section Layouts of a specific type.
Below is an example of using a single image (in the Binder) for a divider between sections-
<$img:Divider24;w=300;h=Height;ebook=60%>
You could use a custom metadata list to vary the image/text which appears depending on what metadata value you assigned to a document.(For example, each act of your novel could have unique custom dividers between scenes.) Here you could choose from Custom Metadata Images, Shapes, or Dividers to use as an image/text to insert.
The example below adds images based on the Custom Metadata value assigned to each document. The specific image/text being inserted will not be previewed in the Section Layout preview area; you will only see the location of the placeholder and its alignment. So you could have Custom Metadata lists with multiple values that can be chosen under the Images, Shapes, or Divider lists.
6. Close the Compile Format Designer after clicking save, and the Section Layout area will show a preview of what you have created.
7. As the image above shows you must go to suffix to place at the end, but can center, determine font and size using this method. I hope this helps.
1 Like
Yes, we are using per layout custom separators. The <$img> tag use is clever - we may try it. Thank you!
Seems elegant. I’m in favor of whatever gets the job done.