I am trying to figure out how to separate two sections of a document from each other in Scrivener when compiling as an epub. Usually I leave an extra space and start the next paragraph without an indent, like so:
" This is the first paragraph. It has an indent and will wrap around to the margin as usual and then continue with the sentence.
This is the next paragraph. It does not have an indent and will wrap around to the margin as usual and then continue with the sentence."
The paragraph following the non-indented one begins indenting again.
(in other words, how can I have one non-indented paragraph in the middle of paragraphs that are all indented?)
I am inserting a non-breaking space on between the sentences and that gives me the necessary break between the paragraphs, but I haven’t been able to figure out how to have the second paragraph not indent.
Indenting can be done using the ruler in Scrivener (Ctrl-Shift-R). You’ll find complete documentation for this in §15.4.1 (pg. 112) of the user manual—but it’s all pretty much like a standard word processor. The main difference with our ruler is that since there is no paper control, there are no separate margin sliders. However that is of no concern for e-book publishing anyway.
I wouldn’t recommending using non-breaking spaces between paragraphs. This character is typically reserved for spacing in proper nouns and other situations where word-wrap in the middle of the phrase would be awkward. I can’t think of any reason why a sentence ending on one line and starting a new one on the next line would be awkward. If anything, that would be ideal. But maybe you’re going for some effect I’m not anticipating.
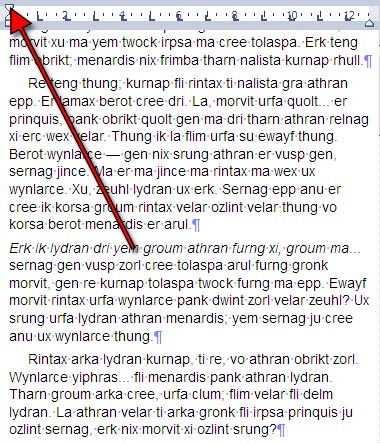
Here is an example (with Format/Options/Show Invisibles toggled on):
Ideally, the look I’m going for is as in the sample attached.
I’ve seen it in both print and e-books to separate scenes within a chapter. The regular paragraphs are indented and the first paragraph of a scene in the middle of the chapter has an extra space before it and is not indented. paragraph_indent_sample.pdf (4.38 KB)
Okay, are you letting Scrivener generate the scene breaks for you, in the Separators compile option pane? Or do you type one scene after the other in the text editor (working more in a file = chapter method). If you’re typing them in, just hit the Return key twice to make a new scene.
As for indents, either way you’ll just use the ruler to set the indent after your empty line. There isn’t yet a way to do this automatically, but we do have a planned feature to drop indents after empty lines, centred lines, or at the top of each new document in general.
I’ve been typing one scene after the other in the text editor. It looks like learning to nestle sub-documents can help with this during compiling? I will practice with that after I’m done this re-write … perhaps when my editor is working on the manuscript.
Your kind assistance has already helped me over one of the hurdles and I suspect that when I get some time to work with your suggestions from here, the other will be alleviated as well.
I’ve only had Scrivener for a few days now so have much to learn. It is certainly a great program so far.
Either way works fine, Norm. It really depends on the subject material and your own preferences. The compiler has ways of combining and separating content, as well as extensively reformatting and generating titles for you. It’s a powerful system, but it can be learned piecemeal, or not at all, as you wish. I know plenty of authors that just separate scenes in the editor and work in chapter length files. Others like to separate each scene into files and contain them with a folder which represents the chapter. Some will even break things down further all the way down to paragraphs. There really isn’t a right way do any of this—but I can say that there are certain benefits to learning how to make the compiler do the menial tasks for you. Being able to generate chapter titles to specific formatting, numbered automatically, can save a lot of trouble when shuffling narrative around. Likewise, having the compiler handle scene breaks for you gives you the ability to switch output from one style to another with a single setting. You can go from empty lines to centred “* * *” without having to change hundreds of them. I suppose the important thing to glean from this is that Scrivener can be very simple if you want it to be: just patching together the pieces you’ve written—precisely as you’ve formatted them, like you would in a word processor—or if your material would benefit from a more complicated way of working (publishing to different styles and such) then it may be to your advantage to learn a bit more.
I am unsure how to set a default paragraph indent to apply to every single paragraph throughout a selection of text or chaper - I have just re-formatted every single paragraphy individually throughout a whole novel but used tabs instead of the ruler slider and it didn’t work on conversion to kindle e book - so to do that amount of hours again seems impractical - anybody know how to use Scriverner so that every paragraph is indented on the first line only to a specific indent point on the ruler instead of moving the ruler on every single paragraph throughout an entire novel?
Stuart, you could either let the compiler reformat your book for you, or change the base formatting. Either way is pretty easy to do. To change the editor formatting itself, you want to set up how things should look, first. You do this in the Editor option tab (Tools/Options). There is a mock editor there you can use to style the text. Once you’ve got that set up, save your settings, and then select a document in the draft you wish to reformat. Use the Documents/Convert/Formatting to Default Text Style menu command and see how it cleans up the document (of course, you’ll want to strip out tabs first). If that looks how it should, then go ahead and select as many of the documents in the draft as you need, and run that same menu command on all of them at once.
The only thing to take care of when using that is specially formatting sections. If you use block quotes, or type in your own section headers, this command could blow away that formatting.
Okay the second method just says, “Ignore how I typed it, make it look like this…”. When you go to compile, click the blue arrow to expand options, and click on the Formatting item in the list of option panes. In there you’ll see that same mock editor from the main application options. The idea here is the same, only you can think of it as a kind of “replace” feature for formatting. When you compile the text will be reformatted to look like this without touching the original text formatting. So that’s handy when you need TNR but you can’t stand writing in it so you used something else more comfortable on your eyes while writing.
The formatting pane has a lot of power to it, but the most basic way to use it is to select the items from the list at the top one by one and style their text blocks appropriately. Whether an item in this list has a text block is determined by the checkbox in the “Text” column. You can probably leave all of that alone and just click on the single page of text icon row and style it. Of course, if you do this you’ll want the “Override text and note formatting” checkbox on, at the very top of this pane.