Hi! I’m new to Scrivener and I am loving the corkboard. I have just started plotting my novel with it. I am using different colour cards for different plot lines. ls there any way that I can hide all cards of a certain colour and show only red cards e.g.? Thanks in advance for your help!
If you make a collection of one type of card like one pov then select all files in that collection and switch to corkboard view
It’s not a permanent thing, but yes there is a filter for both the corkboard and outliner. Access it with regular old Ctrl+F / ⌘F, and flip the little arrow on the left to access additional options—such as removing all red cards, or showing only red cards, etc.
Once you set that up it will stick for the session, so you can easily toggle the filter on and off with the shortcut.
You might also be interested in the View ▸ Corkboard Options ▸ Arrange by Label view mode, also accessible in the corkboard footer bar with a button (it looks like two small cards on two lines). While that doesn’t filter, it aids in visualising the flow of whatever you are using colour coding for.
1 Like
Thanks! I will try that out!
Making a collection worked the best for me, thanks!
So, making a collection as suggested above didn’t work as well as I initially thought, so I think filtering per ⌘F would be best. Unfortunately I am not able to do that. I can’t find how to access the option to show only red cards or hide them, etc. ![]() Could you walk me through it, please? Sorry for being such a digital klutz…
Could you walk me through it, please? Sorry for being such a digital klutz…
I’m on Windows, so you’ll have to convert my feedback below to Mac-speak. ![]()
This feature is called Corkboard Filter (you can also use it with the Outliner) and is discussed in the Windows Scrivener manual section 11.4 Filter Outliner & Corkboard views.
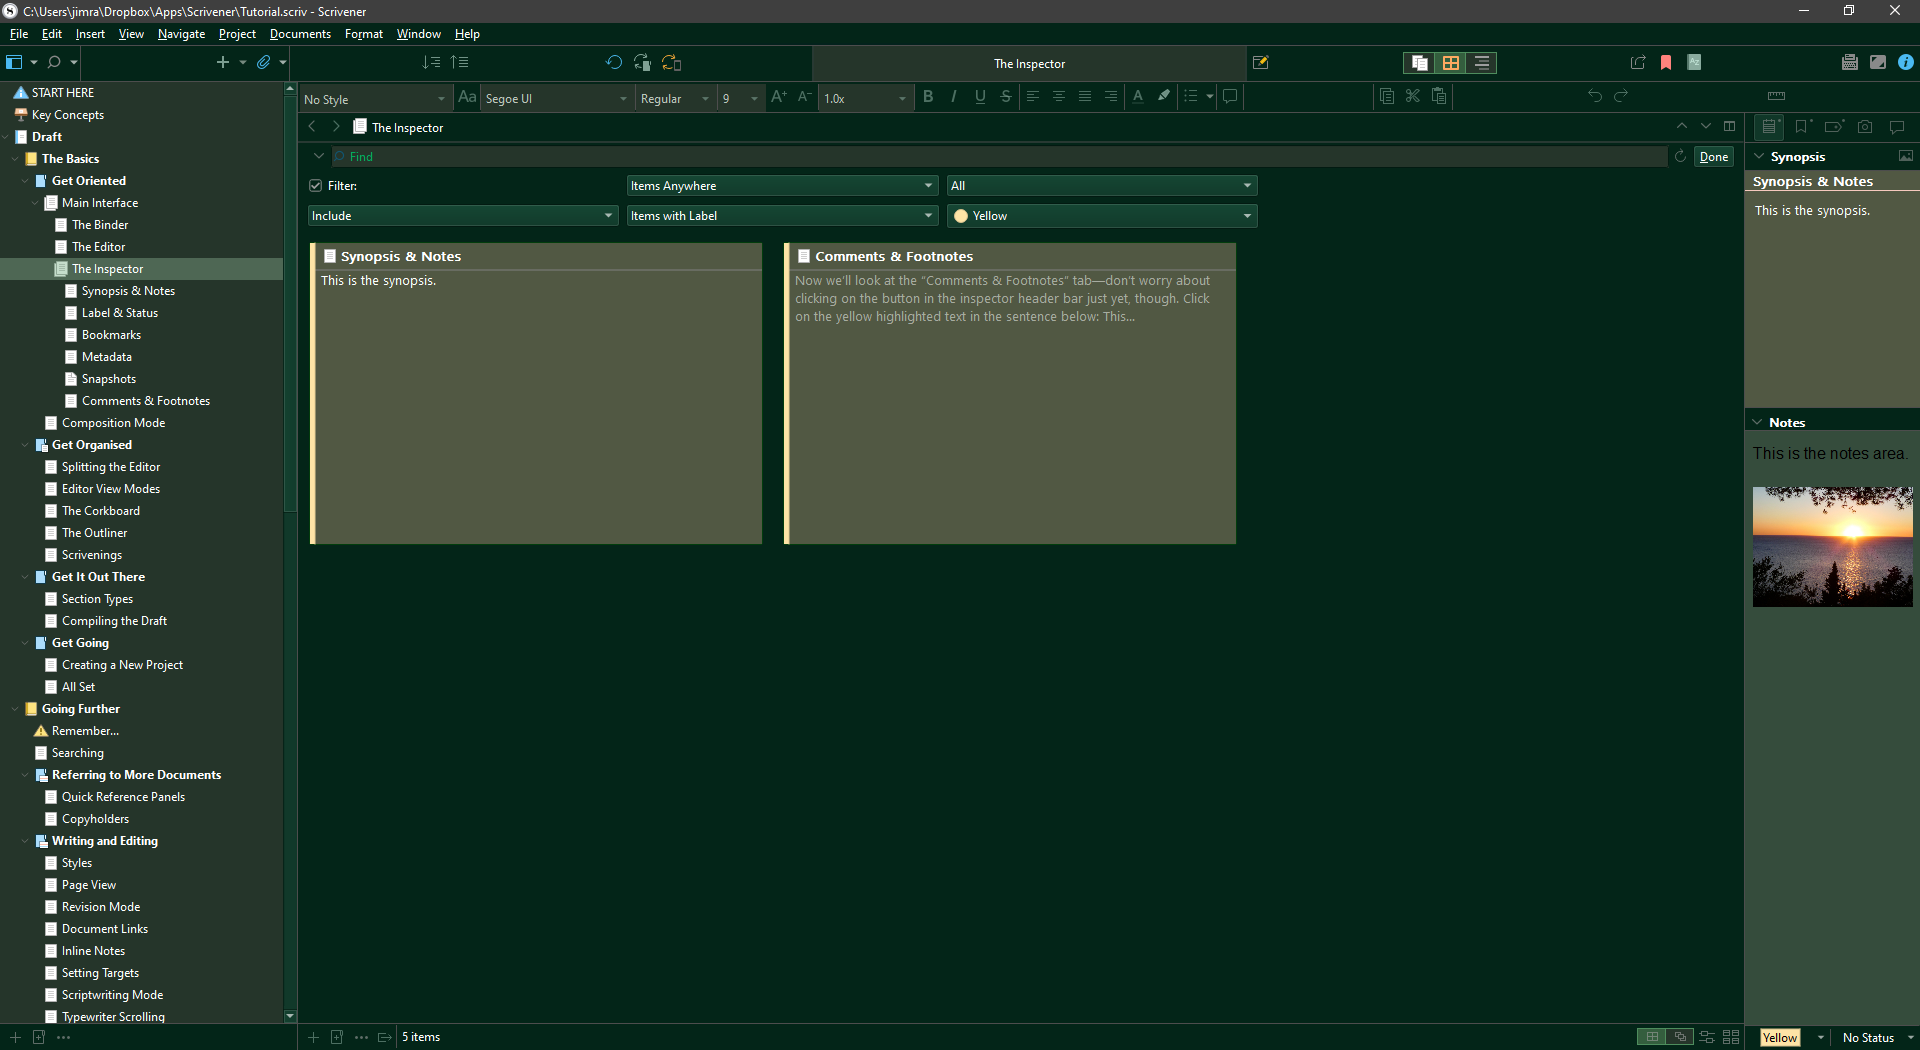
It sounds like you’ve reached the point where you have the Corkboard displayed and the Filter launched, like so:

Moving left to right, set each filter field based on how you want the filter to work -
Put a checkmark in the Filter box to enable the filter:

Scope of the filter (Draft folder vs. non-Draft):

Whether to add/drop items based on ‘Include in Compile’:

Whether to include or exclude items based on the filter settings:

What metadata field to check (Label, Status, or Section Type):

After choosing “Label”, select which Label value to check:

In this case, I chose to Include only items with Label = Yellow.
Best,
Jim
2 Likes
Thanks so much, Jim! It worked! ![]()
1 Like
So, I have been using the filter function while creating index cards on my corkboard and now wanted to start changing their positions while filtered. That is, e.g. when I set the filter so I can see only the red index cards, I would like to be able to shuffle them around and change their order. This doesn’t seem to work, I can’t move them when I am using a filter. The reason for using the filter for me is to visualize only one plot line and to put the scenes in an order that makes sense for the development of that plot line. If I don’t filter it is harder to get an overview of that plot line. Can anyone help?
You might want to revert back to Label view at this point, which will allow you to rearrange cards.
Hi kewms,
you mean deactivate the filter? That makes it much harder to get an overview of that plot line. Isn’t there any other solution? How does everybody else get their subplots in order?
The reason why you can’t reorder when you have a filter enabled is that the documents may not be “next to” each other in the Binder. That is, the actual structure of your project might be something like:
RedDocument 1
Lorem ipsum
RedDocument 2
dolor
sic amet
RedDocument 3
But with the filter, you are only seeing
Red Document 1
Red Document 2
Red Document 3
So you drag Red Document 3 in between 1 and 2. But where does it actually go? Before Lorem ipsum, or after it? Scrivener has no way of knowing.
The Label view shows you the entire Corkboard, but with all documents with the same Label on a line. This allows you to see them both relative to each other and relative to the rest of the Binder.
1 Like
Thank you, that makes sense.