I’m using Scrivener 3.1.1.0 for Windows. Before and after my chapters I have several pages (Dedication, Acknowledgements, Index, References) in which I want to have a page break between them - I don’t want to have my Tabel of Contents and my Acknowledgements on the same page.
I’ve created and assigned corresponding section types for those pages - the page for acknowledgements is labeled as “Acknowledgments”, etc. - and yes, the box “Include in Compile” is checked.
When I edit my project format to add separators (page breaks), these sections do not appear here - only the chapters.
How do I assign page breaks for these sections that I’ve added?
Section Layouts, what you set up in the compiler, are separate from a project’s Types. This use case is a good example of why, as some of your types here may all be served by one simple Layout, like something that prints the content as-is and only inserts of page break otherwise. It would cumbersome to have to replicate that same exact thing over and over in settings, when we can just say, all of these things should work like this.
Think of Types as being how you think of the intentions for your draft folder’s contents, in a pure sense that does not always match how you may format them. Think of Layouts as how we choose to print a particular Type. This difference in purpose between the two is reflected in our naming schemes.
So to start with that:
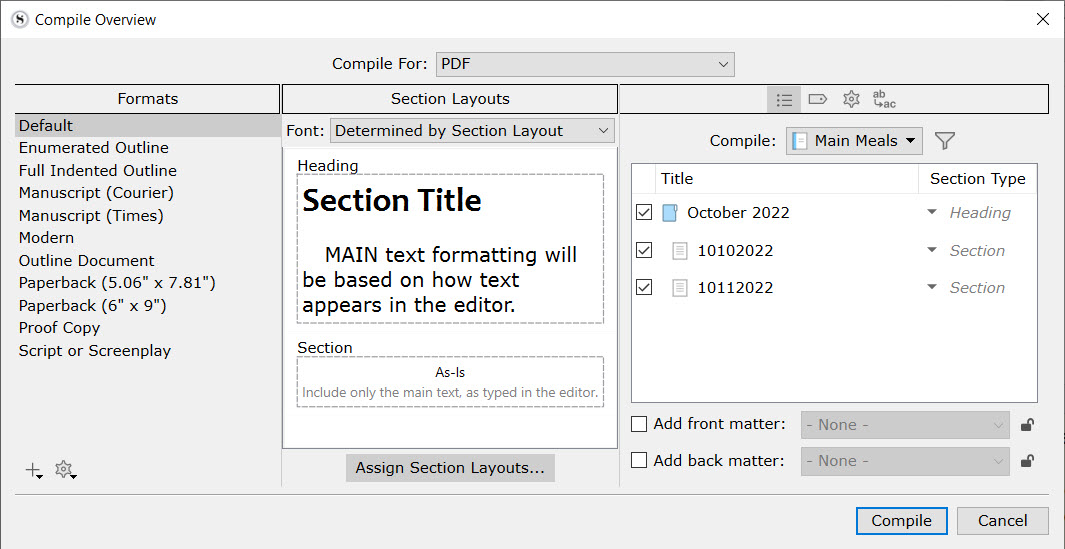
First, check the Format that you’re starting from, and see if it has anything suitable already. For example the “Manuscript Times” Format has a layout called “New Page”, that only does what I described above. Click on the Assign Section Layouts button from the main compile overview, and set everything that should work that way to this one layout (like Dedication and Acknowledgements).
While you’re here, look for a “Table of Contents” layout as well, as a number of our formats have one of those already designed too.
If you do have need for a brand new Layout that works unlike the provided defaults:
Edit the compile format, and go into the Section Layouts pane. Look for something reasonably close to what you want.
With it selected, duplicate it with the + button in the top right, and give it a descriptive name, like “Back Matter”, for your index and references sections. Let’s say maybe you want these to fundamentally work like chapters, but use a different automatic numbering type, like “A”, “B”, “C”. For this kind of change, I would select “Chapter with Title” (again using Manuscript Times as a point of illustration) for duplication.
In the Title Options tab, change the Title Prefix to “Appendix <$L:appendix>”, leaving the carriage return in place. Click back on the Formatting tab to preview the result.
Maybe for this you don’t want to override editor text formatting, as indices and citations can be very different from how ordinary paragraphs work. You could disable Override text and notes formatting. But also note the little brush icon to the right of that checkbox—sometimes tabs, indents and alignment are all you need to keep the formatting of such things intact. You can benefit from having the font changed to 12pt TNR with double-spacing, without having hanging indents or other such things modified.
Depending on which Layout you duplicated from, you may need to insert your page break now. Go into Separators, and select your new Layout. Fixing this up should be fairly straightforward.
Give that a test compile. Maybe it’s not completely done yet, but with these checklists you should be well on your way, and know enough now to make any further adjustments you require.
Create two Section types: Frontmatter and Backmatter
Assign the Frontmatter type to the first documents and the Back matter type to the last documents (if you have those)
In the Compile Format Designer (check the Window title), create two Section Layouts: FrontmatterLayout and Back matterLayout.
In FrontmatterLayout, make sure the Title and Text checkboxes for Content Type are checked. In the Separators tab, set New Page as Separator for the FrontmatterLayout.
In BackmatterLayout, make sure only the Text checkbox for Content Type are checked.
In the Compile Overview window, Assign the FrontmatterLayout and BackmatterLayout to the Frontmatter and Backmatter Section Type respectievely.
Compile a test, to see if this works.
Double-click your Format to open the Compile Format Designer. To the left is a menu with the second option being Separators.
@AmberV Reaching the Compile Format Editor seems to be a consistent usability issue. Despite four ways available to reach that window. May I suggest a clearly visible button - just like the Assign Layouts to Types button - at the bottom of the left column in the Compile Overview window?
Antoni, your advice is spot on, but the nomenclature by definition is confusing.
You need to first set Section Types (project term) in Project settings for front, back matter, etc and then you need to make a custom compile format (only way to edit compile formats) and then when open the compile format designer you create The Front matter Layout section (compile term) settings and Back matter layout sections by renaming section layout types you do not intend to use and assign values for title and text as Antoni suggested, then move to seperator section and edit the front matter and back matter compile layouts and change the settings as suggested. You can even make a collection with the front matter, back matter, maybe 2 chapters and scenes and name it compile trial and then in compile window don’t choose whole project, but just this one collection. Will compile quickly, allowing rapid changes till get it the way you want and not have to compile the whole project each time.
Another case of unable to reach the Compile Format Designer, so it seems a lot of features are missing. They’re invisible to the OP. It is a usability problem.
@fictionwriter Double-click your Compile Format to access the Compile Format Designer. That window has the feature you seek.
Reach to Compile Format Designer by:
Double-Click your Compile Format, or
Double-click a Section Layout preview pane, or
Select Edit Format… from the cogwheel menu bottom left in the Compile Overview window , or
Select the Pencil icon top right in a Section Layout Preview pane and pick “Edit {Layoutname}”.
(Do not click the visible button at the bottom of the list with Formats in the left column of the Compile Overview window, because there is no such a button)
I suppose, though since most of the stock compile formats come with a bounty of things that already have page breaks, it’s more a matter of clicking the very visible “Assign Section Layouts” button, and scrolling around to find a preview tile that has a page break.
One does not need to plunge directly into the deep end, customising their own formats, just to do something as simple as that.
Have you considered that maybe there is a little friction (and boy, is it a little) here on purpose? That maybe pushing everyone straight into the advanced customisation route isn’t the point?