Any advice appreciated.
I’m new to Scrivener and coming from a Microsoft Word background, so a lot of how Scrivener works is very new to me. I’m liking it so far, but I am having an issue with the compile feature. I have a manuscript I’m working on that I need to save several combinations of chapters of as PDFs. Right now, I need PDFs in 6-chapter increments, so a PDF for chapters 1-6, a PDF with chapters 7-12, etc. Now, I’ve figured out how to include/exclude chapters from the compiling and even alter some settings to maintain indents, the font I want, and justify alignment, so that’s all nice and dandy. My problem is that I cannot get the compiler to label chapters differently other than a 1, 2, 3, 4 order. Which is problematic when I have a prologue AND when trying to compile chapters 7-12, for example, exclusively and they’re all just being titled chapters 1-6. Now, I’ve taken a peek into the settings for some of the compiling features, but I’ve got almost no experience with coding language or how to tell it to do what I want, if it even can or if I’m even in the right spot.
So my question is, is there a way to manually change the chapter numbering/titling in the compile feature, and if so, how? I don’t even mind if I have to go through and manually change each one (like, rename chapter ‘1’ to chapter ‘6’ and then do the same for each following chapter), or if changing one will automatically continue the numbering order from there, I just need for every PDF not to be labelled 1-6 when they’re actually consisting of later chapters. And how to get a prologue properly labelled and have the numbering start following it would also be quite helpful too.
Any assistance would be greatly appreciated.
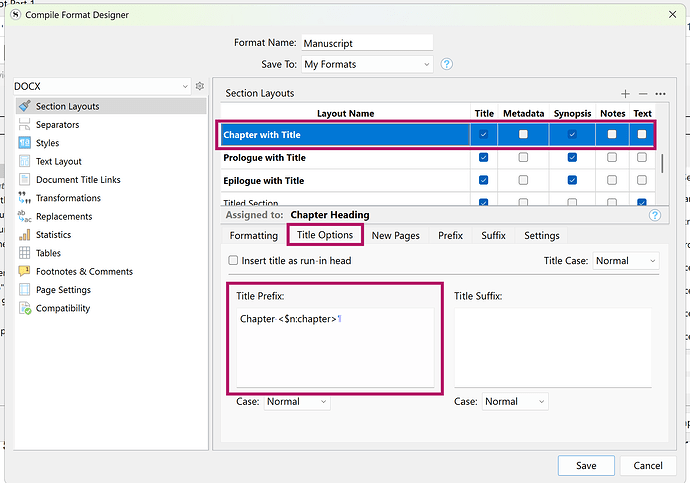
Part of the answer you’re looking for is to have separate Prologue Heading, Chapter Heading and Epilogue Heading layouts. Any chapter allocated a Chapter Heading will auto-count from 1. For Prologue and Epilogue, you don’t have placeholders for numbering, like Chapter <$n:chapter> under Title Options > Title Prefix among your layouts—just have the words Prologue and Epilogue, as they apply.
Further to what @Kevitec57 has said:
On the Mac, I believe there is a setting in the compiler that will compile a sub-part of the whole manuscript, but preserving the chapter and section numbering for the whole draft, which is what you want.
I’m not at my computer (I’m a Mac-user to boot!) at the moment, so I can’t check, and I don’t know if that’s been implemented on Windows. Perhaps someone from the Windows fraternity can elucidate.
![]()
Mark
You could create collections to compile groups of chapters. Why not name chapters by number one, two, seven , etc and let scrivener auto number as name gives actual order of chapters.
I don’t know if I quite understand what you mean, but I have tried to change chapter titles and whatnot. I have them labelled just in the actual writing section for the manuscript, but I can’t figure out how Scrivener is set up to let you actually change how it titles chapters and what to. I did find the spot that has the stuff like <$n:chapter> and assumed that has something to do with it, but I don’t actually know what I have to type in to get it to change or how it works.
Yeah, if it’s not on windows it won’t help much cause I don’t use MAC, but so far it kinda seems like my compile options are stuck on a pregeneration? Like, regardless of what I’ve titled my different chapters, it auto titles them Chapter 1, Chapter 2, etc, and I can’t seem to find where/how to alter that.
What are collections? I’m really, really new to this program, I’ve barely figured out how to do the basics. I’m learning it out of necessity because my access to Word through my university is expiring and I’ve worked on nothing else before, so Scrivener feels a lot more in-depth than I’m used to and I’m not quite sure how to navigate it yet, admittedly.
Ah! I figured it out. There was a weird issue with a box not being checked that seems to have fixed my issue. I can now just choose the option for section titles and actually have the body text show up (before, could only get the actual chapter content to show up if I was using the chapter number feature which was not allowing me to manually change the numbering order, or just getting the chapter ‘titles’ and no body text if using the section titles feature. Seems to be working fine now. But thank you all for your advice!
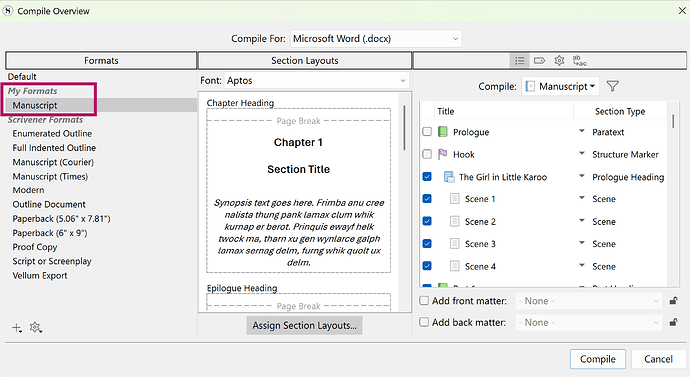
Assuming you’ve created a customised format and saved it as a My Format, available to all projects or Project Format for the specific project only:
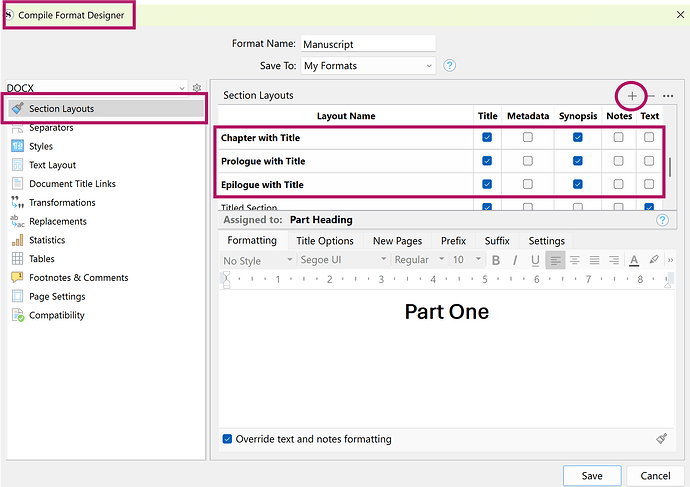
Double click on the customised format to open Compile Format Designer popup.
Click on Section Layouts.
Create 3 layouts, one for Chapter, another for Prologue and a further one for Epilogue, either by customising something existing or by creating a new layout by pressing +.
You need not tick Synopsis as I have, I use a Synopsis at Chapter levels for something not applicable to the discussion.
Working on one layout at a time: Chapter you’d want to auto number. The word “Chapter” will produce the word in the compiled output for each chapter, and the placeholder <$n:chapter> provides the numbering. Since I’ve ticked Title alongside the Layout name, the title of each respective chapter in the Binder will be drawn in for sequential chapters in the compiled output.
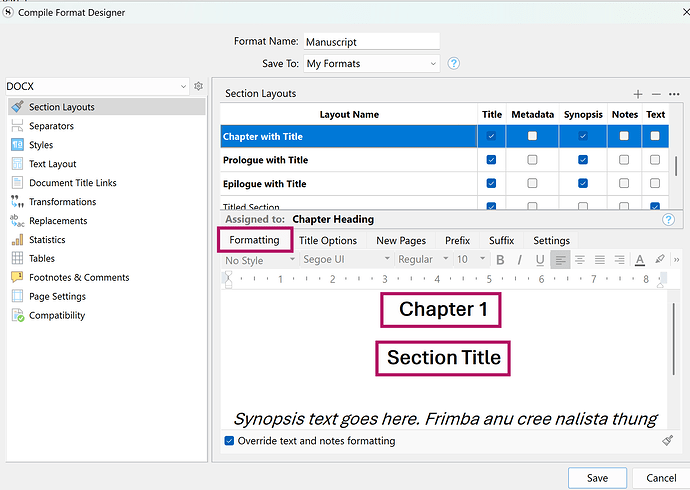
Clicking on the Formatting tab, you’ll see a simulated (not an actual) preview, with Chapter and number and the Section Title is the Chapter Title that will be brought in from the Binder.
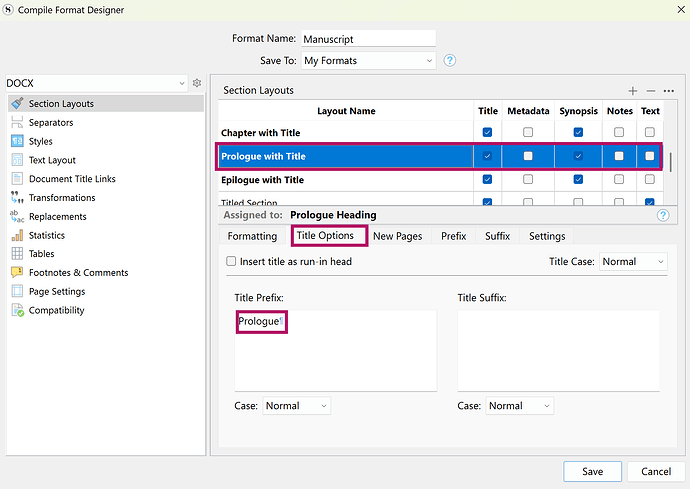
Moving on to creating your Prologue layout, click the Title Options and instead of having Chapter and a placeholder, simply include the word Prologue. Epilogue will work the same.
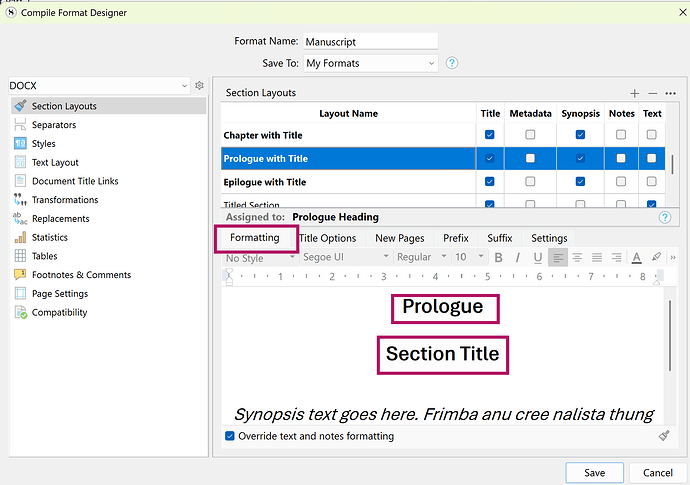
Clicking on Formatting for the Prologue layout, produces the following simulated layout:
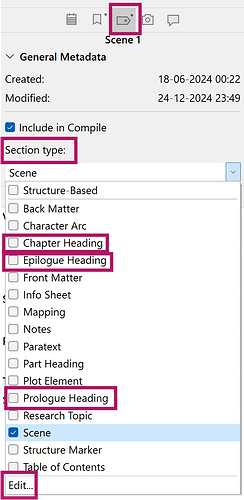
Back in your document, in the Inspector, click on the third tab (Metadata) and open the dropdown for Section Type. You should already have something like Chapter Heading, so create two more, clicking on Edit to add Epilogue Heading and Prologue Heading.
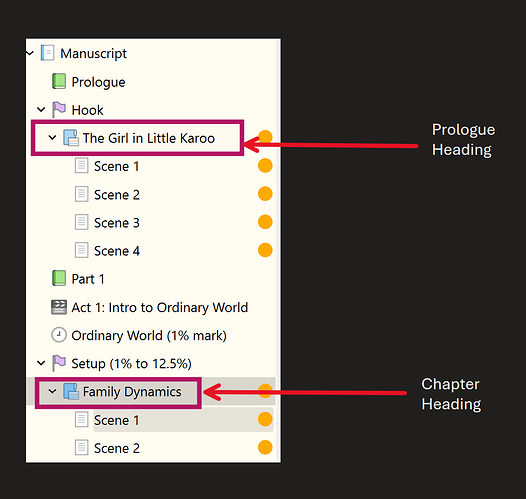
In the sample below, I assign the Section Types as follows:
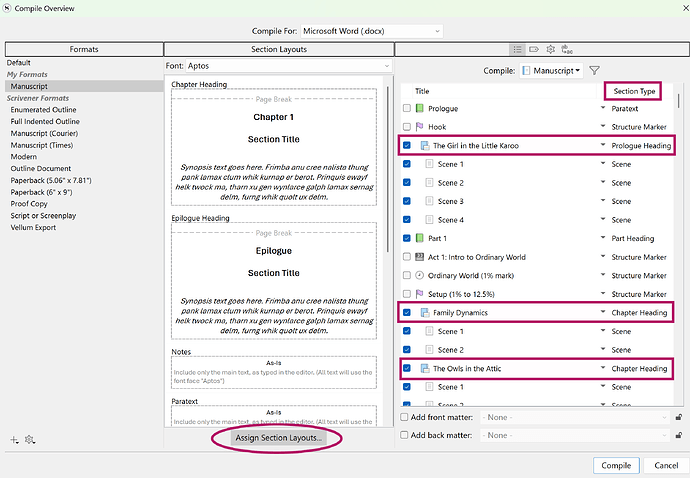
The Girl in the Little Karoo is allocated Prologue Heading Section Type. The underlying Scenes are allocated the Scenes Section Type.
Family Dynamics is Chapter 1 and is allocated a Chapter Heading Section Type. The underlying Scenes are allocated the Scenes Section Type. Each chapter has the same allocation.
Final Step
Back in Compile, you’ll see the Titles of various sections and their Section Types, however you still need to assign Section Layouts to the various Section Types to give your output structure.
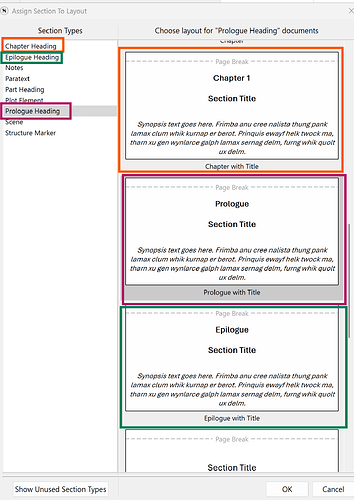
Click on Assign Section Layouts…
You’d now see the Section Types in the left channel and the layouts to choose on the right. Assign each according to logic.
Your chapters might be a complete structural unit, but the approach would be similar.
Glad you did I have some articles on my website including ones about collections. These might help you get to used a great program. I am working on a Compiling series but not up yet on my site. Start here with collections Using Collections — My Writing Journey
Curious, do you have Snagit too. It is great for this kinda of stuff.
No, I use Win+Shift+S and add blocks in the Windows Snipping Tool. If I need to Add Text, I copy the marked-up piece to OneNote. Bless their souls, one day Microsoft will improve their Snipping Tool to include text. They’re still at the kindergarten stage, having included emojis.
