Hi, I’m having real problems importing folders and having them land at the same level as the default ones so:
Characters
Maps
Graphics Research
Bold black represent default folders while the blue are two of what I want to add. I’ve got four or five I need to import so renaming existing won’t give me enough.
Every now and then I can do it but not often. Dragging them around in the binder is impossible for me with my dexterity, so any other options would be massively appreciated.
Is it the fine control of the mouse which is the problem?
Perhaps you could create a new folder at the right level (e.g. highlight the Draft/Manuscript folder then cmd-opt-N to create the new folder – it will be in the top level), then move it to where you want it to be with cmd-ctl-up and cmd-ctl-down. Call it something obvious such as ‘Temp’ perhaps.
Then when you want to import the new folders, drop them onto Temp, then highlight them and cmd-ctl-left once and they’re all at the top level, where you can move them around with the cmd-ctl-up/down shortcuts.
The temp folder is just a temporary workaround to give you a bigger target to drop the files on. You can use existing existing folders for the same thing, of course, but it might be simpler to have a dedicated ‘drop zone’.
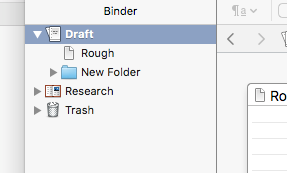
I tried following your instructions with the result shown below and I’m not able to get the “New Folder” to move out of the Draft folder no matter how often I go through the process.
OK lets call Draft, Characters, Front Matter folders level 0 and chapters, character info, reference etc level 1
I want New folder to be level 0 but it’s trapped at level 1.
My drag’n’drop problems are due to a disability which hampers coordination by the way.
OK. There may be a setting affecting that, but it doesn’t really matter. Just highlight the New Folder in the binder and use cmd-ctl-left arrow to ‘promote’ it to level zero and then follow the instructions as before.
BTW (I’m sure you know this, but just in case), cmd-ctl and the four arrow keys are just the shortcuts for the menu commands Documents > Move > left/right/up/down mentioned by PJS above, so it’s the same solution.
Basically, I’m suggesting that once you’ve got the new folders in the binder somewhere, you can move them around easily using the cmd-ctl-up/down/left/right instead of worrying about placing them precisely with the mouse. I hate using the mouse, so I use these shortcuts all the time.
The idea of creating a new folder was just to give you somewhere to dump the new files – it’s not actually needed.
Other shortcuts you might find really useful to avoid the mouse are cmd-opt-up and cmd-opt-down. The move you to the previous next document respectively, but the good thing is that they work not just in the binder, but also in the editor, the inspector and in Compose mode.
Cmd-opt-b hides or shows the Binder. Cmd-opt-i hides or shows the Inspector.
cmd-opt-ctl-b moves the cursor to the Binder, cmd-opt-ctl-e moves it to the Editor and cmd-opt-ctl-i moves it to the Inspector.
You can go a long way without using the mouse at all with these and a few other shortcuts.