A couple of tricks which may help you get up to speed… these often aren’t mentioned in guides, but they’re really useful. As @xiamenese says, Macs by default are set up to be a lot more typist friendly than windows: of course, you have to get used to the different modifier keys placement, but once you’ve got that, you’ll find that everything is very logical…
You can type any accent simply by holding the relevant key down for a second. A popup menu will appear – press the number of the variation to enter it.
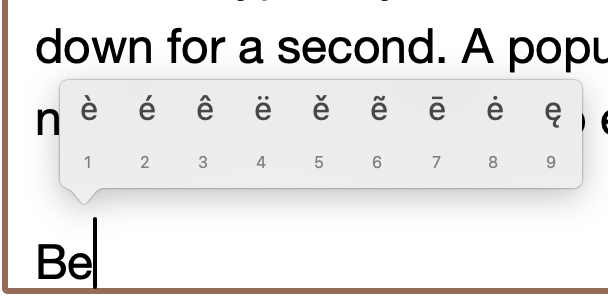
Here I’ve pressed and held on e and will type 2 to get é for Bébé. This works with almost all letter which will accept an accent.
Beyond that, if you hold the option (aka alt) key and type a letter, then that will also give you many of the most common accents and symbols. It depends on your keyboard language, but for an English keyboard, for example, opt-b gives you β, opt-2 gives you €, opt-3 gives you # if you’re British and £ if you’re American, and so on. And most importantly for writers:
opt-hyphen (minus key) gives you an en-dash (-)opt-shift-hyphen gives you an em-dash (—).
Secondly, you can press opt then another key to add an accent to the next character (release the opt key key before pressing the second letter). The second letter is called a ‘dead’ key, by the way.
- Hold
opt and press e, release and press e again gives you é. opt+e then a gives you á etc.
- Hold
opt and press backtick then a gives you à, with o ò etc.
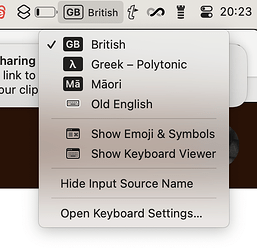
There are hundreds of combinations, so how do you know where to find them? You need to set it up in System Settings. Go to System Settings > Keyboard and under Input Sources click Edit. In the dialogue box, click on All Input Sources and then turn Show Input Menu in Menu Bar and press Done.
Now you’ll have the name of your keyboard layout (Apple calls it an Input Source for some reason…) in the menu bar:
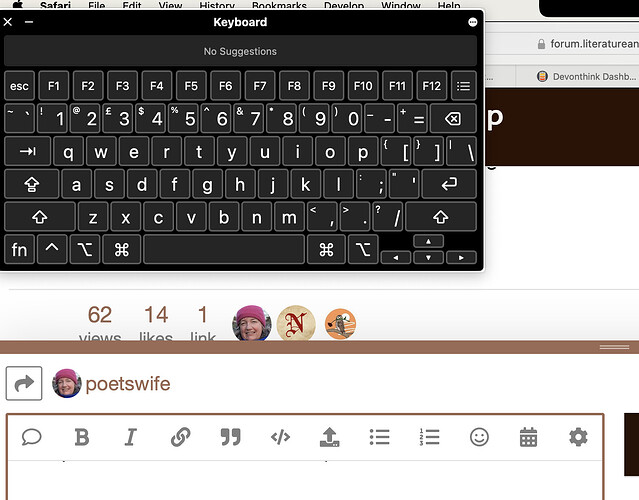
Click on Show Keyboard Viewer and you’ll see a dummy keyboard appear. Hold down the option key and you’ll see the various alternative symbols appear. (I can’t show you this, because as soon as I press the screenshot button the options disappear!)
The ones which appear in orange are the dead keys which you press to get combined symbols – e.g. the e in opt-e, a for á is a dead key.
It takes a bit of getting used to, but once you do, it is so much easier than all the faffing you have to do on Windows to get simple symbols.
Another couple of tips: in any Mac program, the first item on the Help menu is a search bar: type in the name of a feature and you will be shown where it is in the menus. (This is where Windows Scrivener got the idea from – it’s really useful when you’re learning a new program.)
Secondly, whenever you’re in a menu or dialogue box, hold down the opt or shift keys and you often see extra optional features.
For some reason, these last two tips are not widely known, but they really help when you’re first finding your way in the new system. Good luck!
