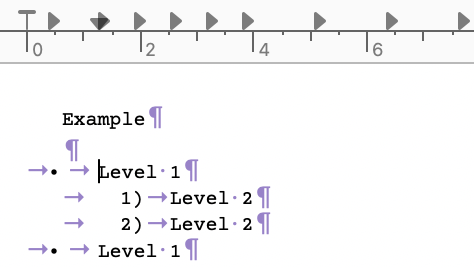
How do I make a list within a list, please? Here’s an example of what I want (but I don’t know how to make Scrivener do it)
Have a wok and a strainer ready, and four bowls for holding
marinating chicken
chopped onion, pepper, garlic and ginger
chopped sprouting broccoli
noodles
Skin and chop the chicken breasts and thighs and marinate them in light soy sauce and freshly-ground pepper.
(and so on). The 1. and 2. parts are easy, but I can’t see how to do the list within the list, for the bowls. I’ve looked at the manual (which mentions sublists, but doesn’t seem to say how to make them), and searched online, but haven’t found how to do this.
Any help gratefully accepted. Keyboard shortcut very gratefully accepted.
I created this by entering the four items, selecting all, Menu: Format List, picking bullet. Then on the “Level 2” items, I selected them, then pressed the Tab key. Can then select the second level lines and pick a different List Format, if you want.
Probably other ways, and probably a way to define Styles (with a Keyboard shortcut assigned) and being more selective about tab settings, but this works as a starter.
There are a few tips to make using lists more convenient to work with (which means you don’t have to write the list on one level then adapt it, but can simply construct it as you go along):
Start your list off with a bullet point in the normal way, and press Enter to start the next item.
Immediately press Tab. The second item will be indented, with a different bullet. When you want to return to the higher level, pressing Enter then Shift-Tab will create a new item at the higher level with the correct appropriate bullet/number type.
If you don’t like the type of bullet for any level (or if you want numbers/letters), use cmd-alt-left/right and it will cycle through the various options. Once you’ve chosen a style for that level, it will stay the same for the whole list at that level, even if you intervene with other levels.
You can indent/outdent the levels with Tab/Shift tab at the beginning of the lines, but cmd-ctl-left/right also works, and you don’t have to be at the beginning of the line.
Another tip you may not be aware of: you can start a new list at any time by pressing opt-tab at the beginning of a line. It will default to ‘-’ as the bullet, but you can change that with cmd-opt-left/right as above.
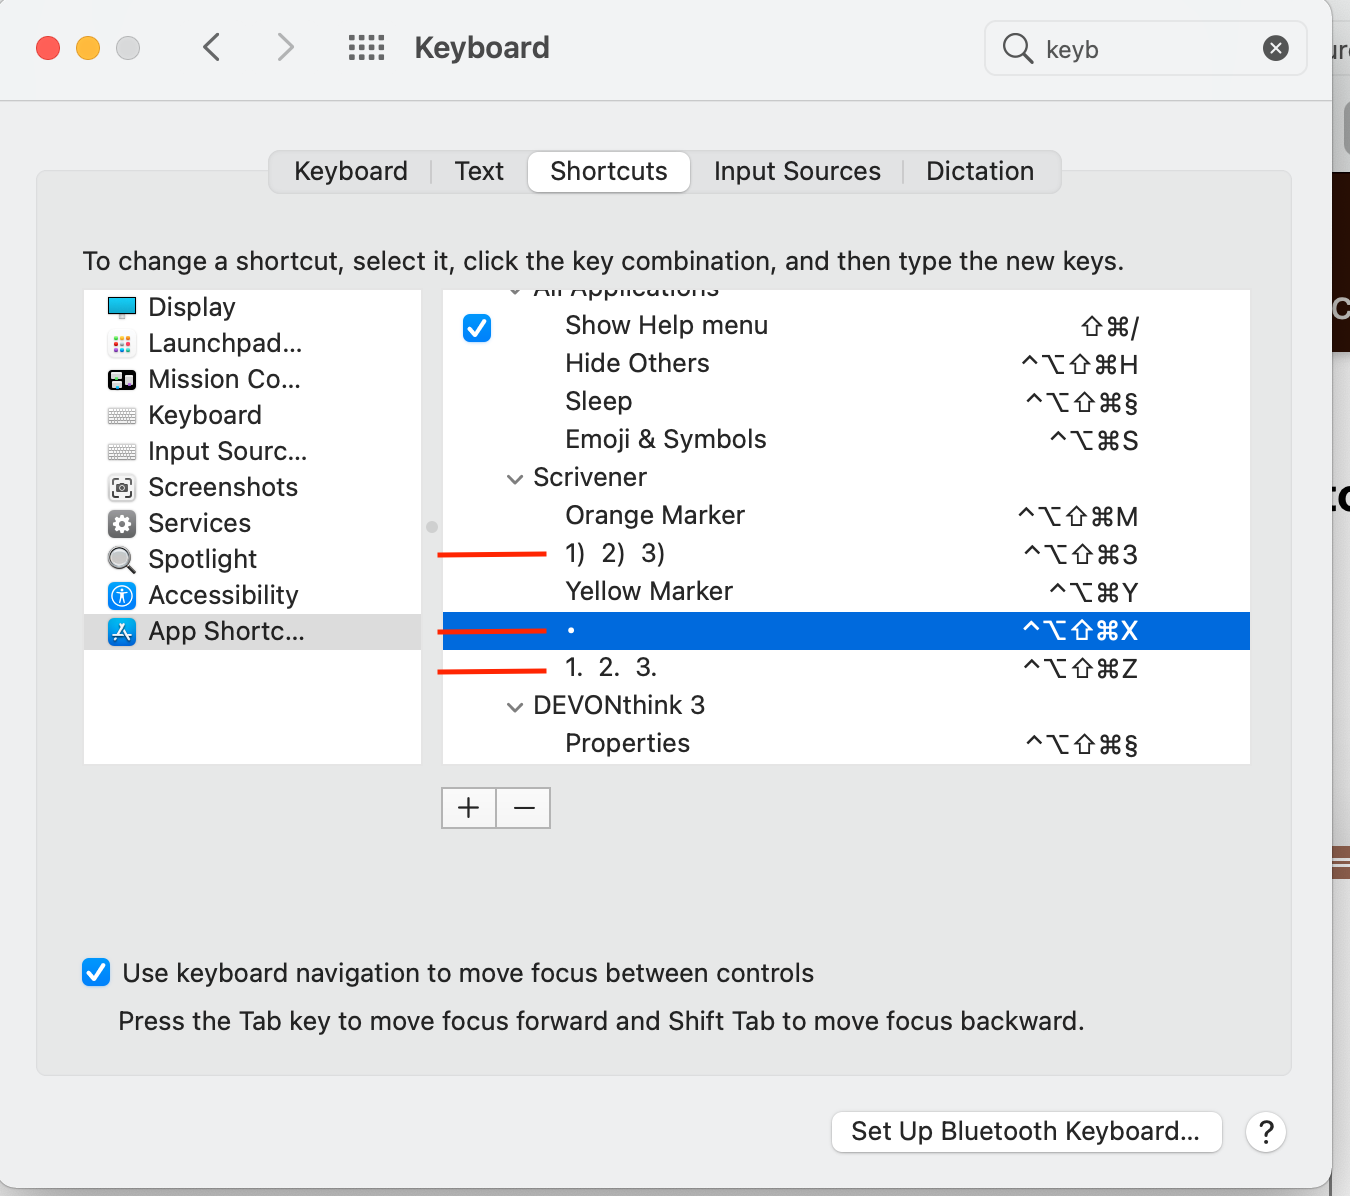
Finally, you can add shortcuts for each of the level one bullet/numbers types (I have them for 1., 1), •, ◦, and No List). Just set them up in System Preferences > Keyboard > Shortcuts > App Shortcuts in the normal way.
(BTW, most of these tips works with any Apple based RTF editor like TextEdit — but I think cmd-opt-left/right and cmd-ctl-left/right are Scrivener only).
It does indeed, thank you very much! Except for the last bit. System Preferences > Keyboard > Shortcuts > App Shortcuts > Scrivener then what? How do I get to the list shortcuts bit?
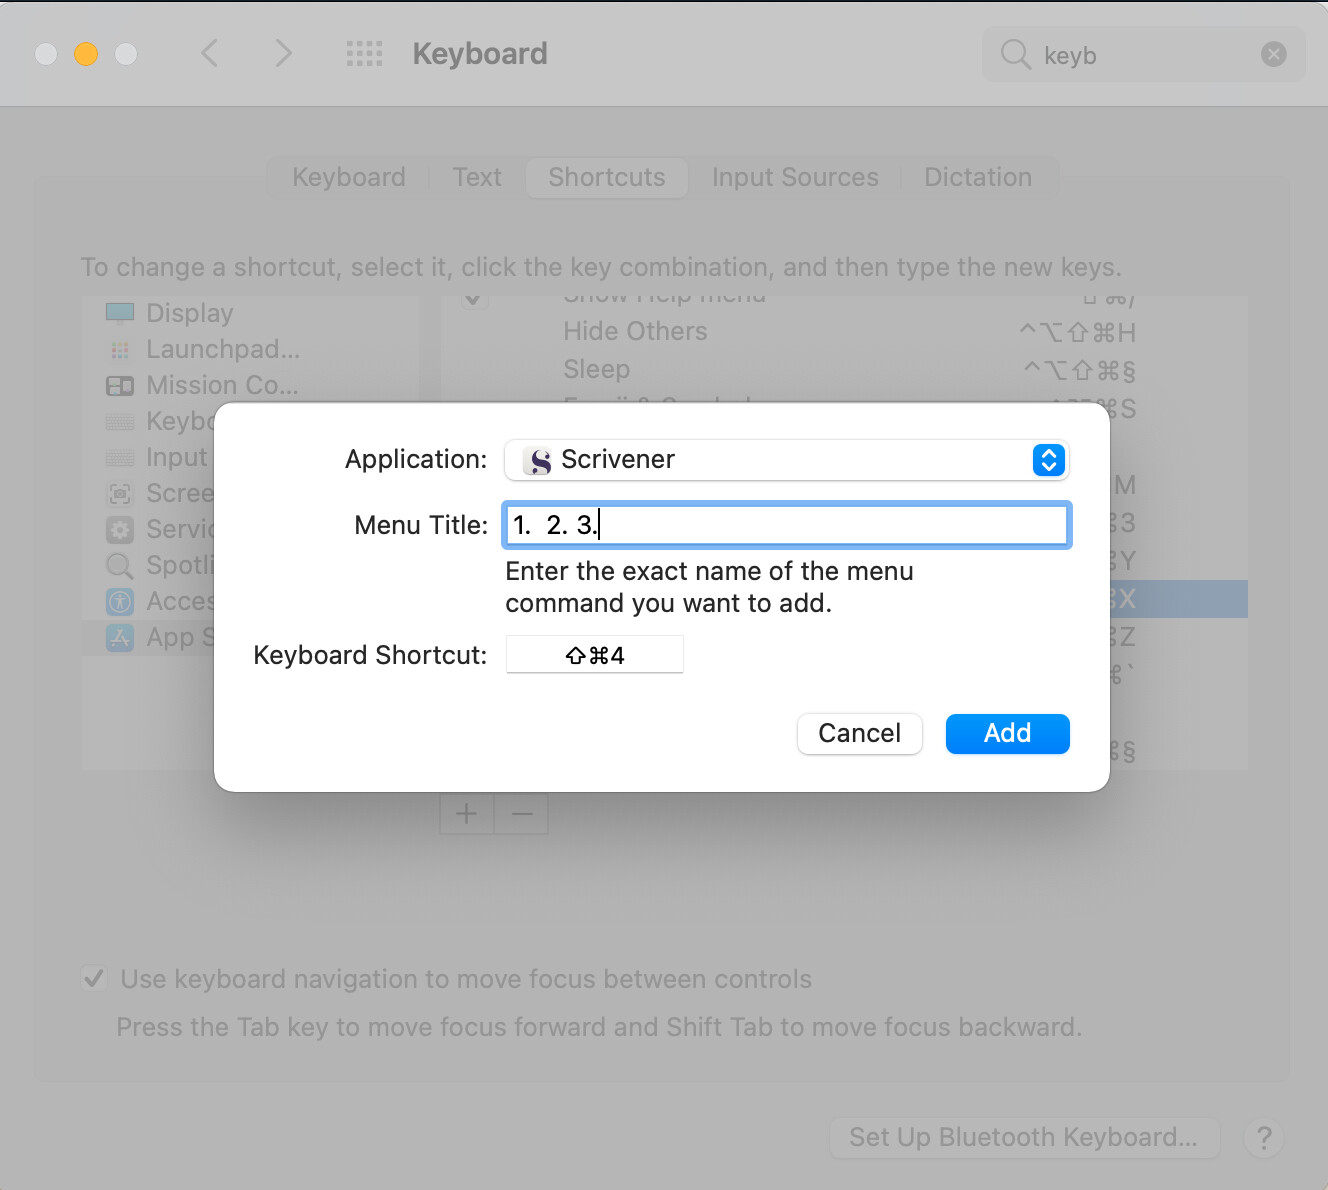
Select ‘Scrivener’ from the Applications dropdown box
Add in the menu title for the bullet you want. NB: this has to be exactly the right title. E.g. the bullet item I’ve chosen 1. 2. 3. must have 2 spaces between 1. and 2. and 2. and 3. and none at the end, otherwise it won’t work.
Choose a shortcut and press Add. (Don’t use cmd-shift-4 – that’s just an example in my screenshot, but it’s actually the screenshot command!)
You’ll see something like this. The 3 with a red line are examples of how to add numbered and bullet lists. (Again, choose better shortcuts than me… the ones in the screenshot are just demos.)
It takes much longer to type this out than it does to do… the trickiest part is guessing the exact menu title. All the ‘triple’ items (1. 2. 3., a. b. c. etc) seem to have 2 spaces between the first and second item, but you’ll have to experiment with the rest.
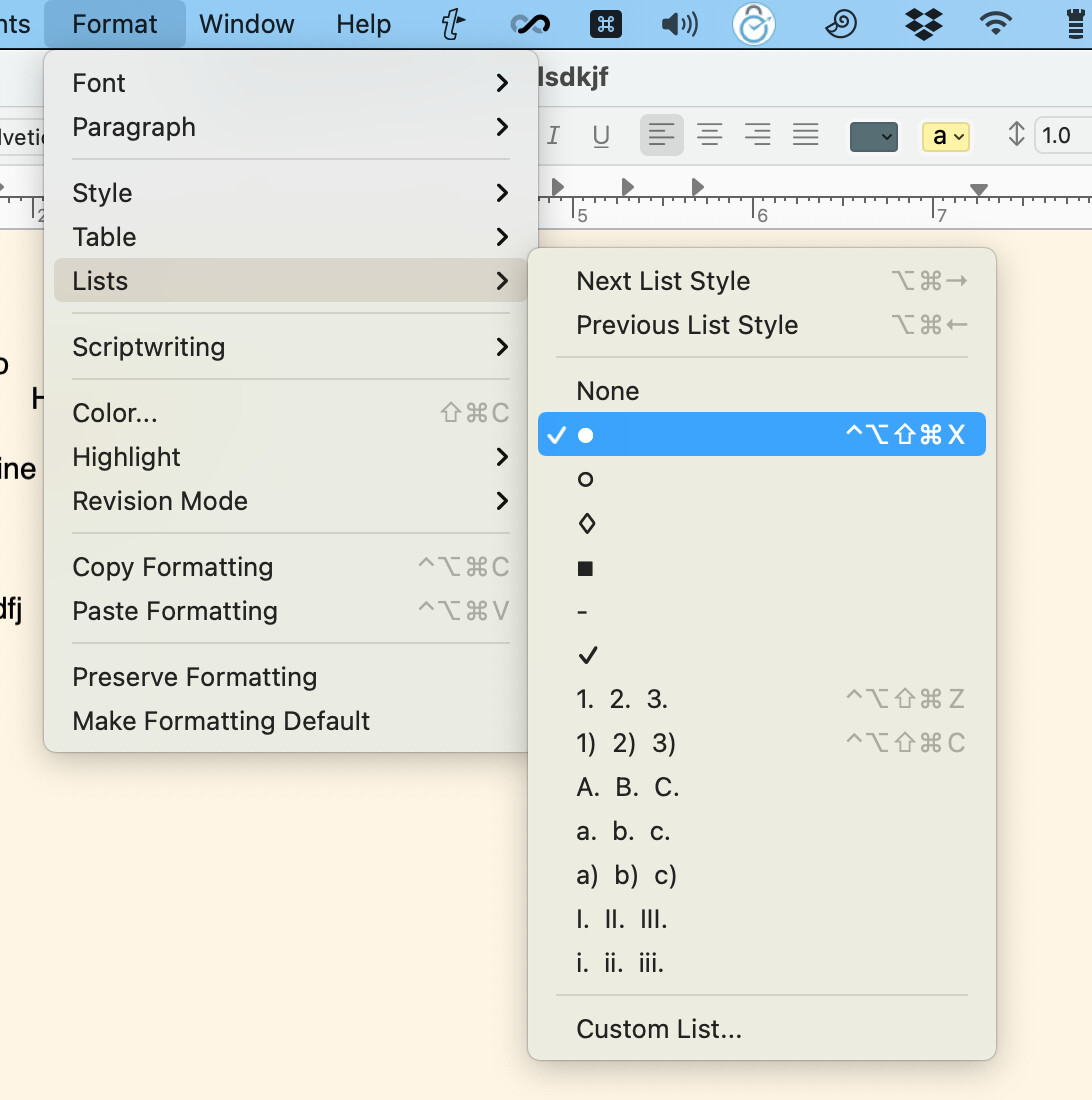
Also, in case you don’t know, the main bullet point • can be inserted with opt-8 on a UK/US keyboard. For the other symbols, the easiest way is to format a list with all the symbols you’ll need in Scrivener (using the cmd-opt-left/right trick) and copy and past the symbol into the shortcut box.
Two spaces, yes. Normally, there isn’t so much of a problem because it’s obvious what to put. E.g. most menu names are words, but in the case of some of the list items, it’s a little more difficult – but trial and error will show that two spaces works and one space doesn’t.
Have a look at my screenshots again: you can see that the text I’ve added in the shortcut dialogue is exactly the same as on the menus. So if you want to add a shortcut for the • bullet menu item, you add a • in the shortcut dialogue, because that’s what you see in the menu!
This is exactly the same process you use on every other Mac app — there’s nothing special going on.
Have you tried the steps out? Is there a particular problem you’re having?