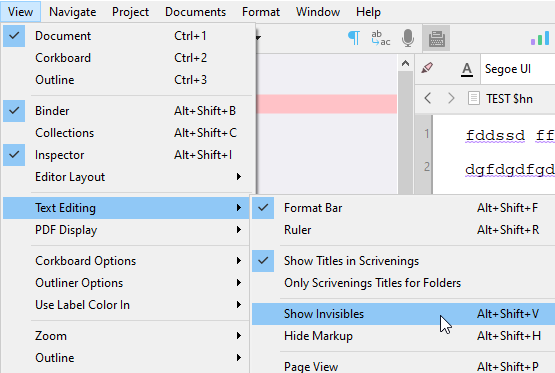
This is important:
Do you actually see an extra carriage return when showing invisibles ?
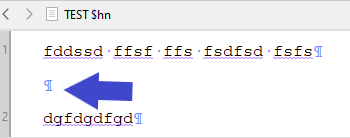
This is important:
Do you actually see an extra carriage return when showing invisibles ?
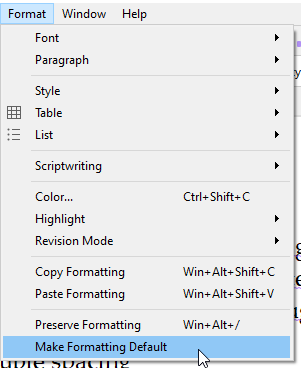
To back things up a bit, since it seems that the fundamental issue is a greyed out button and not much else: it is a lot simpler to just put the cursor in your sample paragraph, ensure the cursor is blinking within it, and use the Format ▸ Make Formatting Default menu command. You’ll be asked whether to save the default to the software in globally or the project, choose globally. That’s it!
We should probably update that article to push that method first rather than the more complex settings panels, but at the moment you’ll see it references secondarily as an “alternative” method.
When I go to View/Text Editing>Show Invisibles is grayed out. Can’t click on it.
Amber, when I go to the project, the cursor is blinking, but where is, “Format>Make Formatting Default?”
In another project of short stories I have been working on, I just did a test and it does not double space and allows quotes to be indented. I just don’t get this stuff.
…where is, “Format>Make Formatting Default?”
As noted previously it is a menu command. Along the top of your Mac is a strip of buttons with text labels in them, which appear in all software. This is called a menu. One of these text labels, or menus, will read “Format”, and when you click on it, a list of commands will appear, or what we refer to as “menu commands”. At the bottom of that list is one called “Make Formatting Default”.
In another project of short stories I have been working on, I just did a test and it does not double space and allows quotes to be indented. I just don’t get this stuff.
I don’t know what you mean by “allowing” quotes to be indented, but from what you’re saying, you probably need to click the This Project Only button once you use the menu command described above. Somehow you managed to change the default for this project without realising it, which is quite a feat!
Well, thanks for the simple example. I pulled up Scriviner and went to the current project. I clicked on Format as you said. At the bottom of the menu commands I did find the one named, “Make Formatting Default.” I tried it in both this project only and all projects. I then typed a line and hit “Enter,” and the same thing happened… it double spaced.
When you are typing and have dialogue, the correct thing to do is create a new paragraph with the speaker being quoted. So, what I mean is that whenever I hit the enter key, the next line should be directly below, not double spaced and with a quote, it needs to be indented.
While we are working on this problem, I have a new question. Is it possible to take my compiled e.pub document and import it back into Scriviner?
Oh sure, I understand what is conventional with dialogue, I was just a bit confused by the word “allow”, as that seemed to imply the software doesn’t even let you manually indent via the Ruler, or the Format ▸ Paragraph ▸ Tabs and Indents... menu command? If that’s the case, it might be a clue as to what is going on, but I’d have to think about it a bit.
That aside, one is free to do whatever they want in Scrivener. Many people prefer to work in double-spacing because it’s what they are used to. It’s not like Word or Pages where you have to have things formatted correctly in the creative writing environment. But that’s a major digression.
Whatever the case you are not looking at something typical; maybe even a bug. Here’s what I would try, you have this blank test project you created already, the one that is working fine. Open that project up alongside your main WIP, and drag and drop an inconsequential file from its binder, into the blank project’s binder. Or if you find it hard to get things arranged on the screen so that is easy to do, use the Documents ▸ Copy To Project submenu instead.
Now, in the blank test project, load up that file and try entering a few test lines in it. Is it still misbehaving? If so, great. Do this:
File ▸ Back Up ▸ Back Up To... menu command.I’ll take a look at it and see what I can tell from it, and return with any advice.
Is it possible to take my compiled e.pub document and import it back into Scriviner?
Yes, and no, I suppose. You can, just like you can import just about anything including PowerPoint presentations. The question is whether it will be of any use to you there. It’s just going to be a research file that Scrivener can’t read itself—which is where some might say “no”.
How do I open up two Scriviners?
I think I did as you requested. Sorry for the frustration, and I very much appreciate your help.
No worries at all! I should be the one with apologies if the impression is that I am frustrated. 
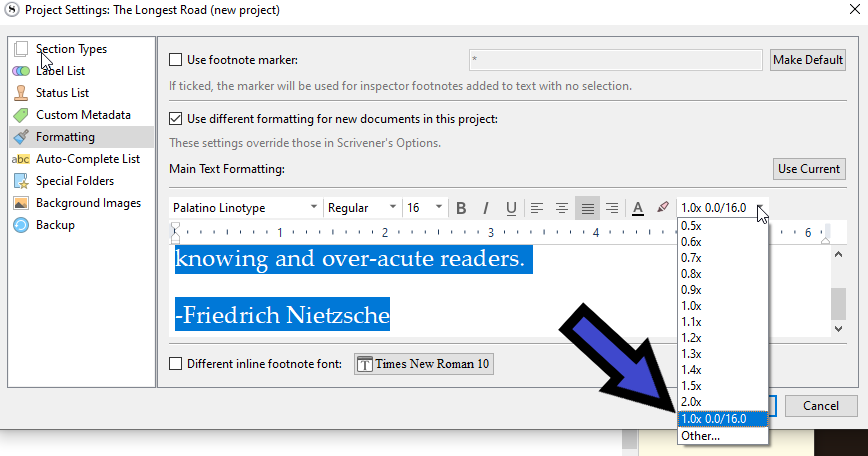
Click “other”
BACKUP YOUR PROJECT
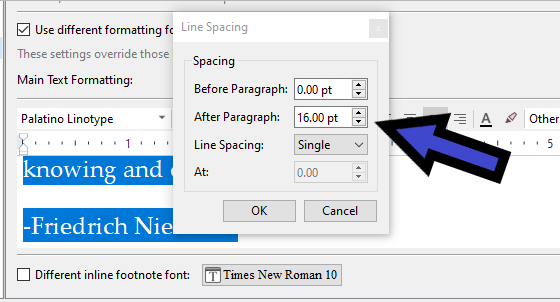
Either select what text I selected in my second screenshot and set it for the project :
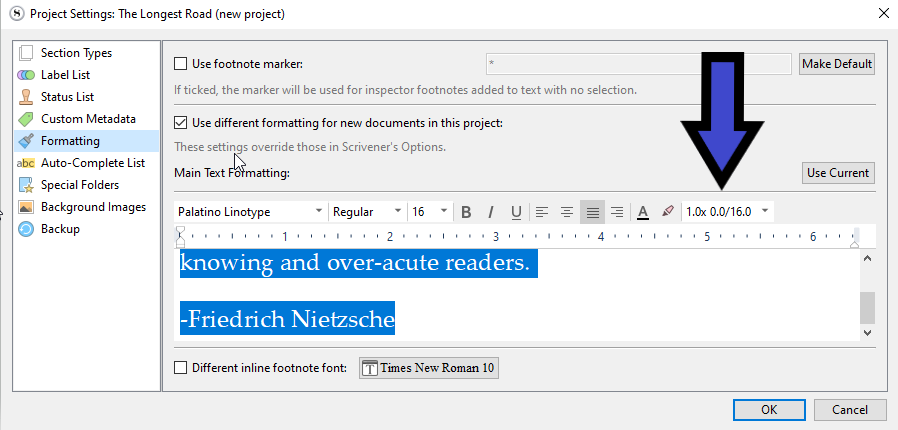
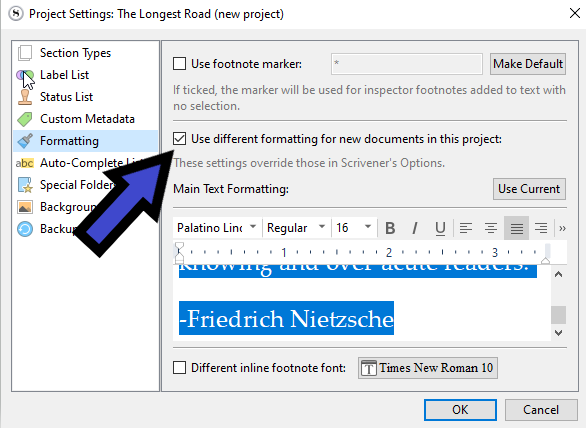
Or go to Project / Project settings / Formatting tab and change that 16.00pt for 0 pt.
Then (regardless of which way you above chose to set the default formatting), select all documents in your binder, and :
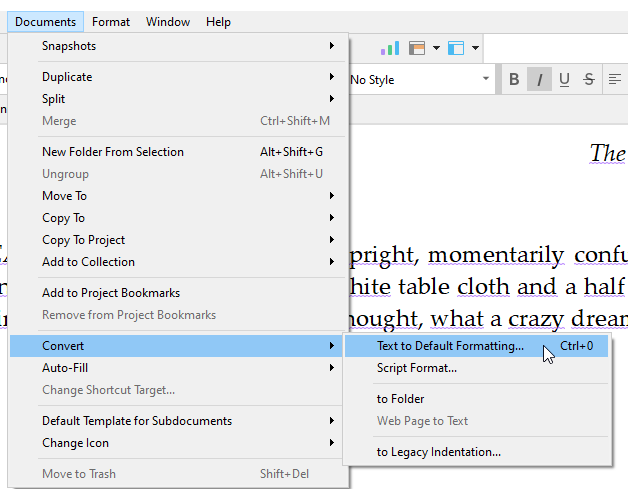
You should be good to go after that.
Sorry, in formatting, I have the Use different formatting for new documents in this project selected. In your next example, with Formatting still selected, I don’t see the 1.0x0.0/16.0 selection.
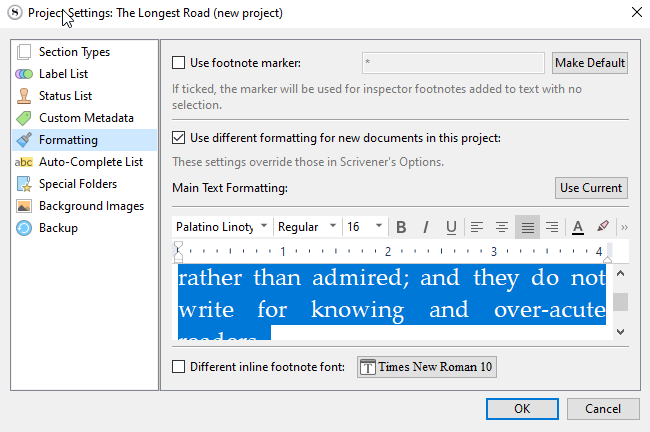
I am very sorry to be so inept at this but I can’t widen the window and I do not see, “other,” anywhere.
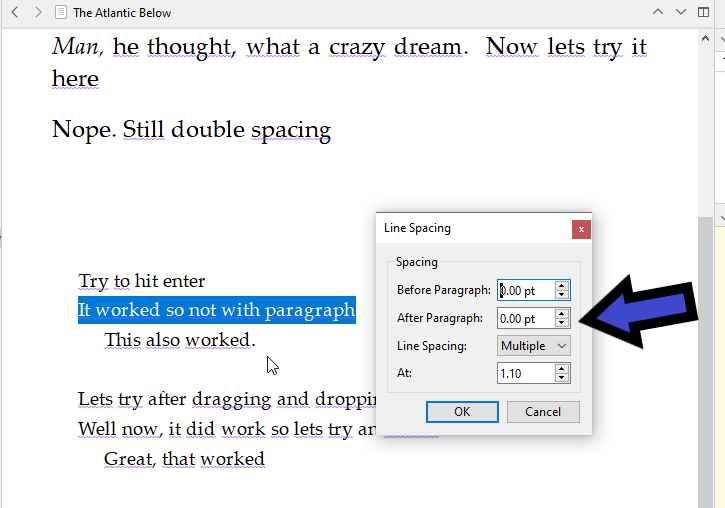
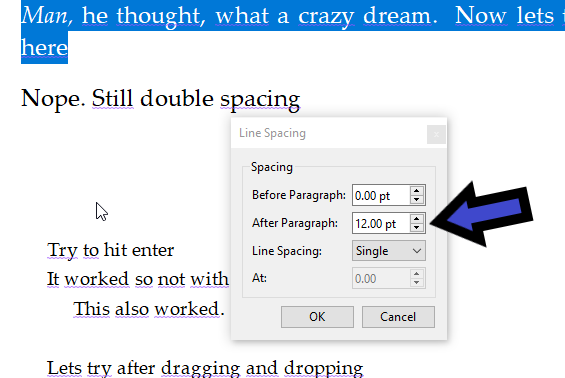
Yeah, your paragraphs in that sample are padded. It’s not double-spacing in the pure sense (where every line is twice as tall, even within paragraphs), but after-paragraph-spacing, which is a common typesetting alternative where one doesn’t indent at all, ever (usually seen more on the web than in books—like here).
Personally I would just disable the Use different formatting for new documents in this project checkbox, in that Project Settings window. It is very likely the source of all the problems, and ultimately it sounds like you prefer to have a certain type of formatting in general. Leaving this setting on may just lead on to further confusion in the future. Much simpler to just have all your projects working the same way.
There is a very good reason why we do not turn that feature on in any of our templates! It’s great to be able to do this if you want to, but it’s really confusing if you don’t even know the feature exists.
I am very sorry to be so inept at this but I can’t widen the window and I do not see, “other,” anywhere.
Again, I wouldn’t even bother with trying to change the project’s settings, I’d just turn it off. But if you really want, I’d recommend just using the Format ▸ Paragraph ▸ Line and Paragraph Spacing... menu command, after clicking into the mock text editor area within the Project Settings: Formatting window.
The Windows version is close, but there are some points of difference here and there that may be confusing things. For example it’s impossible for the line and paragraph spacing tool to become invisible on a Mac. The Format bar widens and compresses dynamically, and its narrowest configuration is nearly half the width of the minimum dialogue box size.
Yep.
. . . . . . . .