Split binder?

I’m currently working on a long book with an even longer set of research documents. As a result, I find myself spending a lot of time scrolling up and down the binder, between my draft at the top and the research at the bottom. I know I can lock the binder to one editor or other, which helps some of the time, but often I need access to both. (In my draft, I try to break chapters up into sections as much as possible to facilitate later re-ordering if needed.)

What would be super helpful is being able to split the binder in two, much like splitting the editor into two horizontally, so that I could scroll through each section separately. That way I’d be able to have the research ‘locked’ into the bottom half and my draft locked into the top half.

No idea how easy or hard this would be (or whether anyone else would find it useful), but thought I’d toss it up.

Another option would be to have a copy of the binder available in the inspector, though I suspect that would be harder to implement, and it would be a nuisance when working on smaller screens.

Thanks – can’t imagine life without Scrivener.

One alternative is to set one of the Editor panes to the Outline view, then use Open as Quick Reference to open items from that pane.

Katherine

1 Like

That’s a good idea. Thanks Katherine. (I love how there’s always a solution in Scrivener – just needs to be worked out!)

I sometimes need “two binders” as well in larger projects. The user manual project has about 3,000 nodes in the Draft folder outline—as you can imagine it simply not feasible in any sense of the word to have every single item expanded and showing in the Binder. It would become a worthless tool. :slight_smile:

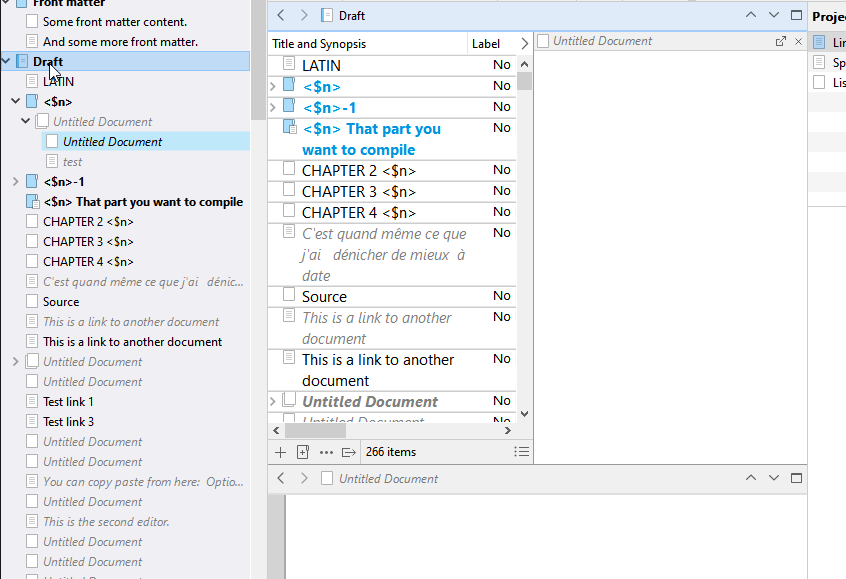
My strategy is to navigate in layers. I only expand the binder down to layer two, which for me is the chapter layer. I click on a thing, and it loads into my left split, which is an outliner view.

For the third layer of navigation there are two ways I can go, depending on what I need:

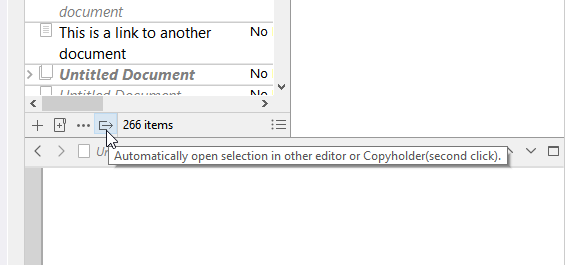
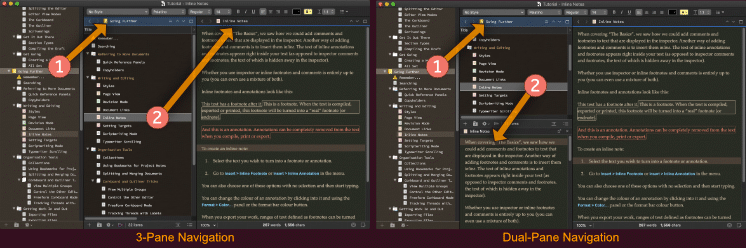
  1. Treat this like a basic 3-pane navigator. I set the left split to auto-load what I click on into the right split. So my full chapter is listed as an outliner in the left, and whatever segment of text I want to work with is on the right.

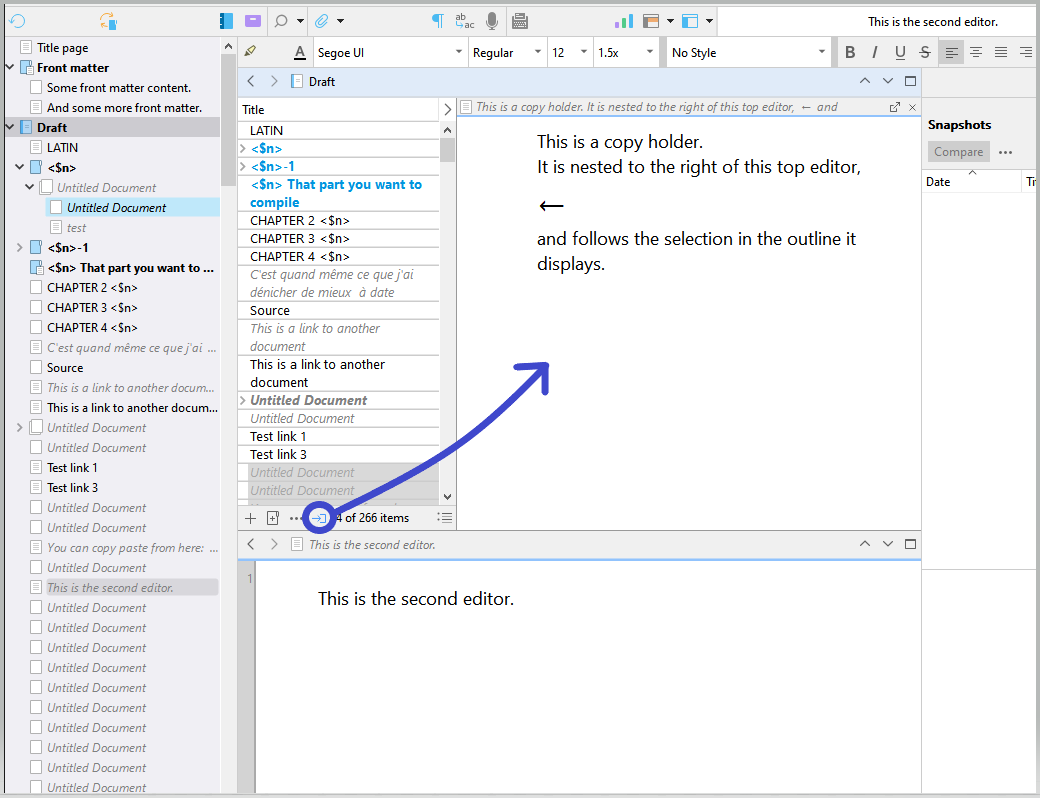
  2. But sometimes I don’t want the right side to change around a lot, while still needing to work with the contents of the left split. This is what I refer to as needing two binders. For that:

    1. Select the item I want to view.
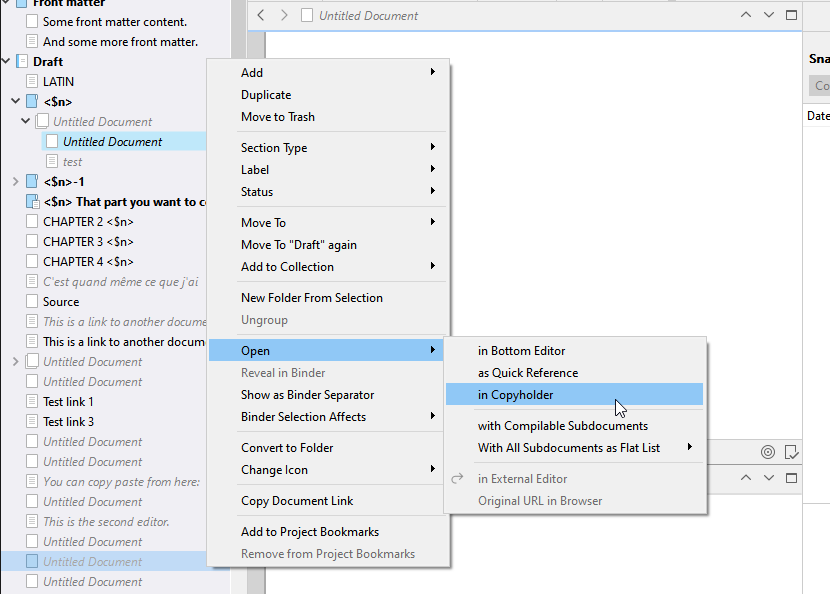
    2. Use the Navigate/Open/on Copyholder command (I have assigned a custom shortcut for this).
    3. Maybe that’s all I want, but usually I want this to happen going forward as well, so I use the 
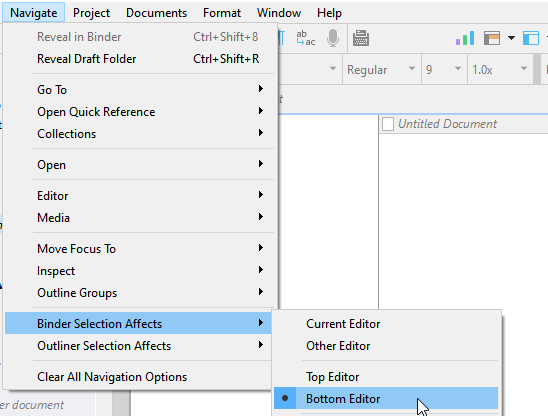
Navigate/Outliner Selection Affects/Copyholder.

    Now I’ve got two binders, in spirit anyway. One loads the chapter, the other loads the contents of the chapter, and the right split can be research, or a section I’m doing major work on that requires referencing other areas in the left split. If I do ever want to change the right split, I can use ⇧⌘O / Ctrl+Shift+O from either the binder or the left outliner.

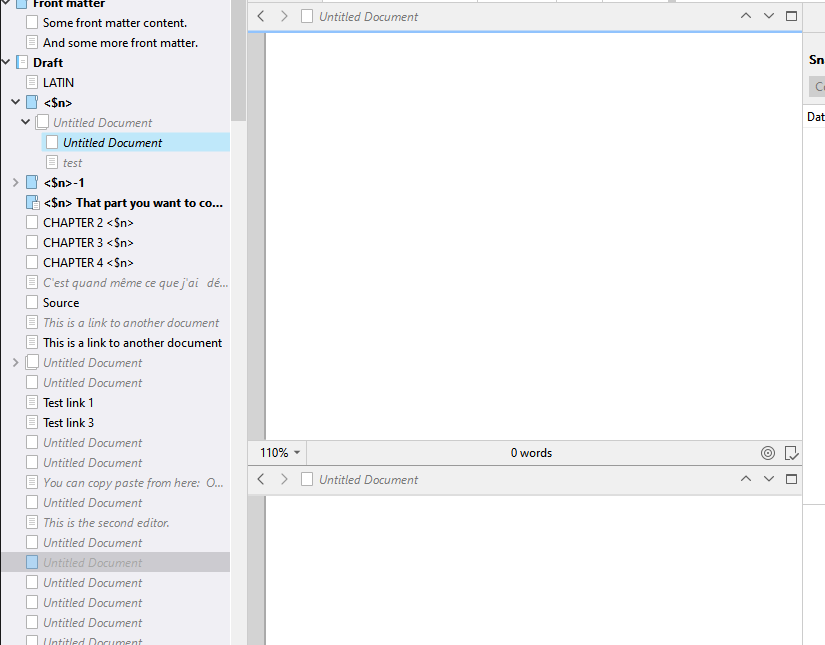
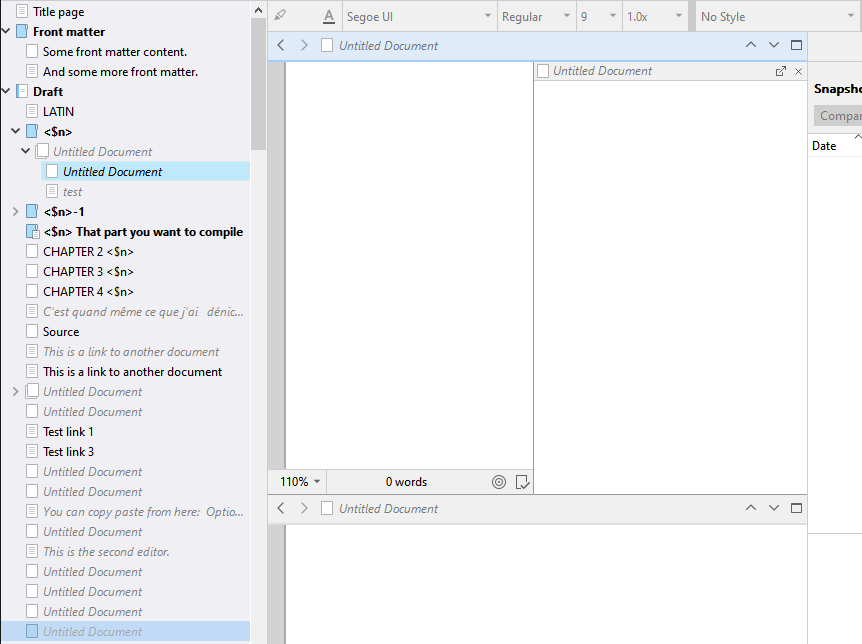
You may want what is in effect two splits that look like the left one, in the Dual-Pane example. Each has a subsection of the binder loaded as an outliner, and a linked Copyholder pane for viewing research and editing text. It’s a way of keeping two major parts of the binder “pinned”, and for some things, may even allow you to close the binder and free up space until you need it again.

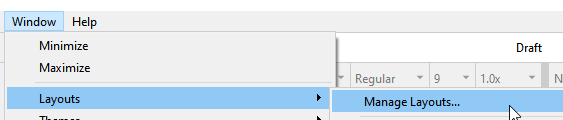
It’s worth noting that once you get something like this set up the way you like, I highly recommend using the Window/Layouts/Manage Layouts... command to save your settings. Now whenever you need a “deep navigator” or whatever, just select it from the menu in one shot. Another useful tool to keep in mind is Navigate/Clear All Navigation Options, which does just what you’d expect it to.

There are other approaches as well! Copyholders aside, this is a technique I’ve been using since Scrivener 2, but in v3 there are other ways of “flattening” the distance between objects in your project. My favourite for this is Quick Search. Need to get to your Research folder? Just hit ⌃⌥G / Shift+Ctrl+G, type in ‘research’ and punch return. Anywhere you need to jump to can be as accessible as that—and in knowing that, you can accelerate navigation through the use of naming schemes. Frequently accessed major research sections could start with “#”, and now typing in “#Birds” is extremely precise and efficient, whereas “birds” may return thousands of choices to wade through.

Project Bookmarks are also a fantastic tool for flattening the project. Just click the icon in the tool bar, select the item and off you go.

Keep in mind that if the goal is to actually stick with the binder as your master navigation tool, all methods of jumping to a thing, can very simply become a tool for scrolling to the thing, with ⌥⌘R / Win+Shift+R, or the Navigate/Reveal in Binder menu command.

3 Likes

Thank you very much AmberV for your detailed response. There’s heaps to work with there! :smiley: :smiley:

I came to repeat the request for a binder split (which I would still support - so much easier!) but your suggestions are interesting and I would like to study them further, unfortunately I can’t see that image well enough; it’s too small.

Could you possibly provide a large example so I can reconcile the words with the image more easily?

Thx :slight_smile:

1 Like

You’re welcome!

It’s small because the words don’t matter (edit on re-read I see you meant the words with, not the words in the image, but hopefully the descriptive text to follows better explains the illustration). All that is important is the broad area of the interface and how it interacts with another broad area.

  • In the left: what I click on in the binder (1) loads into the left split, and what I click on in the left split (2) loads into the right split.
  • On the right, the binder still does the same, but what I click on in the left split (2) now loads in its Copyholder. There is no action that automatically changes the right split.

P.S. I updated the post with Windows shortcuts, as it is now relevant to both platforms.

2 Likes

Alas your use case and mine are… different.

I want a split binder because I currently have three panes: binder and two editors (upper and lower).

When seeking to ensure consistency between widely separated parts of the book, I want two editors and to be able to navigate both from a binder whose content is indeed long and would therefore benefit from a split (or duplicate). I’m also not searching or jumping between known folders but exploring in adjacent regions.

“Layering” isn’t really what I need here. Thanks for trying though.

When I need to do similar to what you are describing, I lean upon the history function heavily. Both splits (and copyholders for that matter) record your navigation, so jumping around to new sections really doesn’t cause us to lose our place. We can go off on a tangent and explore a bit, even for hours, and still return to where we were when we started. In essence I consider history the ability to have more than two splits—with history we have an “infinite” number of them in practice—we just don’t see them all at once. And if we do narrow down what we want to work on into a linear sequence in history, we can quickly bounce forward and backward in history much like we would use tabs in programs like Sublime Text to make a single window capable of working with lots of things at once.

Maybe that will help, if I understand correctly.

Oh, I use the history function heavily as well, but it’s not “navigable” or structured, or searchable…

I have to clear the histories periodically because they end up filling the screen and any item beyond the last dozen or so entries has fallen out of my memory so I have little idea why I was working on it. They’re useful, but not the answer.

A binder split, on the other hand, would be perfect! :slight_smile: Maybe one day. (Like the All WHOLE Word search, a dream, an aspiration, a vision… :smiley: )

Clicking the icon I circled twice makes the selection be opened in the copyholder.

image

This said, I agree that it would be nice to be able to split top/bottom the binder. :wink:

Oh! That’s interesting - must confess I don’t know how to get that from the basic binder + two editors (stacked vertically) setup. I have just poked around and re-read @AmberV’s notes but I don’t get it yet.

Could you give me the commands to get there step by step (might be only 1 but I don’t know it).

Thx :slight_smile:

How to

Right click any binder document (it doesn’t really matter which).

Clicking the copyholder’s header’s icon :

image


You can then optionally set things like this

Bottom of the top editor (left side of the editor-copyholder split → click twice) :
image

And :

image

So the mini “binder” will load documents to its right, and the real binder, in the bottom editor.

You can set it up any which way you want. You can have the editor that has the split at the bottom if you prefer. Your taste.


Once you are satisfied with the result you get, I recommend that you save it as a layout.
image

1 Like

Thank you for the effort you put into that - I get it now. (I even tried it with two copyholders and two pseudo-binder outlines… symmetry’s important :wink: )

I discovered that saving and restoring layouts didn’t work the way I thought (the copyholder didn’t disappear when I went back to my saved 3 pane layout) but I can now set up/tear down such layouts.

Zoom works in the copyholder (ctrl + scroll wheel on my mouse, but there are none of the usual document indicators of course) so this is a viable solution for some problems.

Thank you again for taking the time to spell it out for me. Kudos!

1 Like

That’s a bug LL is already aware of.
The copyholders are not properly dismissed by a layout that doesn’t have them. (They actually end up occupying the whole of the editor’s space.) :man_shrugging:
But once you manually close the copyholder(s) using the X, it is fine ; up until you reload one.

1 Like

For the word count, use stats / selected documents.
The label and status still display normally at the bottom of the inspector.
Include in compile can be made a column in the outliner that is now your “mini binder”. (But that exposes you to misclicks…)
You can make wordcount a column too.

@AmberV, just one question. Shouldn’t the Save layouts under Window/Layouts/Manage Layouts... also save Copyholder positions?

I’ve found that it saves almost everything aside from the open Copyholders (and their position) and the size of the different editors.

I’ve been toying with the zettelkasten idea for some time now, and I got this “interesting” layout. The Binder loads in an Outliner [1], and then its contents (my citations in this case) load in a Copyholder below [2]. The Corkboard opens up in the editor above [3], and that shows the backlinks to it in the Inspector [4] (or it should, but I forgot to change from the project favourites). To navigate in the Corkboard, I’m using Collections based on the names of the items 1 for economics, 2 for sociology, etc.; I’ve then set up some shortcuts to it.

When I save it and try to use it again, I only get the Binder, two editors (Outliner + Corkboard) and Inspector.

I’m pretty sure there are easier ways to set up a zettelkasten. I may try Obsidian-Scrivener integration, but I’m not sure it is worth the hassle, just for the sake of seeing the connected cards in a graph-like manner.

Thanks in advance.

Since Layouts are not project-specific, and Copyholders are specifically content from the project being shown in the editor, they don’t have a way of saving that information. So in that sense it would be like a layout trying to re-open Quick Reference windows, which you couldn’t have without there being something to show in them.