Visualizing a Lecture Time‑Grid in Scrivener?

For the past semester, I have been using Scrivener as the primary tool to prepare my lectures. It has proven to be very beneficial, allowing me the flexibility I need to organize and reorganize the content as required.

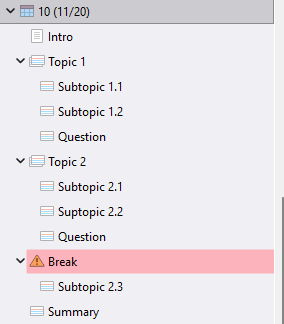
Something that would make my workflow even better is the ability to visualize the timeline of every lecture within the lecture structure. Suppose that I am teaching for two hours. When preparing the lecture content, I must consider the break and also that every 15-20 minutes, I need to ask a question to check if the students are grasping the material correctly, or include a joke to regain their attention.

When I used Word to prepare my lectures, this was relatively easy to visualize, although not entirely accurate. Every one page or two for a question or joke, four or five pages before the break, etc. However, using Scrivener, I struggle to quickly gauge how much time I will spend on each topic, and the result is that I sometimes prepare more content than the students can actually grasp before disconnecting.

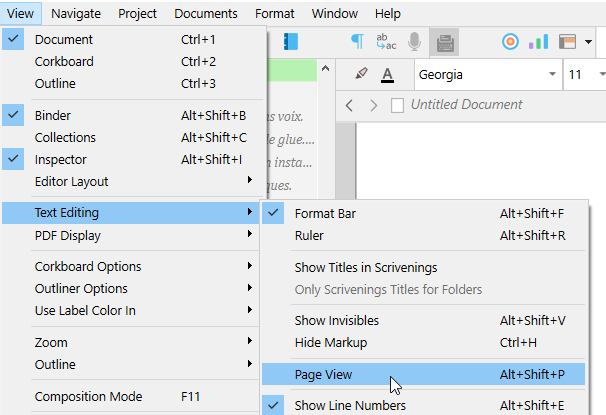
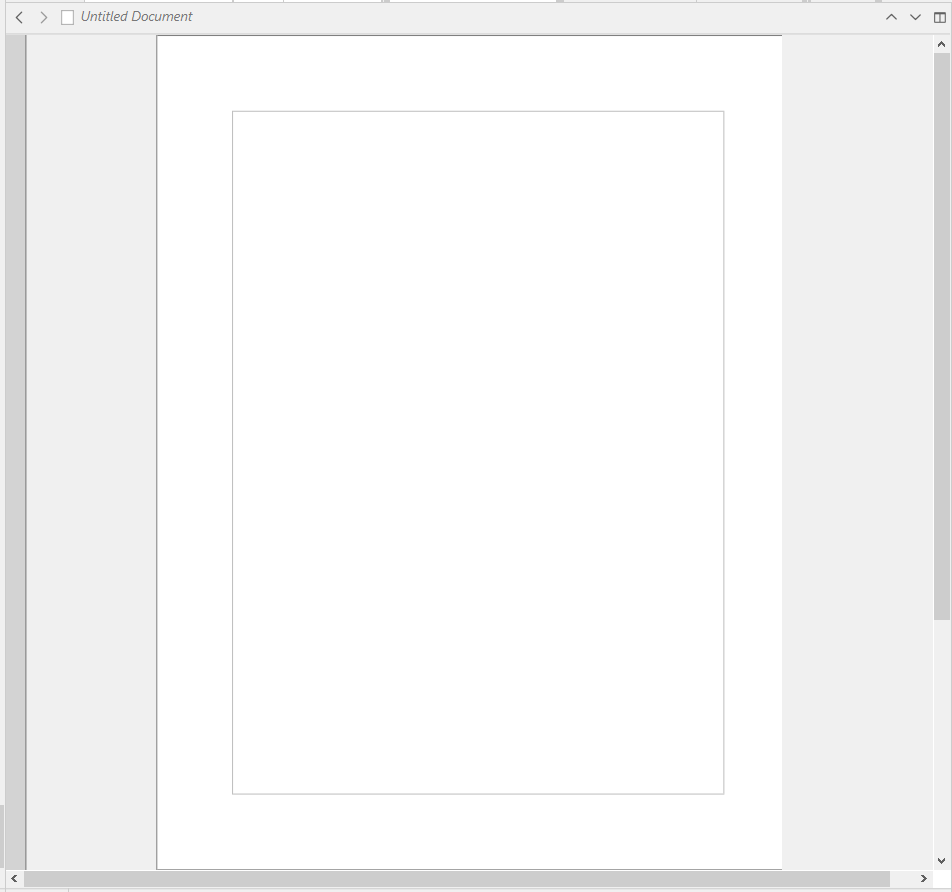
One option would be to check the number of words in the outliner (the reading time is not displayed on the outliner, and anyway, it does not reflect the slower speed of my lectures); another one is to use the composite view of the lesson to get a visual idea of the length of each section. But I don’t find either solution visually intuitive. I need to write first and then check. No clues indicate when to stop writing while I am writing (such as, in Word, when I reach the end of the page).

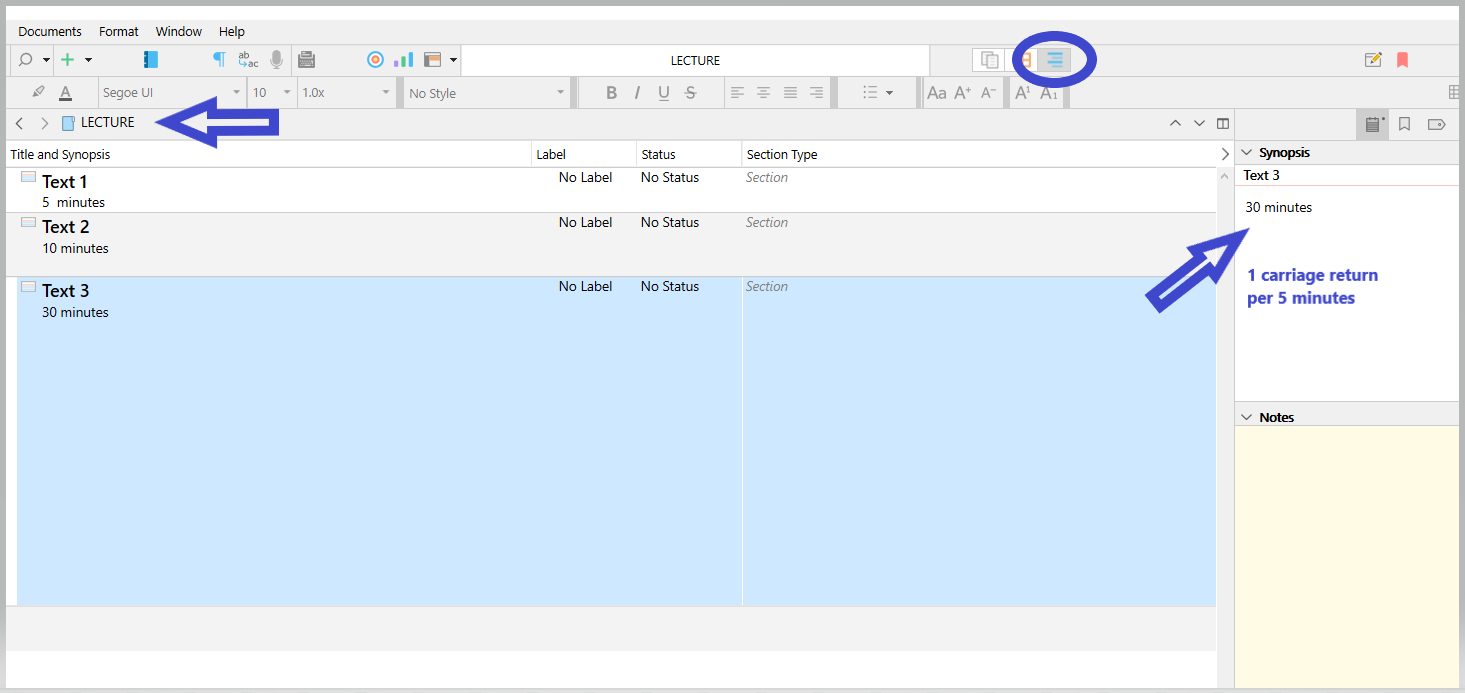
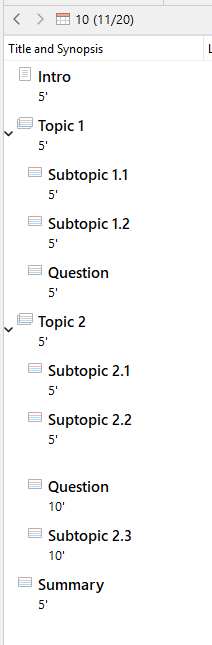
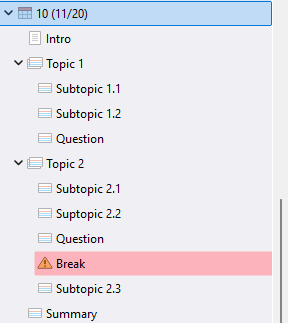
Another solution would be to structure my lessons based on time segments, each one as a text document in the binder (Introduction - 5 min; Idea 1 - 15 min; question to the class - 5 min; Idea 2 - 15 min, break - 10 min, and so on). However, this would be too rigid (because it is inevitable that some content requires more time, while others are faster to introduce). Besides, I prefer to structure my lessons in the binder based on the content taught (Topic 1—subtopic 1—subtopic 2—conclusion/summary—Topic 2, and so on); it is this function that has made Scrivener so useful for my lectures.

If there were a time grid on the binder, allowing me to locate each part of a lecture, that would be the ideal solution. However, I understand that this is not possible, and other workarounds are necessary. Perhaps adapting this method to create timelines on the corkboard would be a way to go? But what I need is not a timeline of events (as in a story), but a time grid of the actual clock time to which my lecture time is constrained.

I wonder if other Scrivener users have found effective ways to visualize the time dimension of their projects and would like to share them. Besides lectures, this could be helpful for talks and speeches. Thanks!

You could turn on page view, set the page to a size that matches the time you wish a page to take you to read through it, and do what you say you were doing in Word.

Once you know the page size you need for pages to be slices that go by the time unit you want (say, 2 minutes, or 5 minutes), you are then set. No need to further tweak it.

Page size :

…You could also play with the font size, rather than the page size. Same result. Unless you compile and want to read off of your print.
You can go for a mix of the two.
Same as before, once you’ve got your perfect setting where a page matches a set time at the pace you read, you are good to go.

3 Likes

Thanks! I hadn’t thought of that, but it is a straightforward solution.

Still, it would be great to know if other users have alternative workflows, not only to visualize the time needed to read a given section, but also to determine the placement of each section in the time grid of a lecture. This way, I would know, for instance, that if I exceeded the allotted time for the previous section, the next one would need to be shorter. (I imagine that, after a few lectures using @Vincent_Vincent’s tip, I will be capable of knowing that without the need for supplementary visualizing.)

1 Like

Why not test it out (your text) with a stopwatch?
Write the time it took per section (in the text/editor), then later gauge the time you may allow per larger sections, and edit the text accordingly.

That’s what I would do.

Yet, surely you already know that no matter how precisely you set things up, it’ll fluctuate from a lecture to another. You’ll inevitably have to adapt live.

1 Like

This is what I will do, and this is what I actually do.

Now, suppose I already know that one page takes approximately 10 minutes, and I am planning the first hour of a lesson. I have a topic that, no matter what I do, will take me 30 minutes, and two other topics that will take 5 and 10 minutes, respectively. Opening each document, I can see that visually: three pages, half a page, a full page. However, on the binder, the structure only shows me three equal documents, with no visual indication of their different durations.

Most of the time, the page approach will work. However, if I have a lecture with a lot of 5- and 10-minute topics and subtopics, I will not be able to calibrate how to time it at a simple glance. Whereas, if I had an actual time grid against which I could put each section, that would be visually transparent.

Use outline view instead of the binder. (Split the editor)

⮝⮝ The above is not proportional. I initially had just inserted a bunch of carriage returns without counting. I am not redoing the screenshot.

2 Likes

I like it, thank you!

But consider this case:

I cannot see at a glance how I am doing; I still need to calculate to ensure whether I am within the lecture time or if I am exceeding it. I may discover too late that I have overprepared. Otherwise, I need to recheck after writing each section, but that may interrupt the writing flow. On Word, reaching page 5 is already telling me that I am about to reach the end; I don’t need to leave my current view to know that.

1 Like

How would reaching page 5 in Scrivener be different?

I no longer have “page 5”. In the example above, I have a few half-pages (each 5 minutes long), and I can only view them one at a time.

I missed that part of your previous post. This is a great workaround! I can effortlessly visualize the different durations of the sections.

But then, how could I visualize also the time limit, for instance, the 50-minute limit before the break? Perhaps creating a blank section with a colour tag, to make sure what comes before and after the break?

Perhaps you should have a look a Aeon timeline.
I never used it, but I think it might fit your needs. (Although you’ll likely have to keep the time representation coherent manually. ??)

Otherwise I think that what I showed you so far is as close as Scrivener (a text editor) can get to a “document timer”. There is no time grid as this has nothing to do with text editing per se.

You could wishlist it though. In your case it is justified. But what I mean is that for most people, time is unrelated.

. . . . . . .

You can insert as many dummy document/files as you wish. Just mark them as excluded from compile.
You can use labels to color code them.

3 Likes

I will take a look at it, although I do not feel the need to use a separate program, given that the page approach would work for me in most cases.

I understand this would only be useful for a few users. Your proposed workflow is a reasonable solution, so I do not see the need to wishlist it yet.

I thought about that. The problem is that it seems to interrupt the structure (which, again, for me is the most helpful feature of Scrivener when planning my lectures; the time concern comes second). For example:

Subtopic 2.3 should belong to Topic 2, and not to Break.

And they need to be assigned a label, too, of course.

. . . . . .

You can put it where it goes. Have your break be a simple file inside section 2, just above 2.3, with nothing child to it.

1 Like

That makes sense, with the label color in the background, the time limit is now visually clear:

Thank you so much @Vincent_Vincent!

1 Like

:+1:

You can make it even more so :

1 Like

You might have a look at the script formats. In standard screenplay formatting, for instance, one page is approximately one minute of screen time.

1 Like

The other way might be putting the time in the synopsis in the Inspector and if look at a lecture in Corkboard view you would see the time per segment in your text and could include number of pages as well so can quickly see the time and rearrange cards or know where to shorten or lenghten a section. The corkboard view can also show color. The other thing is to use icons, you can use the flags in scrivener or make custom icons (png files can be imported into scrivener to give time info in the binder based on the icon.
example below. I use the same icon and make different color versions as well which a color could represent a period of time.

1 Like

I spent many years editing and recording the English translated soundtrack for Chinese TV programmes and promotional videos. Because the video had already been finished in the Chinese version, it was essential that each paragraph of the English took exactly the same time to read as the Chinese original sound track.

For the most important one I did, pretty early on in my time, the only solution was literally to count syllables and to edit the English to have ± 2 syllables in relation to the Chinese. In due course I worked out that if I printed the English on A4 paper with 1" (2.54cm) margins all round using Times New Roman 12pt, it would read at 6 secs per line. That was much easier than counting syllables in English (very simple in Chinese… 1 character = 1 syllable, and Chinese is syllable-timed so each syllable takes almost exactly the same time; English is stress-timed and syllables vary slightly).

So it might depend what language you are lecturing in, but if I were preparing lectures in English and needed timing, I would use Page View with my page set to A4 with 1" margins, 12pt TNR as the font, and then at the end of each paragraph I’d put an inline annotation giving the time needed to read/speak that paragraph based on the number of lines.

As you aren’t having to match your text to the timing of another language version, you don’t need to be accurate to the second, and you can make a note of the cumulative timing as you go.

HTH

:slight_smile:
Mark

3 Likes

Along those lines suggested by Xiamenese, you may have different speeds you present lectures. Like a slow note taking speed and an intro speed. You could use your phone and read the lecture for 100 or 200 words per each lecture style and have a calculated time. So then based on each document and the style you could calculate a lecture time using 100 words takes x minutes and then put this time in the synopsis which would be visible on the corkboard and could even have custom metadata field call time to lecture and do it in minutes that would be visible in the outliner view.

Update: I really should read a whole thread before I post. I see that @Vincent_Vincent has already suggested Aeon Timeline and that it has been considered by @tqctc, who prefers not to introduce a new app into the mix. But I’ll leave my post in, in case it’s helpful for others.


Could you use the Screenplay Runtime template in Aeon Timeline to plan your two-hour lecture periods? Since AT syncs with Scrivener, it might be worth exploring.

3 Likes

@SCN I will definitely try it out when I have more free time, perhaps during the winter break, although it is true that my preference is not to introduce a new app. My feeling is that Aeon Timeline is much more precise than I need. For a 50-minute lecture time, I can deal with a 5-minute margin of error, even a bit more. Knowing approximately how my content will fit into a class’s schedule is what I hope to achieve with simple visual clues effortlessly integrated into my Scrivener workflow.

I mentioned that my intuitive approach with word processors was looking at the number of pages. It is not very accurate, but accurate enough for the margin of error I can accept. It is as simple as, say, counting 1 page for 10 minutes; no need to calculate how many minutes 586 words will make.

Taking my last lecture notes as a starting point, I attempted to determine how much time I spent on each page, only to realize that the printed pages do not correspond precisely with the pages in the editor’s view. I use the default Compile to PDF settings, with the same font and size, and I believe the printed margins are also the same (it uses the project page settings). However, the printed version includes the section names as headers and, therefore, is longer. 4.5 pages on screen make 5.5 pages in print.

I have not found a way to display the section names as part of the document in the page view, unless I include them manually as headers. Is there a way to do that?

@xiamenese’s method is an intermediate option between the imprecision of counting pages and the precision of counting words. I still feel it would be too much effort for lectures, because I often prepare them in a rush or within a minimal time. But I will definitely consider it for other occasions where I prepare more carefully, such as talks or conference papers.

I will also experiment with this. However, what I like about @Vincent_Vincent’s suggestion of using carriage returns in the synopsis representing units of time is that they can help me easily visualize the length of the different sections. That would be very helpful to quickly decide to move one section from the first part to the second part of the class, for example.

1 Like