Double-click the Compile Format you’re using in the left column of the Compile Overview window to open the Compile Format Designer. (Save and Edit if necessary) In the Section Layouts Pane of the Compile Format Designer, you’ll find the Table with Section Layouts, which has columns for the Content Types Title, Text, Synopsis, and Notes. Select the checkbox for Synopsis for the Section Layout you’re using for Chapters to add it to the Compilation. Place your two lines in the Synopsis pane of the Chapter.
Yes - I found that. But I’m not sure how I specify the font etc for the synopsis in the layout if I want it to be something other than the Chapter heading or the text. I guess I just have to keep playing with it. I really thought the Heading document type was the right way to go but that gave me scene separators after it which I didn’t want.
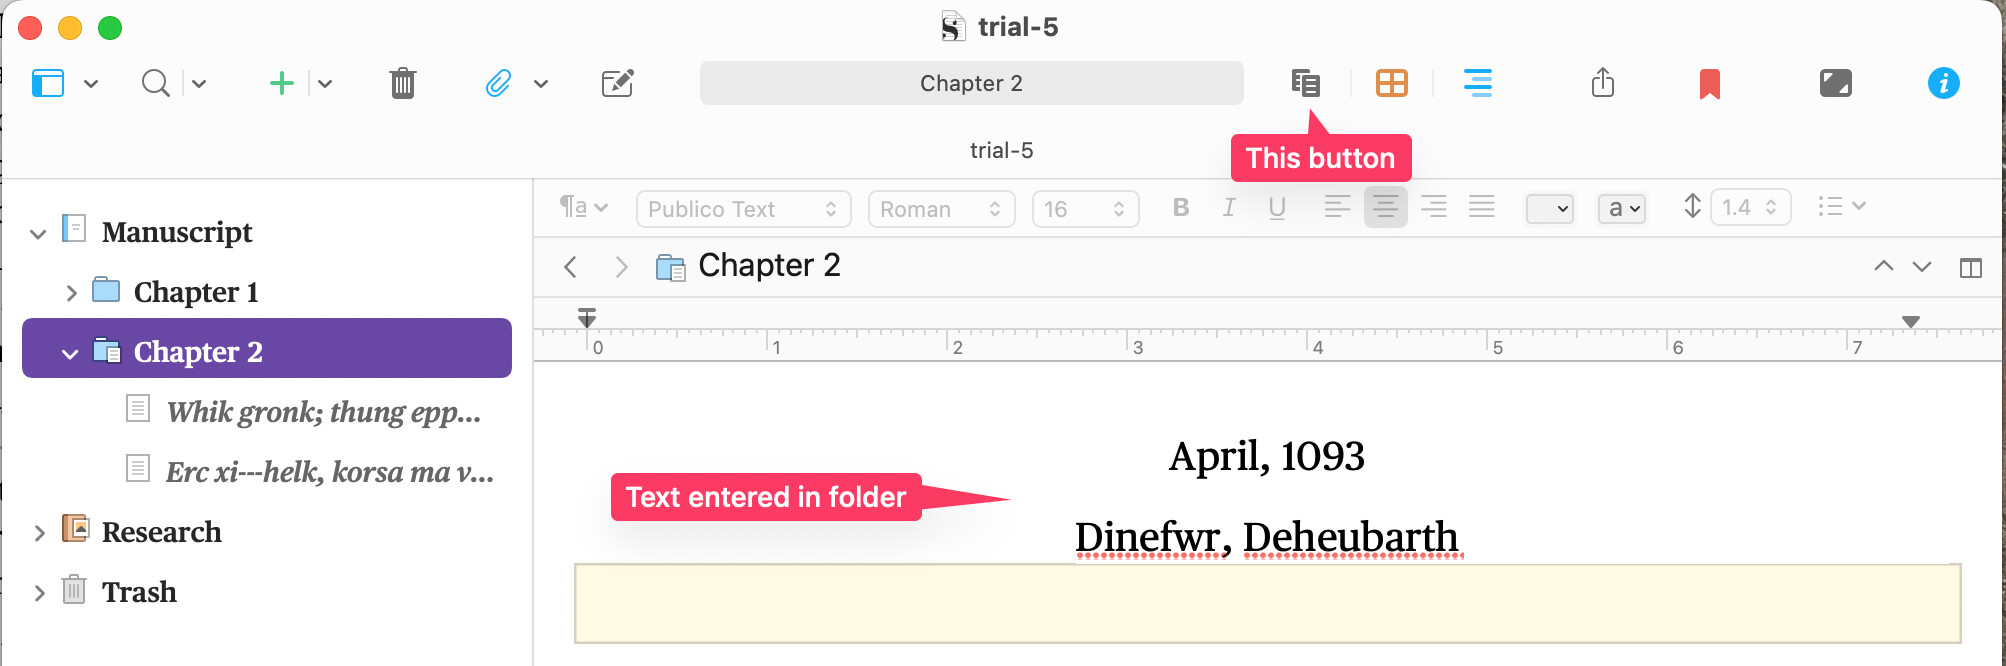
If your chapters are folders with scene documents as children, then there’s no need to use synopsis with its resulting formatting questions. Folders can have text content just like documents (which is why it’s possible to convert between the two).
When you click on a folder in the browser, by default it opens in Corkboard view (unless you’ve changed that) but with the button in the toolbar, you can switch between “Single document view” and “Scrivenings view”. So you can have a set-up like this:
Because the text is included in the Chapter folder, in the compile formatting, in the table that is referred to above, for your “Chapter” section layout, instead of turning on ‘synopsis’, you turn on ‘Text’. You will then have exactly the same formatting options for it as you would any other text sections.
another option to do what you want is format text anyway you want for these intro pieces and capture the text as an image and save these in a folder on your computer. Now place a placeholder in the synopsis field to add the appropiate image for each chapter or scene to add the image of the specially formatted text. (if make the background white, then the image edges would fade into the text.
A discussion on this already exists, so I’ve merged your duplicate with it. Above, you will find my approach to adding subtitles, which I don’t believe has been suggested yet. It includes a sample project, so you can examine it directly.
The idea is simple though: we have one field for the title by default, why not add another?
So I don’t think that can work because I want to be able to have a different splitter between my subtitle and between scenes. In your picture there is a dot. I don’t want a ‘dot’ after my subtitles but I do want to be able to specify a scene splitter symbol. I also want to be able to apply text formatting to the subtitles at compile. Definitely don’t want it to be subject to the text format for the other binder contents.
The dot doesn’t compile; that is merely an indication in the editor between one binder item an another in Scrivenings view. It is settable to other indicators in Options > Appearance > Scrivenings (I presume that is the case with Windows!).
Scene splitters are another matter, which you set in the compile format editor; you can set them to what you want, and, at least on the Mac, there is a distinction between folders and text files. I haven’t implemented scene splitters, but here is a compile of what you see in that image.
I tried using Custom Metadata and it didn’t work. I clicked the text box to include the custom metadata for Chapter Title. I chose the section layout that clearly showed me MetaData goes here but when I compiled and looked at result - no metadata in the output.
I don’t quite know what is going on there, as the sample project doesn’t have a “Chapter Title” layout, but “Chapter Heading” (minor difference, but it’s worth being precise to make sure we are on the same page). In that layout, if you examine it in the Format Designer and click on the Prefix tab you will find the <$custom:Subtitle> placeholder, which would insert the text of the “Subtitle” metadata field, if one is typed into the Inspector for the item that uses this layout.
But all of this is described in much more detail in the original post, so I wouldn’t want to repeat myself too much.
As for the “Metadata” checkbox you refer to, no that isn’t what you would want to use here as that just inserts a big block of all the metadata—it’s more like what you’d want to use to create a backup compile. But you shouldn’t have to modify anything, the sample project is set up to work out of the box. So I maybe do not understand why so much modification is being done.