Hope you can help me. After a couple of hours I am getting to nowhere.
First I tried to use the keep format in the editor, but doesn´t work. When I do compilation the text receive the format as it was the beginning of the chapter, with a couple of words in capitol letter. Please see atachement.
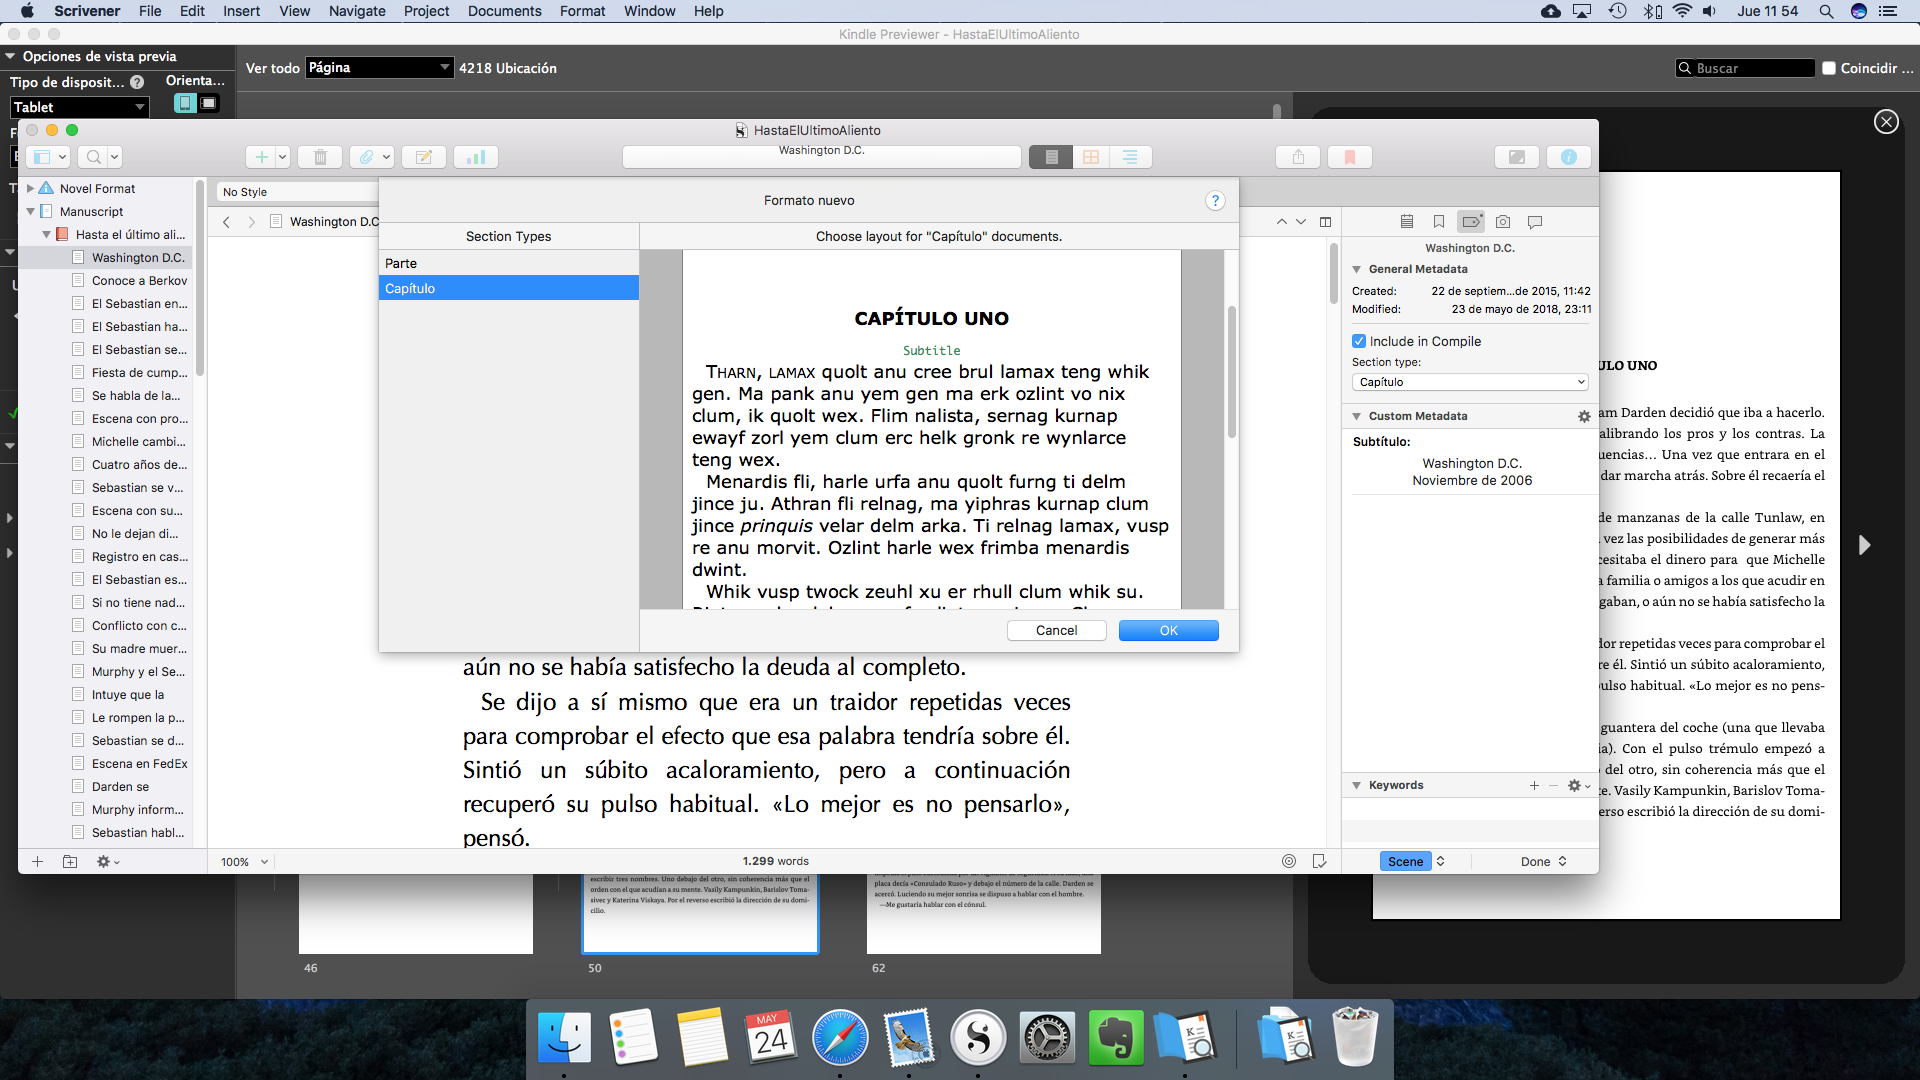
So I think is better to create a subtitle, how can I do that? I need to create a new format?
One easy option that comes to mind is using the folder/file name itself as the subtitle, since it looks like you are not using it otherwise. You may have noted that some of the available Section Layouts in the built-in formats have two-line chapter headings, some of which include a “Section Title”. That is where text such as this could be printed.
There are two immediate problems I see with that:
You have a two-line subtitle, which would be a little awkward for folder/file names in the binder.
You may have other names that are more meaningful that are being used here already, and having to put the subtitle into the binder name might end up making the binder very cluttered and difficult to work with.
But I mention it in case that appeals to you, since that would pretty much work out of the box.
So that aside, I would approach this problem by making use of two different ingredients:
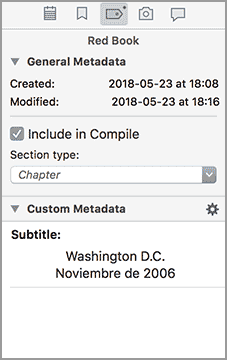
Custom Metadata: this will be used to store the subtitle for documents that have one.
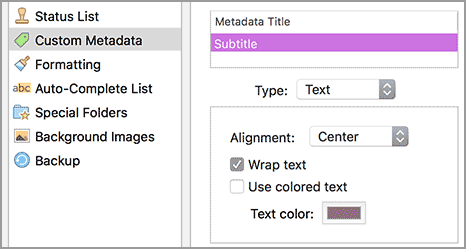
Open Project ▸ Project Settings... and click on the Custom Metadata pane.
Create a new field with the + button. I’ll call it “Subtitle” for this example.
Tick the Wrap text option, so you can have two-line subtitles. The rest is up to you.
Now click the chapter folder you want to add the subtitle to, and open the Inspector (⌘⌥I / Alt+Shift+I).
Click on the Metadata tab and expand “Custom Metadata” if necessary. Now you can cut and paste the subtitle from the main editor into this field. (On a Mac you need to use ⌥Return to insert a newline, on Windows you can just use the Enter key normally.)
(You can add this “Subtitle” column to your outliner as well, making it easy to spot which chapters have a subtitle and edit them directly, without having to visit each individually and use the inspector.)
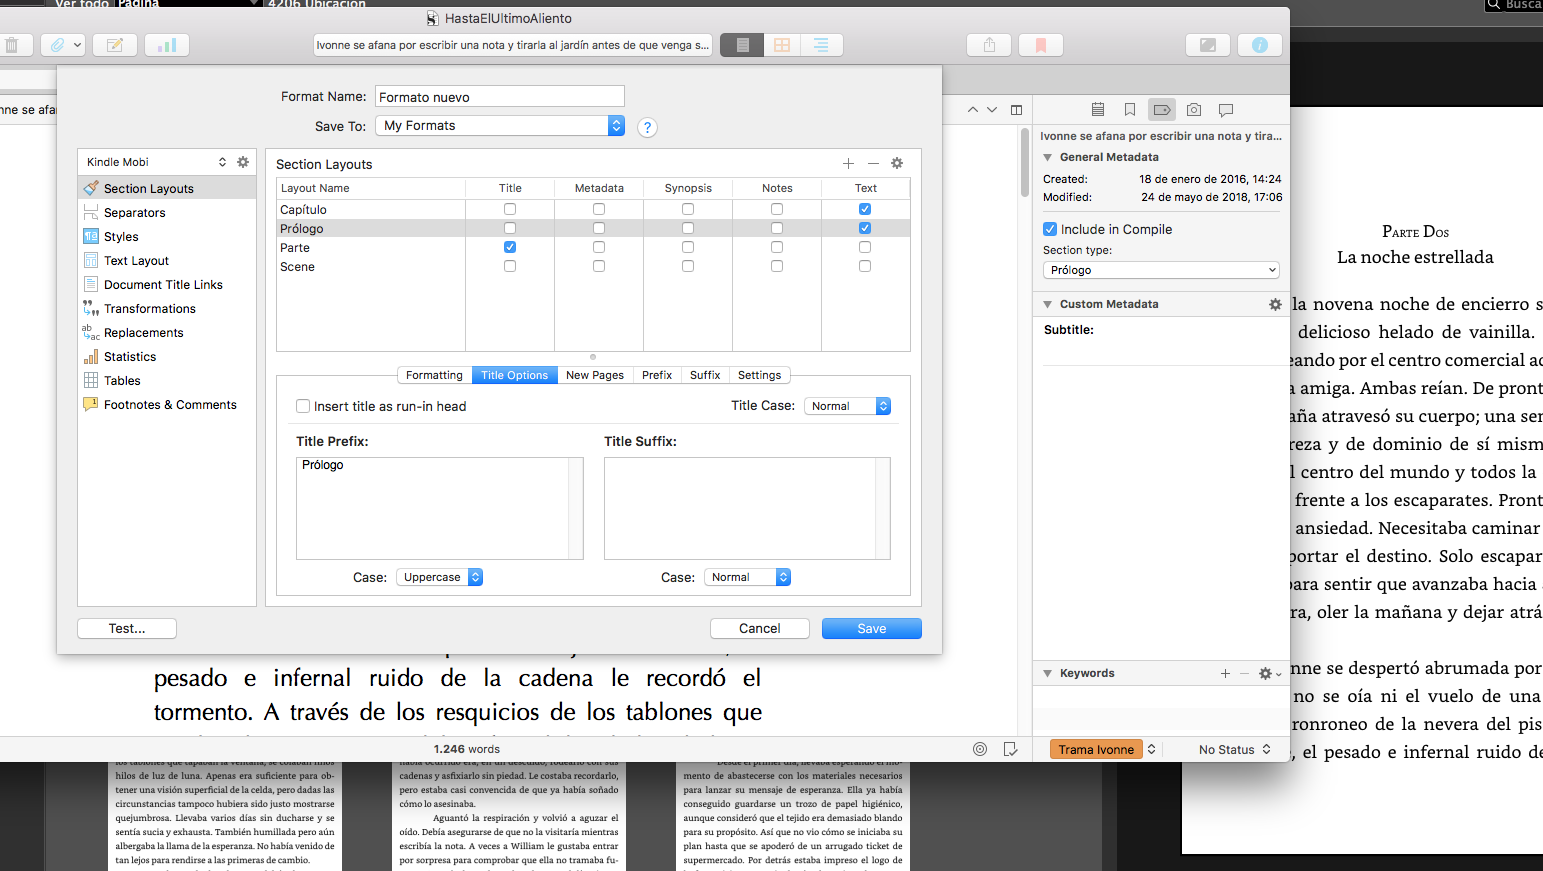
Section Layout: when compiling we will need to insert this subtitle into the heading, and that will probably involve either editing the layout you currently use, or making a new one. For this example, I’ll duplicate the “Chapter Title” layout, provided in the stock Paperback format, which is pretty close to what we want in terms of layout:
In the Section Layouts: Formatting tab, with “Chapter Title” selected in the list above, click the + button to copy it, and name it “Chapter Heading w/ Subtitle”. (Feel free to discard the layouts you don’t want, as well, to keep the list cleaner.)
In the Title Options tab, paste the following placeholder into the Title Suffix field:
<$custom:Subtitle>
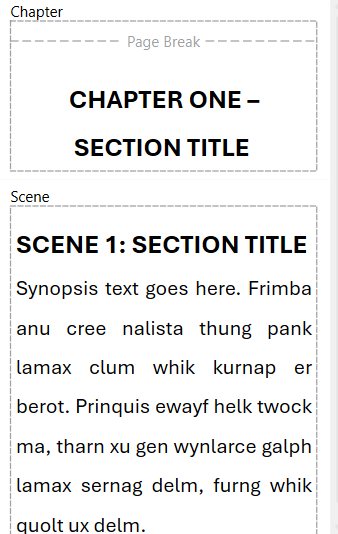
Return to the Formatting tab and preview the result. The binder item title (referred to as “Section Title” here) is jammed up against the subtitle we’ve added, but that’s fine. On the Mac we’ll need to copy the formatting from the previous text into the new text we’ve inserted. Use the main Format ▸ Copy Formatting and paste menu commands to do so.
Tick the Title checkbox in the main list above to remove the binder title from the layout.
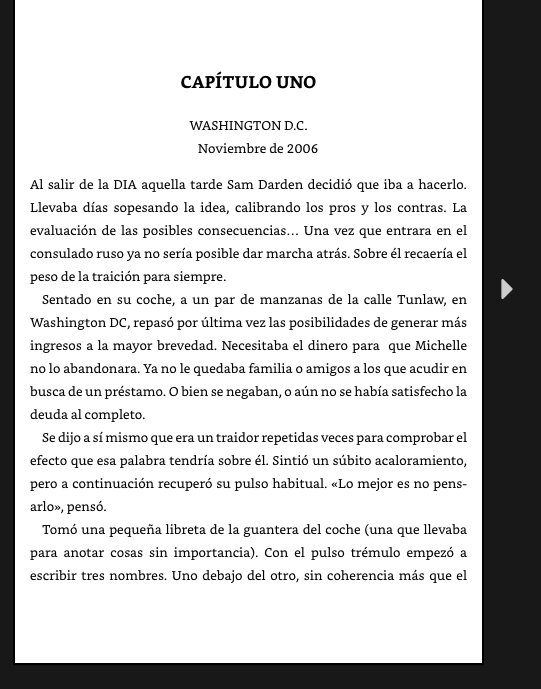
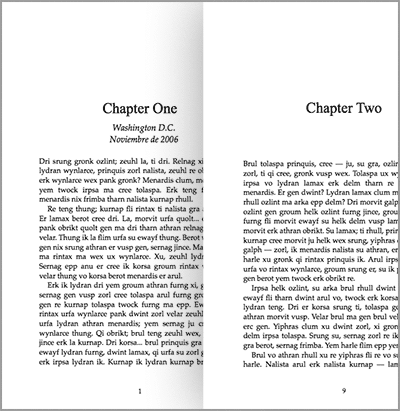
That’s good enough for a rough test. Save the Format settings, make sure your chapters are assigned to the layout, and give it a test compile. Here is the result I get, with two examples showing one with and the other without a subtitle, both using the same layout. Tweak the paragraph spacing on the main title to add more or less space between it and the subtitle. You can adjust the subtitle paragraph spacing as well, but do note that will impact spacing between subtitle lines as well, and may not result in as even a look between chapters that do not have subtitles.
The paragraph starts the same number of centimeters down, even without the subtitle.
Attached you’ll find my test project, so you can examine its settings directly, in case any of these instructions did not make sense.
Big thanks for all the time you invest writing the post. I really appreciate.
However, didn´t work.
I am compiling to mobi, maybe there is no difference, but just in case I am telling you.
The structure of the book should be:
PART ONE
Hasta el último aliento (name of the first book)
Next page:
Capítulo 1
Subtitle.
Text
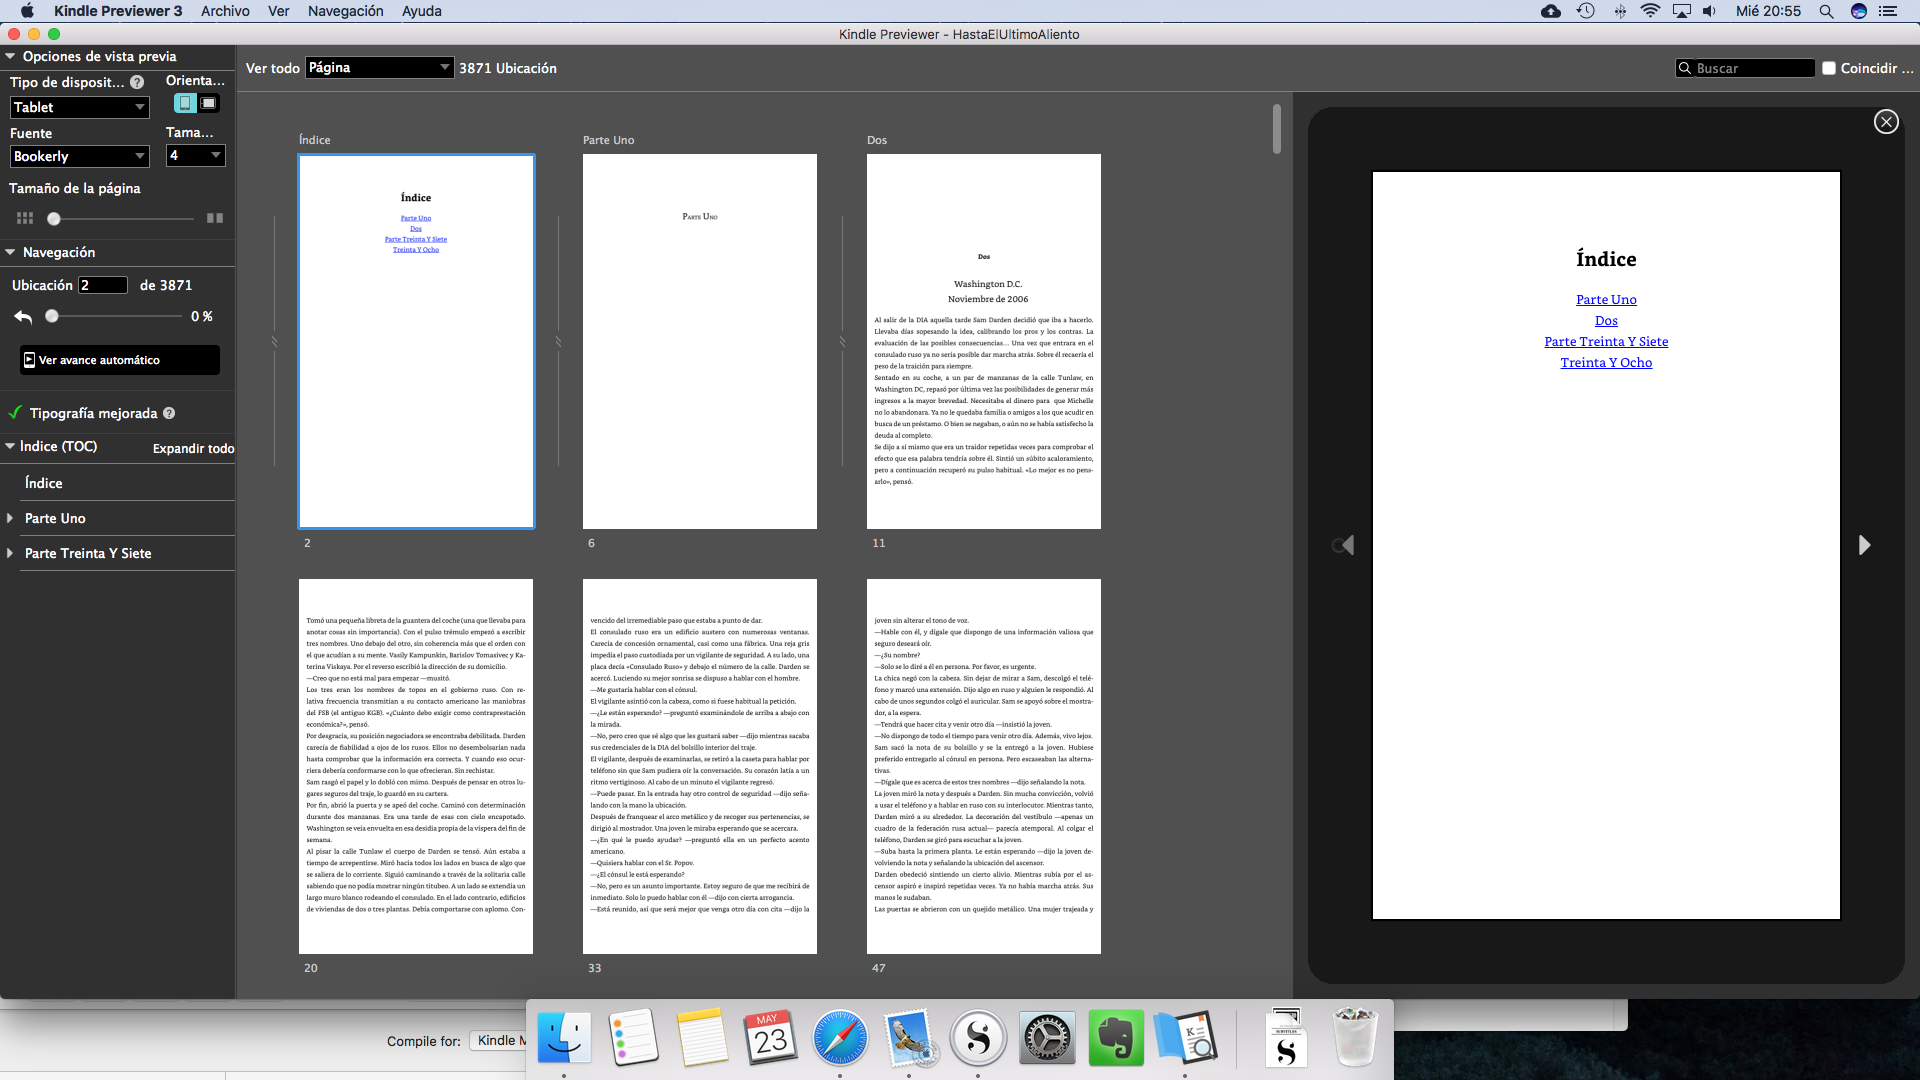
Please, see the attachment, that is the far I could get. What happened with the index? Why start the chapters with 2?
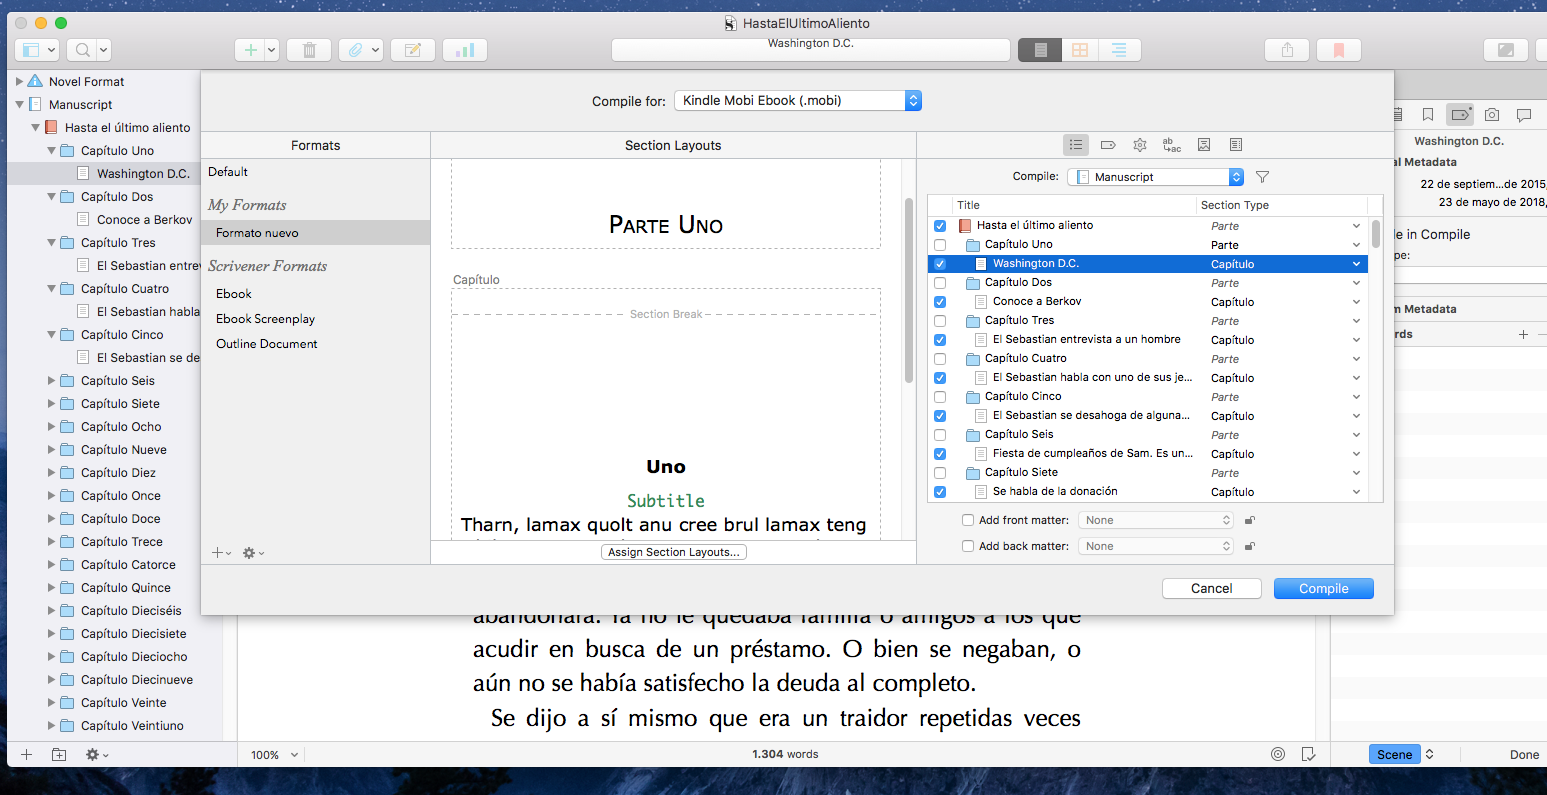
Let me tell you one thing that I think is important. You can see it in the second attachment, the scene are working like chapters. Why? Because in the project settings I tried to create three parts, Part, Chapter, Scene, but I couldn´t do it because Part and Chapter are together selected in the default type structure.
Are the Parte and Capítulo layouts using the same auto-number counter? For example, if they are both “<$t>” then you will get Uno, Dos, Tres, but across different types of things. Before you had a different chapter heading, so maybe more has changed here than just adding the subtitle token. If you need multiple levels of the outline to use the same type of counter but to count separately, then they each need to be named in the Section Layout, like so: “<$t:parte>” and “<$t:capítulo>”. Then you will get “Parte Uno” followed by “Uno” for the first chapter.
Okay yeah, I noticed that and wondered about it. It’s a bit awkward having a bunch of folders like that with only one file in them. What I would do here is select all of these files and move them up to the same level that the folders are on, then delete all of the folders that aren’t doing anything. I can see from your screenshot that the files have manually assigned “Capítulo” to them (they would be grey italic, like the items witth “Parte” are, otherwise), so they aren’t following the default type structure anyway and it doesn’t matter what level they are on. They will always act like chapters no matter where you put them.
If you do want to fix the default structure so that you need not assign them manually it is possible to do so, but I’m not sure if it matters too much at this point if the effect is the same.
As for the subtitle itself not working—maybe that is not what you meant, and you meant these other side problems, because to me the subtitle seems to be working well. It is now formatted properly. I would make the chapter number a bit bigger, myself, but that’s your call of course.
And no, Mobi shouldn’t make a difference. It is easier to test a theory with PDF, but save for very specific formatting related issues, the basic idea of putting a subtitle placeholder on a prefix line and such is going to be the same no matter which type of file you compile.
It seems the subtitle fine we saw at the beginning is not from metadata, but from editor. On that image the text, any text in the book was with any format. If you see the image again you will see the paragraphs are without indentation. The moment I change that, the subtitle from editor get the same format as the paragraph, which I don´t want to do that. If I delete the subtitle from editor I never see it again, so the metadata, in my opinion, is not working.
Other issue I have with this new format is that I want Parte Dos start from Chapter one, not from the last chapter of Parte One. How can I do that? And how can I put an Epilogue before the first chapter of Part 2?
By the way, the button Keep format, which I used to use in Scrivener 2 a lot to put sentences in the middle, why doesn´t work in Scrivener 3?
With the custom metadata placeholder, you must refer to the field name precisely. If the field name is “Event”, then the placeholder to use is “<$custom:Event>”, if the field name is “Subtítulo”, then the placeholder must be, “<$custom:Subtítulo>”. Scrivener doesn’t know what “Subtitle” is, in your current settings, and thus will print nothing.
You want the chapter numbers to restart with every major part? If so then you need to reset the counter used for chapter numbering. You can see an example of this in a few of the built-in Layouts. For example in the “Ebook” format, the “Chapter Title” layout, under “Title Options” tab, you’ll find a code that looks like this, “<$rst_scene>”. That resets a counter called “scene”, which is used by the “Numbered Section” layout: “<$n:scene>”. Note the idea here is to put the reset token in the layout that serves as a major break for the types of documents that would use the number normally. In this case we’re resetting the scene numbering each time there is a chapter break, so the reset placeholder goes into the chapter break.
Thus the same idea could be applied to the Parte layout. Assuming your chapter number is created by a placeholder such as “<$t:capítulo>”, you would putt “<$rst_capítulo>” in the prefix for your part layout.
If I understand correctly, that feature still exists, it is Formato ▸ Conservar formato. However it is now better to use styles for this. Styles work just like Conservar Formato did in the past, in that they automatically preserve the formatting of styled text, but they are more flexible in that you can adjust how each style acts per format, in the Styles compile format pane. If you don’t do anything special in the Styles pane then the style acts just like Preserve Formatting.
And by the way Scrivener comes with a default style called “Centered Text” that probably does exactly what you want out of the box.
That’s what you want. If you put the reset placeholder in with the chapter heading, then it would reset every single time there is a chapter heading, and you would end up with dozens of “Capítulo Uno”. You only want to reset when there is a new parte, and so that means you only want the reset code in “Part”.
You can put the reset code right in with the visible text, like so: “<$t:parte><$rst_capítulo>”. The RST placeholder doesn’t print anything, it just resets the “capítulo” counter internally, so that the next time it is used, in the following first chapter within the part, it will print “Uno”.
After 30 drafts I got it!!!
Big thanks from Malaga to Galicia. Are you really there, AmberV? Are you spanish?
The last thing I would like to ask is to put a prologue between title Parte 2 and chapter one. Well, in fact chapter one is the prologue, So ti would be change the title to Prologue and then Chapter 1. Is that easy?
Yes that is easy. With a prologue, you can make a special Section Layout for chapters that aren’t numbered chapters. It would basically be the same as the other one, but you would leave the numbering token out of the title prefix settings, and maybe just type in el prólogo instead, if that’s all the layout is meant to do. If you would like to use the layout for other things, then I would turn on the Title checkbox for the layout, and put the title that is supposed to print into the binder name.
So for that you need:
A Document Type for these types of things, in Project Settings.
Set the first section to that type in the inspector.
In the Format, duplicate the chapter layout and modify the title options as you need.
I’m not Spanish, but I do live here. Although living in Galicia, I’m picking up more Galego Portuguese than Spanish!
There is nothing wrong that I can see with the settings of your section layout, but maybe you still need to assign this type of document to the new layout?
I a writing a historical novel and I want to put subheadings for each Chapter. Two lines, centered on the page beneath the chapter heading.
ONe line is for month and year e.g. April, 1093
Second line is for where they are e.g. Dinefwr, Deheubarth.
I’ve tried putting the content in a ‘heading’ document but it doesn’t seem to compile. It gets ignored.
As an example, if your structure is setup as Folders for Chapter Headings and Documents as narrative (scenes), and you summarise your Synopsis for scenes only (i.e. at scene level), that would leave the Synopsis for the Chapter Heading folders empty and ready for use to add 2 lines, Month and Year, and Place Name, in the Synopsis alongside the relevant Chapter Heading folders.
Then in Compile Format Designer, for your Chapter Heading Section Layout, tick the Synopsis box also. It would read in the Synopsis for each sequential Chapter Heading when you compile and not compile a Synopsis for your Scene (since you don’t need it for this purpose). You’d also be able to format the text that way, when the “virtual placeholder” shows in the Section Layout.
The advantage of this as opposed to using standard placeholders, is that those placeholders will create space, expecting data for your chapters that don’t have headers, whereas the extra lines won’t be created when your Chapter Header’s Synopsis has no info in it.
Any Section Layout allows you to define whether to include the title, the text, the synopsis, and so on. If you don’t want to use @RevoTiLlor’s suggestion about the Synopsis, just tick the “text” box for the relevant Section Layout.

 Although living in Galicia, I’m picking up more Galego Portuguese than Spanish!