OK, it sounds like that you would benefit from doing the Tutorial, because that will explain how it all hangs together better than I can in a quick post.
Briefly, I’ve set up a very quick demo project to do what you want: it’s based on the Novel template and the PDF compilation target with Default chosen in the sidebar. This is for simplicity — the steps you take are basically the same whichever template you use.
What you’re trying to do is:
-
In the Editor you say ‘This document is of this type’ — you allocate it a Section Type.
-
In Compilation, you say ‘I want this type (Section Type) of document to look like this’ (Section Layout).
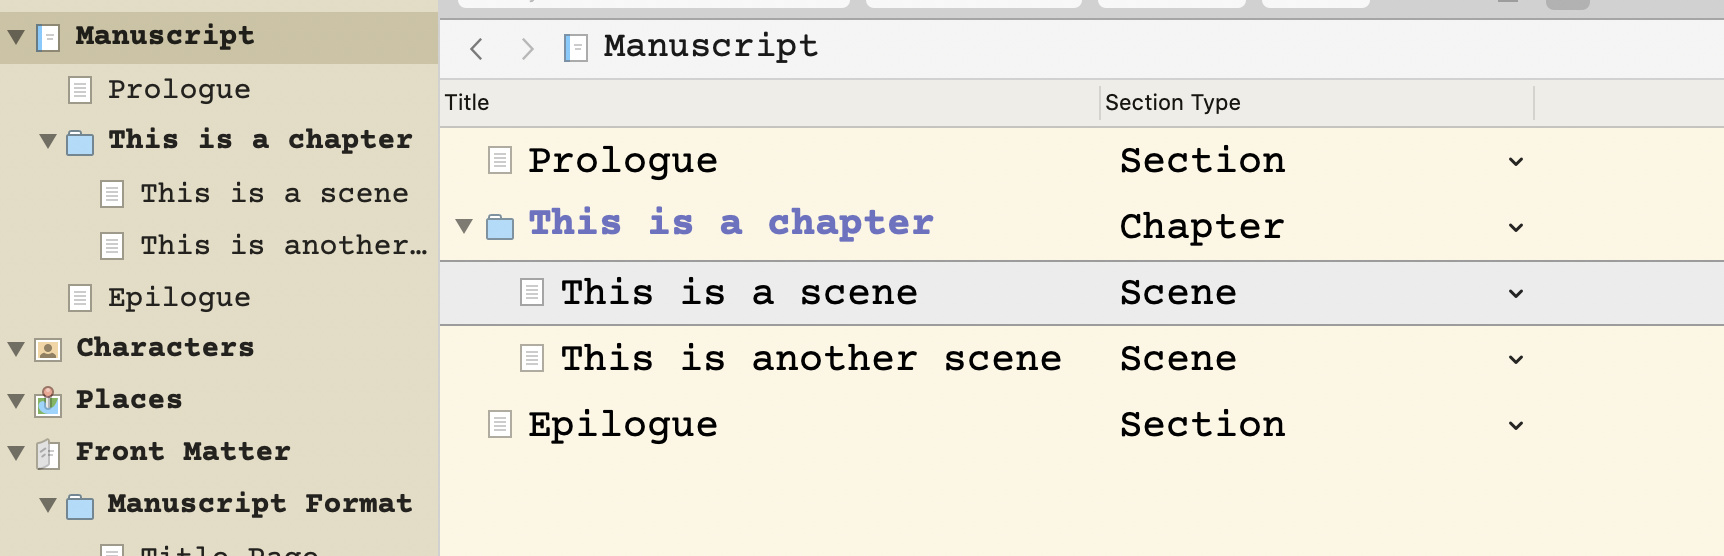
In your case it looks like you have three different types of document (Section Types): 1. Chapters, 2. Scenes and 3. sections such as the Prologue and the Epilogue, which because you want them to look the same, can share the same Section Type.
Right, in the binder, select both the Prologue and the Epilogue, right click and choose a Section Type for them. ‘Section’ looks good enough in this simple project— it really doesn’t matter what the name is as it’s only a placeholder.
Normally, Chapters and Scenes are given appropriate Section Types anyway by default: just make sure that they each have the right one and that they’re different from the one you give the Prologue and Epilogue. If not, give then Chapter and Scene respectively (again the actual names don’t matter). Now select the Manuscript/Draft folder and show it in outline mode (cmd-3) and make sure the Section Type column is visible. You should see something like this:
Now compile the project (cmd-alt-e) and choose Compile for PDF and the Default format. Click the Assign Section Layouts button and you’ll see something like this:
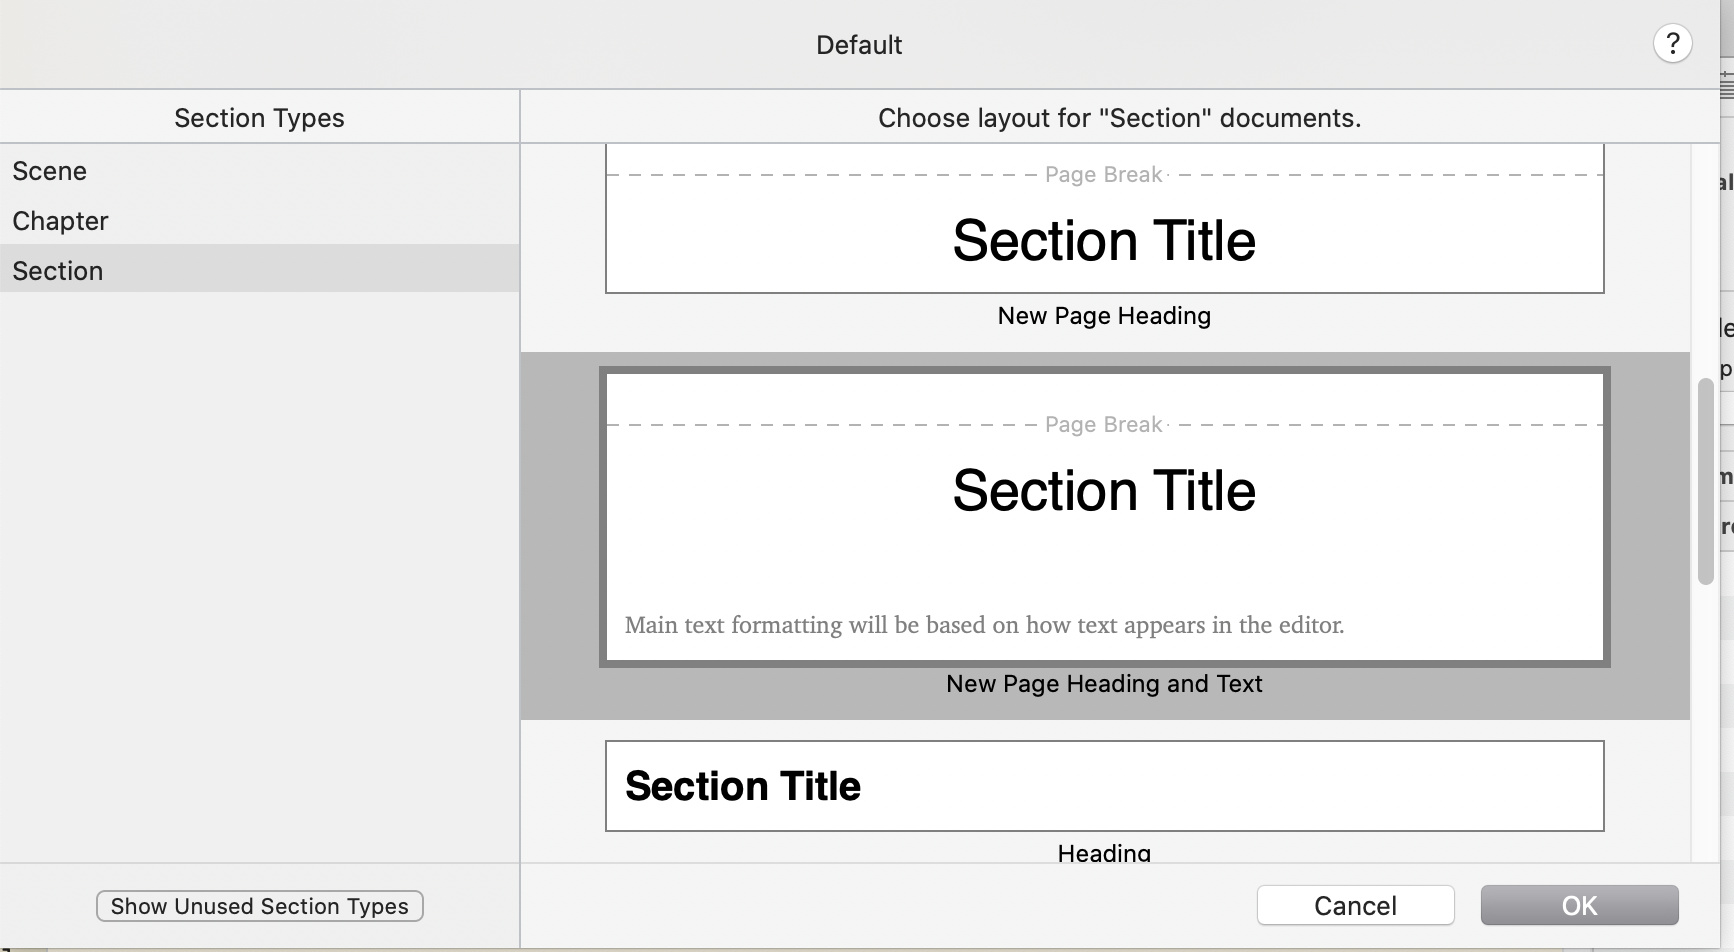
You see how the Section Types you allocated are on the left hand side. Click on ‘Section’ (i.e. your prologue and epilogue) and then scroll through the list on the right until you get to the Section Layout that you want to apply. In your case it sound like you want the one called New Page Heading and Text. Click on it.
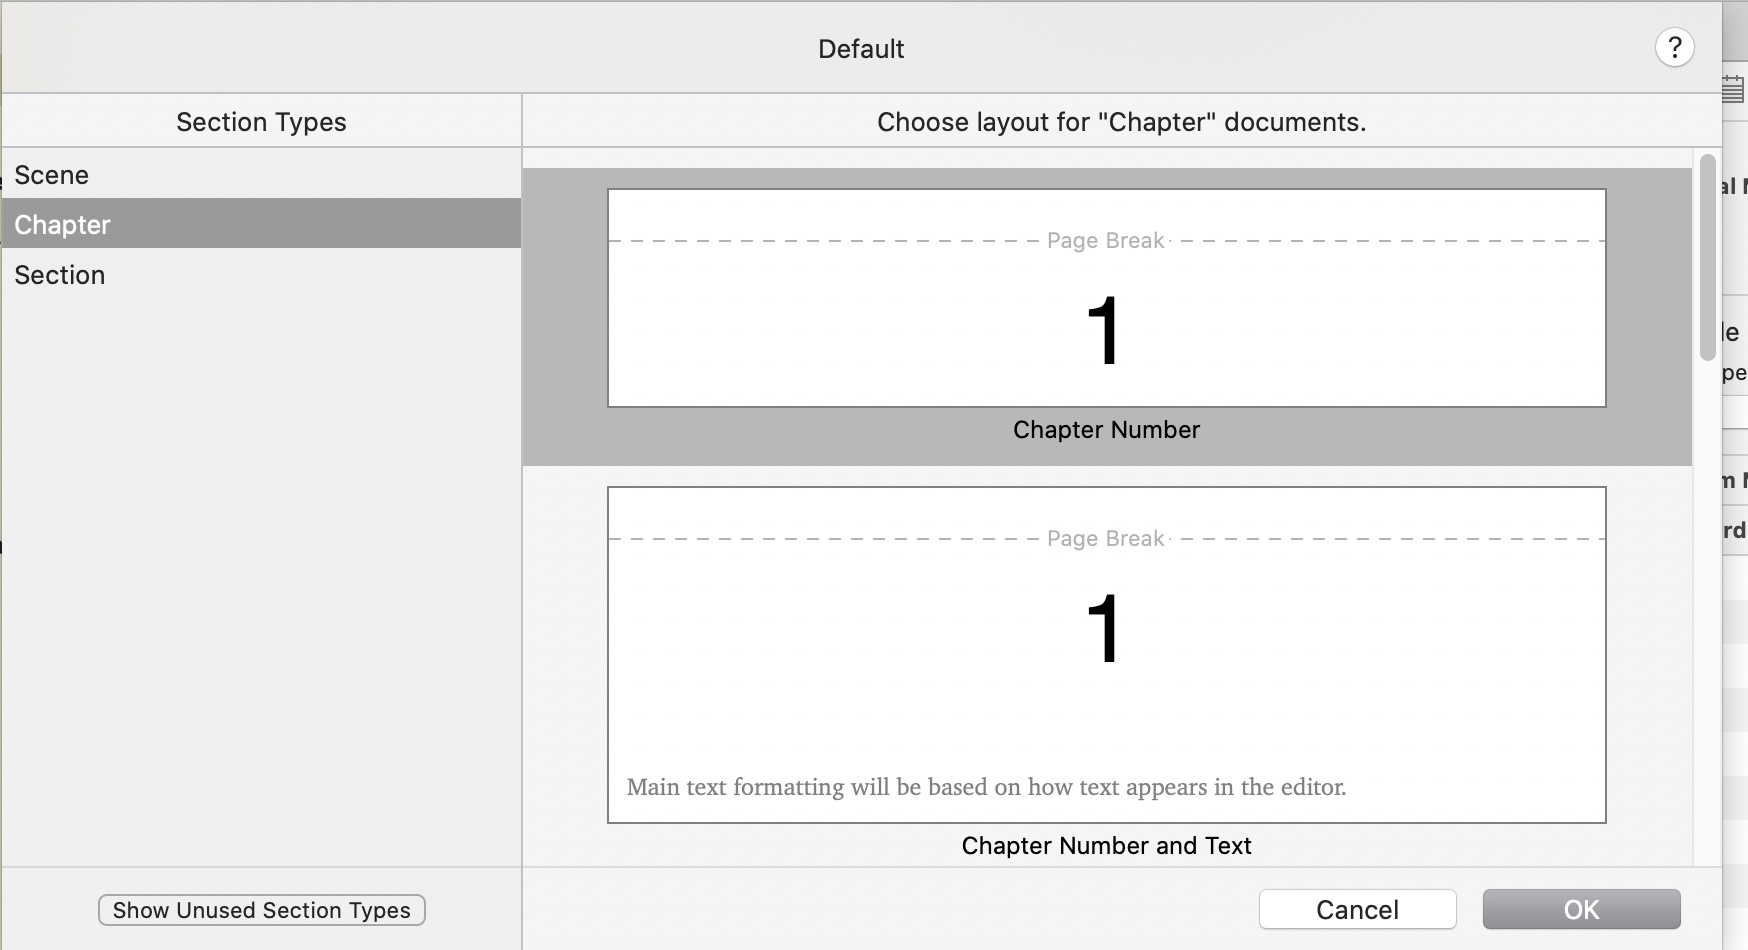
Then click on the Chapter type and choose the layout Chapter Number, like so:
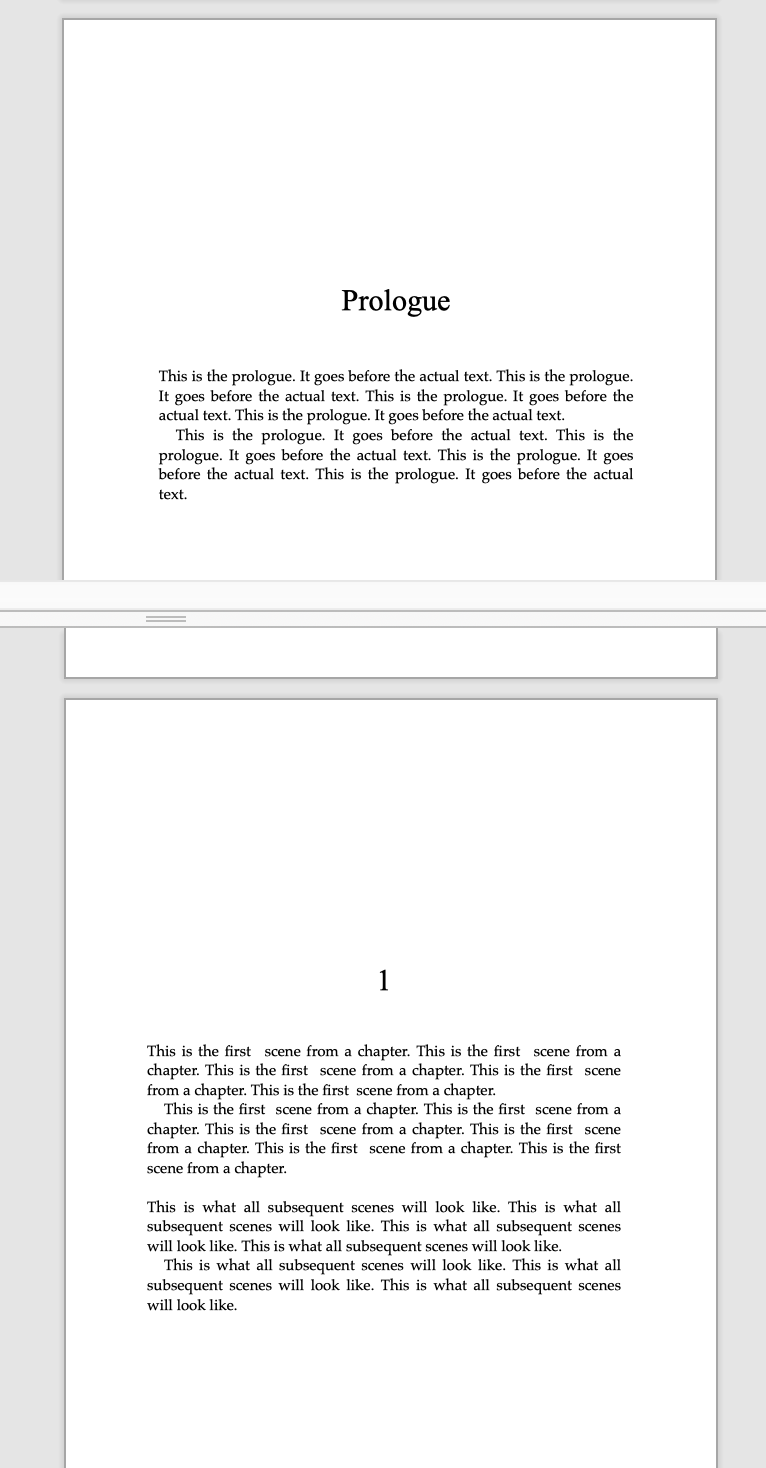
You can see the similarities and the differences between the two Section Layouts: they both have large bold centred heading — the difference is that one shows just the number and the other just the title.
The other difference is that the Chapter Number layout only shows the heading – there’s no text beneath it — while the New Page Heading and Text layout obviously shows the text. Why? Because in your Binder, the text for the prologue and epilogue is provided within that document itself, but for Chapters, the text comes from separate sub-documents — the scenes.
So, the final thing you have to do is allocate a Section Layout to the Scene type — and you probably want ‘Text Section’, which doesn’t have any heading at all.
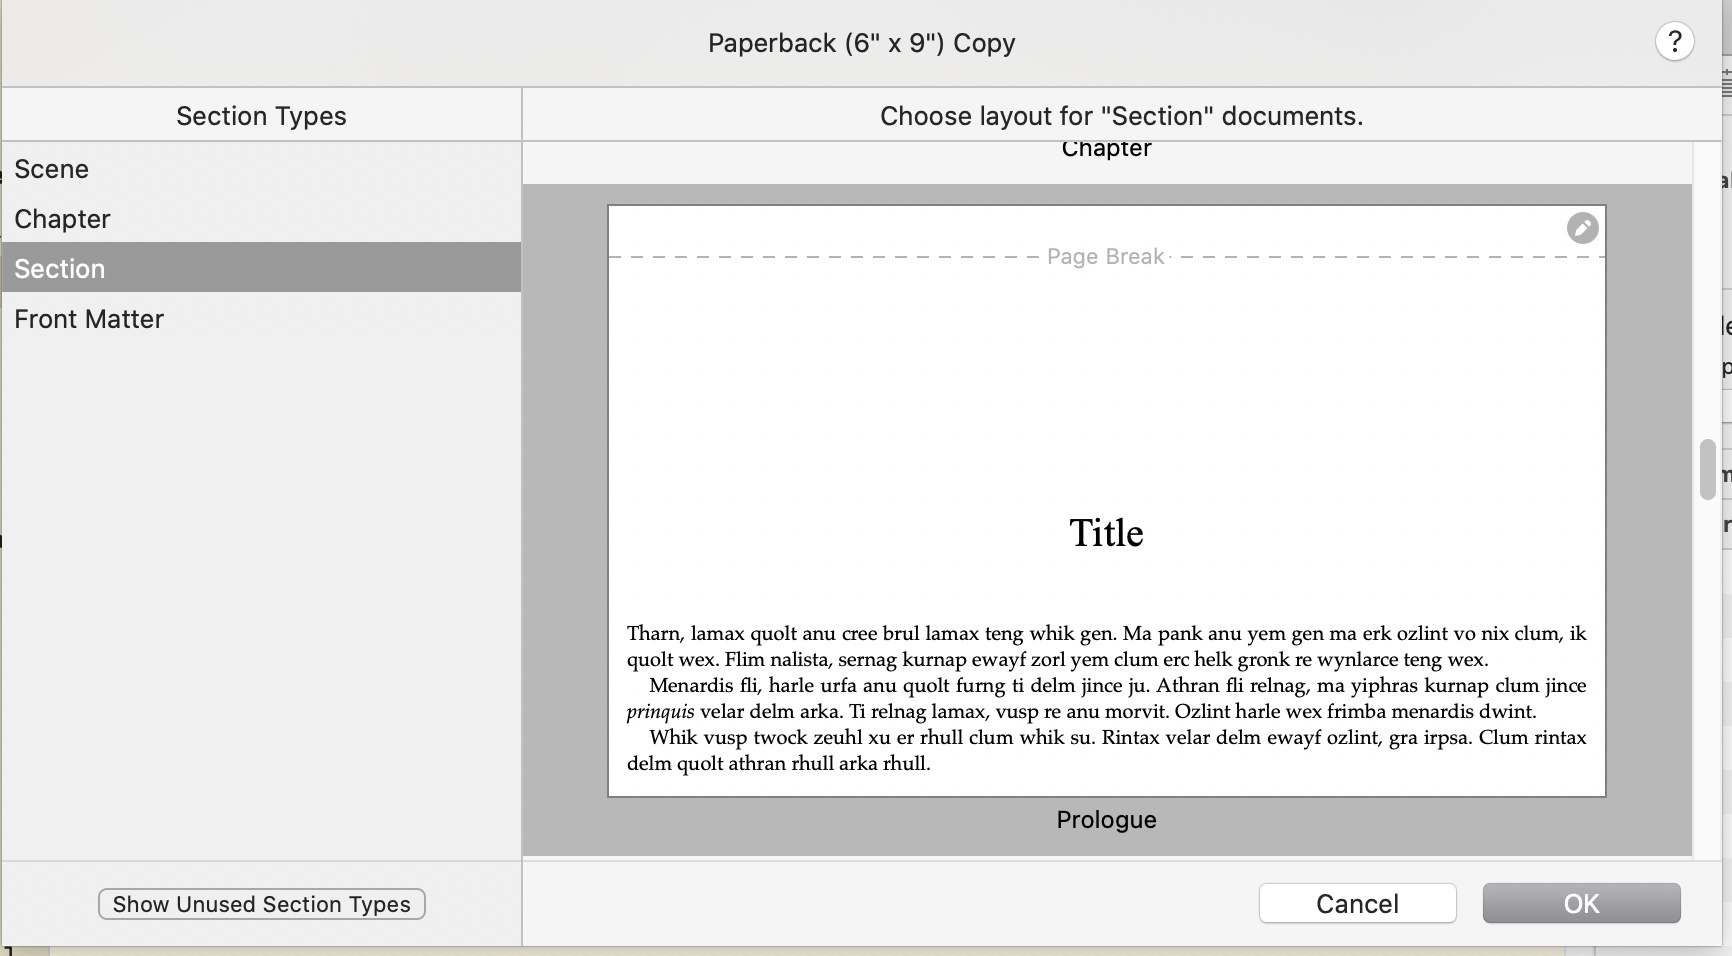
Once you’ve done that, you can press OK and then compile to test the result. I’ve done it and it gives the result you want: prologue and epilogue look the same as Chapters, except that one uses Title and the other Number. The gap between heading and text is identical. (I can’t show you the pdf because you can only include 3 screenshots on the forum).
If for any reason, you’re not happy with the layouts chosen, then try another of the built in ones. If they’re not right, then you can duplicate and edit the Default format and then edit or create your own layouts. But for many simple cases, the defaults are close enough and you may not have to do this at all.
That’s a very quick run through and of course it can get more complicated / flexible than this, which is why it’s important to read the Tutorial. And of course your document structure won’t be exactly the same as the one I’ve used here, but I hope it explains the process enough to get you started and that you find it useful.

 ).
).