In the Scrivener Binder, aside from adding those tiny logos (my eyesight is not the greatest), is there any way to add a more dramatic background colour or other element to distinguish between a long, dense list of chapters? I’d love something simple, like to make a text title appear on a flat coloured background in bright primary colours. I tried doing something similar by using the LABEL field, but the result shows only (as far as I can see) in the Notes panel. As I say I just would love a simple way to mark the files in the binder by strong colours; it would be hugely helpful when it comes to scanning through them and knowing what’s what at a glance. Many thanks for any helpful advice you can offer!
Hi.
. . . . . . . . .
LABELS :
. . . . . . . . .
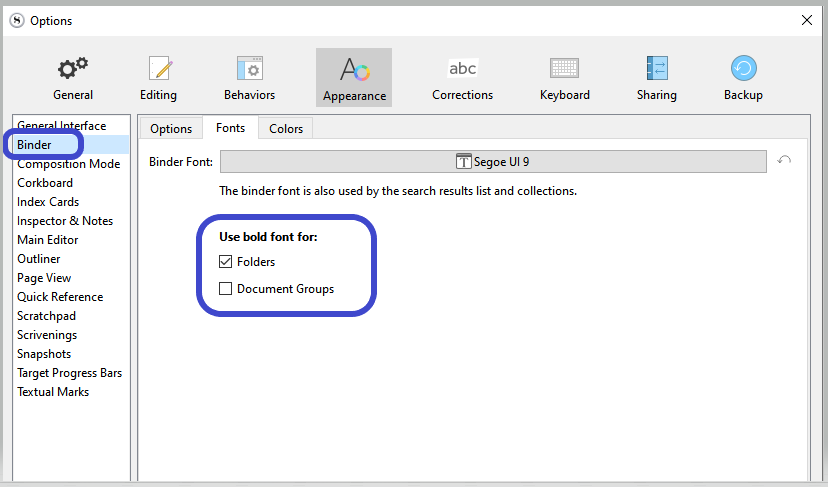
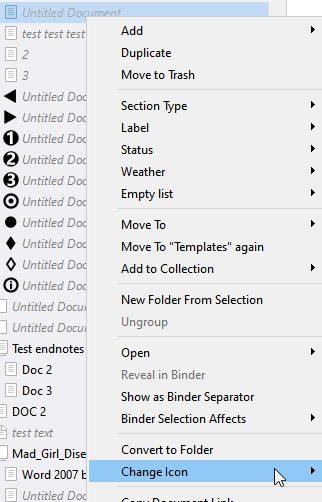
You can also manually change the binder element’s icon for something more obvious.
Right click the element in the binder:
Those custom (black and bold) icons you see in my screenshot you may get from here :
4 Likes
Fantastic! That is exactly what I was looking for. It’s a massive help. Thanks so much for taking the time to reply.
2 Likes
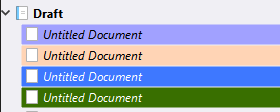
I absolutely live by background Label coloring in the Binder! Recommended for many purposes.
1 Like
Yes, it’s amazing how much a seemingly small thing like this can help the mind to focus and clarify its intent.
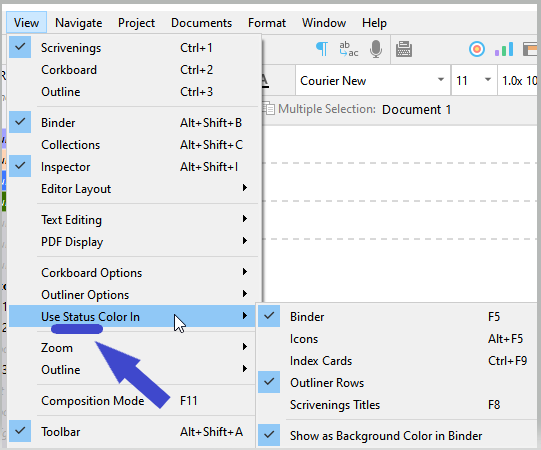
Now that I think of it, what I’d really love is to be able to do this (change the background colour in the binder) based on the Status rather than the POV. Knowing at a glance at what stage of development a scene is at seems to me more important than knowing who’s POV it is, which is easily checked in the Inspector bottom right. (Of course, having a way to switch between the two would be the icing on the cake.) Unfortunately, after a bit of rummaging around, I think I’m limited to POV which means a bit of mental juggling to associate what the application thinks of as POV with what I think of as various stages of completeness.
Not the end of the world, of course, but it might be a nice addition/tweak at some stage from the developer.
You can use labels for anything you want.
Make the status be your POVs and the labels be your status.
It’s easy. Just set them so.
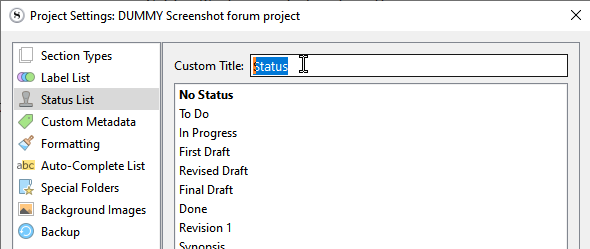
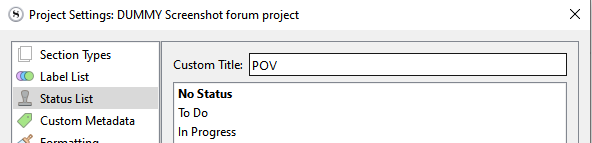
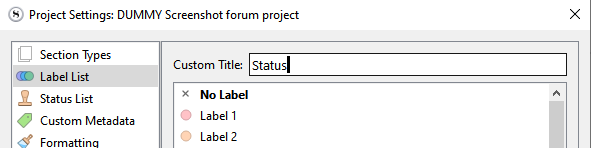
You can rename status for POV :
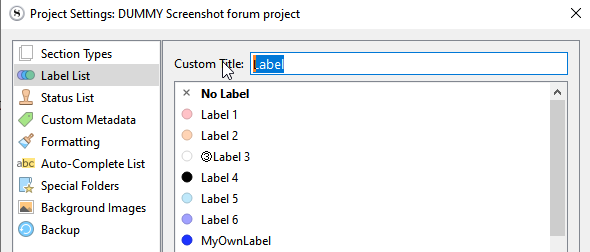
And “Label” for “Status”
. . . . . . . .
All you have to do in your current case is “reprogram” labels as statuses and vice versa. (In the project settings, as per my screenshots above, where I renamed “status” for “POV”. Set what is currently your labels as POVs (formerly “Status”), and your statuses in what was until now the Labels.)
(Once you are done setting this the other way around just as you want it, I would recommend that you make yourself a template out of this project, so that you don’t have to do it again for your next project.)
(Statuses and labels (whatever the name they end up with) can also be fetched from one project and brought in another one, in all cases.)
. . . . . . .
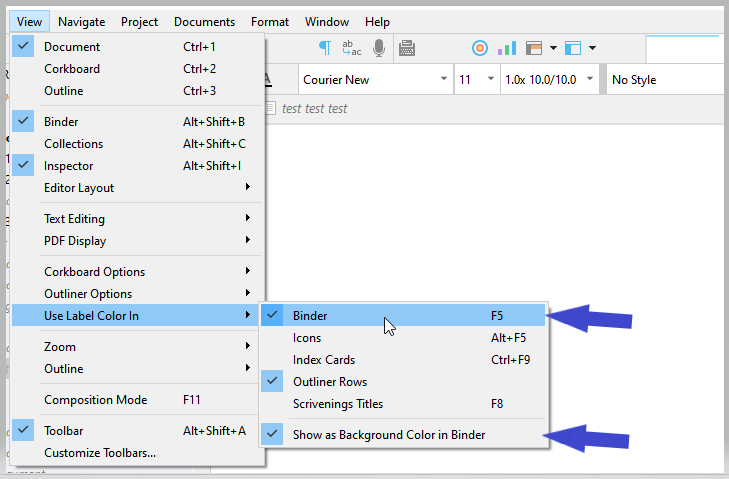
You can’t just switch between one and the other as what is displayed as a cue in the binder, as default status doesn’t support it (nor does it support colors). — In the future, perhaps.
→ Keywords are another way of tagging documents, and they render a visual cue based on colors in the outliner view.
. . . . . . . .
You may very well find this thread of interest :
1 Like
Oh wow, this is absolutely fantastic. (There is so much more to Scrivener than meets the eye.) This sounds like exactly what I’m looking for. I will take my time and follow your instructions carefully (I’m slightly nervous of making a huge messy project even messier!), but this seems very much like the answer I was hoping for. Many thanks again for taking the time!
2 Likes
Great! That proved to be so easy to set up. (I suppose I’d forgotten I must have set up some version of this in the past and that it wasn’t, after all, a default setting. So good to have all this flexibility in the application. I’ll have to pay more attention to the manual and stop just jumping in, full of great ideas – although that’s fun too! Thanks again.
By the way, on an indirectly related topic, is it possible to select all the chapters in a project and apply a default formatting style to them?
By “all the chapters”, I presume you mean all the text, whether in Binder terms it is in Chapter folders or Scene documents.
If I understand right, then “No Style”, set in Options/Preferences/Settings (depending on Operating system; you don’t say which you’re on ![]() ) is what you want. The point of “No Style” is that when you compile it becomes Normal/Body (again depending on target format) when you compile, so that you can easily compile the same project to RTF/DOCX/ODT/ePub etc. without having to make style changes. Also it means you can work in any font you are most comfortable with (24pt Comic Sans?) but compile to a standard font.
) is what you want. The point of “No Style” is that when you compile it becomes Normal/Body (again depending on target format) when you compile, so that you can easily compile the same project to RTF/DOCX/ODT/ePub etc. without having to make style changes. Also it means you can work in any font you are most comfortable with (24pt Comic Sans?) but compile to a standard font.
Only use defined styles for text that differs from the normal, like block quotes and headings, or inline font styles like small caps if you need them. Personally, I click off font information in paragraph styles, and use binder hierarchy to provide headings at appropriate levels; I don’t use headings within the text.
HTH
Mark
1 Like
Many thanks, xiamenese, for the response. And apologies for my inability to use the correct terminology!
Up to now, importing some text, typing in other parts, I have all sorts of formatting and layouts and would like, at last, to simplify. I’m on a Mac, as I should have said, and using the Project Settings > Use Current option was starting to open each text doc, select everything and apply a custom style to everything when I figured I was probably doing it all wrong.
Many thanks for your clarification. Yes, I understand it now, No Style seems the way to go (once the Project has a ‘working style’ that works for me). Do you know now if there is a way to apple the No Style (or removing all existing styles) for documents in the Binder at once: I have hundreds, big and small, so it would be a real time-saver, and a sweeping out of the Augean Stables!
Many thanks!
What you are wanting to do is regularize the /formatting/ of your text. This is distinct from questions of the assignment of defined /styles/. Your variously pasted text looks like it does not because it has an assigned style, but because the brute formatting of the text was carried over from the source.
-
There is an item in the [Documents] menu by which you can apply default paragraph formatting to any selected text. This is what you are looking for. (The default formatting for paragraphs is set in Scrivener Prefs/Settings. Make sure it is set like you like to see paragraphs when you are writing. Compile can, of course, cast a different look on your paragraphs when the time comes.)
-
Next time you paste in text from elsewhere, use Paste and Match Style [sic] instead of simple Paste. This will strip out 99% of unwanted formatting from the source, so you won’t wind up in the same condition in the future.
Indeed: Documents → Convert → Text to Default Formatting…
You can open the whole manuscript in Scrivenings, select all, then use that menu option. That said, if you have applied styles, you may find some paragraphs don’t change. The best way to deal with that is to select the paragraph, cut it and immediately use Edit → Paste and Match Style (that will be your default No Style; it’s essentially a plain text paste).
Three further suggestions
-
If you are pasting in text from other apps like Word and they have some bits in italics or bold face that you want to preserve, just use ordinary Paste and then use the Convert, as Paste and Match Style will remove italics etc.
-
It is worth setting a shortcut to Text to Default Formatting… in System Preferences/Settings → Keyboard → Keyboard Shortcuts → App Shortcuts. If you haven’t done that before, I can’t remember if you have to create the app category first as I did all this many years ago. I use Ctrl-Opt-d as my shortcut.
-
Similarly, if you’re going to use Paste and Match Style most frequently in Scrivener, it is worth setting a different shortcut for Paste and then set Paste and Match Style to Cmd-P.
Seems @gr might have got there first, but here’s my take.
![]()
Mark
@gr did! ![]() Just another point, sometimes pasted in text can contain unwanted control characters that have weird effects; Edit → Text Tidying → Zap Gremlins should deal with them.
Just another point, sometimes pasted in text can contain unwanted control characters that have weird effects; Edit → Text Tidying → Zap Gremlins should deal with them.
1 Like
Thanks so much, @xiamenese and @gr. I’ve combined elements from both of your generous and helpful contributions and now have, for the first time, a document that is so regular and handsome that it only throws more light on the deficiencies of the writing itself! Sincere thanks!
2 Likes
I just wanted to say this has to be the most helpful, patient and positive forum for any piece of software I’ve ever bought. It adds so much to the value of the application when the users, understanding its value to their own practice, are so generous with their time and experience. Thanks again, one and all
8 Likes
I’d like to throw in something else. If you know this already just ignore it!
You can search for labels (“label: red”) and save them as collections (right-click on the magnifying glass above the Binder after the search).
That means if you use a red label for POV 1 and a green one for POV 2 and a collection for each, you can click on a collection and, in scrivenings mode, you can read its plot level in one piece, regardless of how divided it is in the actual text. That’s truly amazing for keeping an eye on continuity.
And with just one click on the Binder you can return to the actual text and see the rhythm of the POV changes. You could split up the parts even more or merge them, change their position in the text, or whatever.
2 Likes
Another way to do it is have status labels like red, yellow, green and use other colts for pov based on how want to look at it. Keep status values and use in the outliner view and can group values in alphabet
Here’s your icing: You can do this with collections, as Suavito elaborated above. You can also set collections to show at the top of your binder. One click switch! ![]()
The bonus: when you save a search (say for a status, or a POV) as a collection, it will automatically update with any changes! ![]()
3 Likes